
Something a little different this week for you because I’m splitting up the details about my latest project into two posts and it’s all about recreating a designer look for less.
So firstly a little background…For the last few years Linda of “Nice Dress Thanks I Made It” has hosted Designin’ December. It’s a sewing challenge where the idea is to recreate a designer look for a lot less cost than the original. I love this kind of challenge because there really aren’t any rules regarding design or fabric…fun! I joined in the challenge back in 2017 but due to family commitments and lack of time, I didn’t get the chance to join in last year. This year I was determined to get a head start.
Earlier this year when I wrote one of my posts about 5 things that were inspiring me, one of them was the idea of adding more dresses to my wardrobe (see the two linen dresses that I made this Summer one, two). In my inspiration round-up, I mentioned the collection of Elie Saab and when I started to wonder about what to make for the designer challenge I remembered the fabulous dresses. I watched the Elie Saab runway show a few times and finally decided that the one I would try my hand at copying is this one.

It’s a basic sheath dress with a curved seam running down the front from one shoulder down towards the opposite hip. Inserted in the seam is a wide flounce. “How hard could it be?” I thought…hehe! So in my research, I re-watched the one little bit of video over and over again so I could look at the dress from all angles and I came to the conclusion that the ruffle/flounce actually continues over the right shoulder and down the back of the right sleeve. I don’t want a bunch of fabric flapping about off my sleeve so I made up my mind to stop the flounce just at the back armhole and take the end of it into the armhole seam. Much more practical and just as effective.
Now I needed a pattern to hack for the design and immediately thought of the fabulous Donna Karen pattern (V1809) that I used for my braid detail dress. This time I used view C. Obviously, it is a sleeveless dress pattern so I needed to find a sleeve pattern piece that I could use with it and. A quick rummage through my pattern stash and I found the sleeve from an old Vogue pattern which was just what I wanted.
I made a toile of the basic sheath dress and basted in a couple of sleeves to see how they fitted. I found the sleeve head to be too deep and also that I needed to make the shoulders of the dress wider. I skimmed a little off the sleeve head depth and I also re-shaped it to accommodate my forward-rolling shoulders (see here for a post about adjusting sleeve heads), then I added an elbow dart to the sleeves. On a slim fit sleeve design like this, an elbow dart makes it so much more comfortable to move your arms. Take a look at this post for a tutorial about adding elbow darts if you want to try adding some to a sleeve yourself.
ps…the photos in this post are more rough and ready than the normal fare because some are just snaps taken as I worked 🙂


Once I was happy with the fit of the basic dress shape I drew a placement line for the large flounce. Then I measured the length of the line which would be the measurement to use for the flounce pattern.

It took me 4 goes to get the flounce pattern to just how I thought it should be. Each time I slightly changed the inner curve shape in order to shift the fullness and I also moved the position of the grainline (the pattern shown above looks rather higgledy-piggledy but it does the job!) I ended up with the grainline running down the side of the flounce rather than lining up with the centre of the dress…by doing this, it seemed to shift the flare of the flounce more to the centre area.
Another thing I noticed on the original designer dress is that the front hemline of the dress that goes underneath the flounce is actually curved up toward the opposite side seam. I’ve done the same with mine and because of that, the front hem will have to have a separate shaped facing. This is easy enough to cut out…I simply traced off the hemline curve, measured an equal depth all along and added a seam allowance at the bottom too.
The fabric I’m using is the most gorgeous teal green crepe from Clothspot (still available here at the time of writing this) and the cutting out went really well. I also found some Venezia silver-grey lining in my stash (bought from Stone Fabrics) and I’m going to line the body of the dress with it.
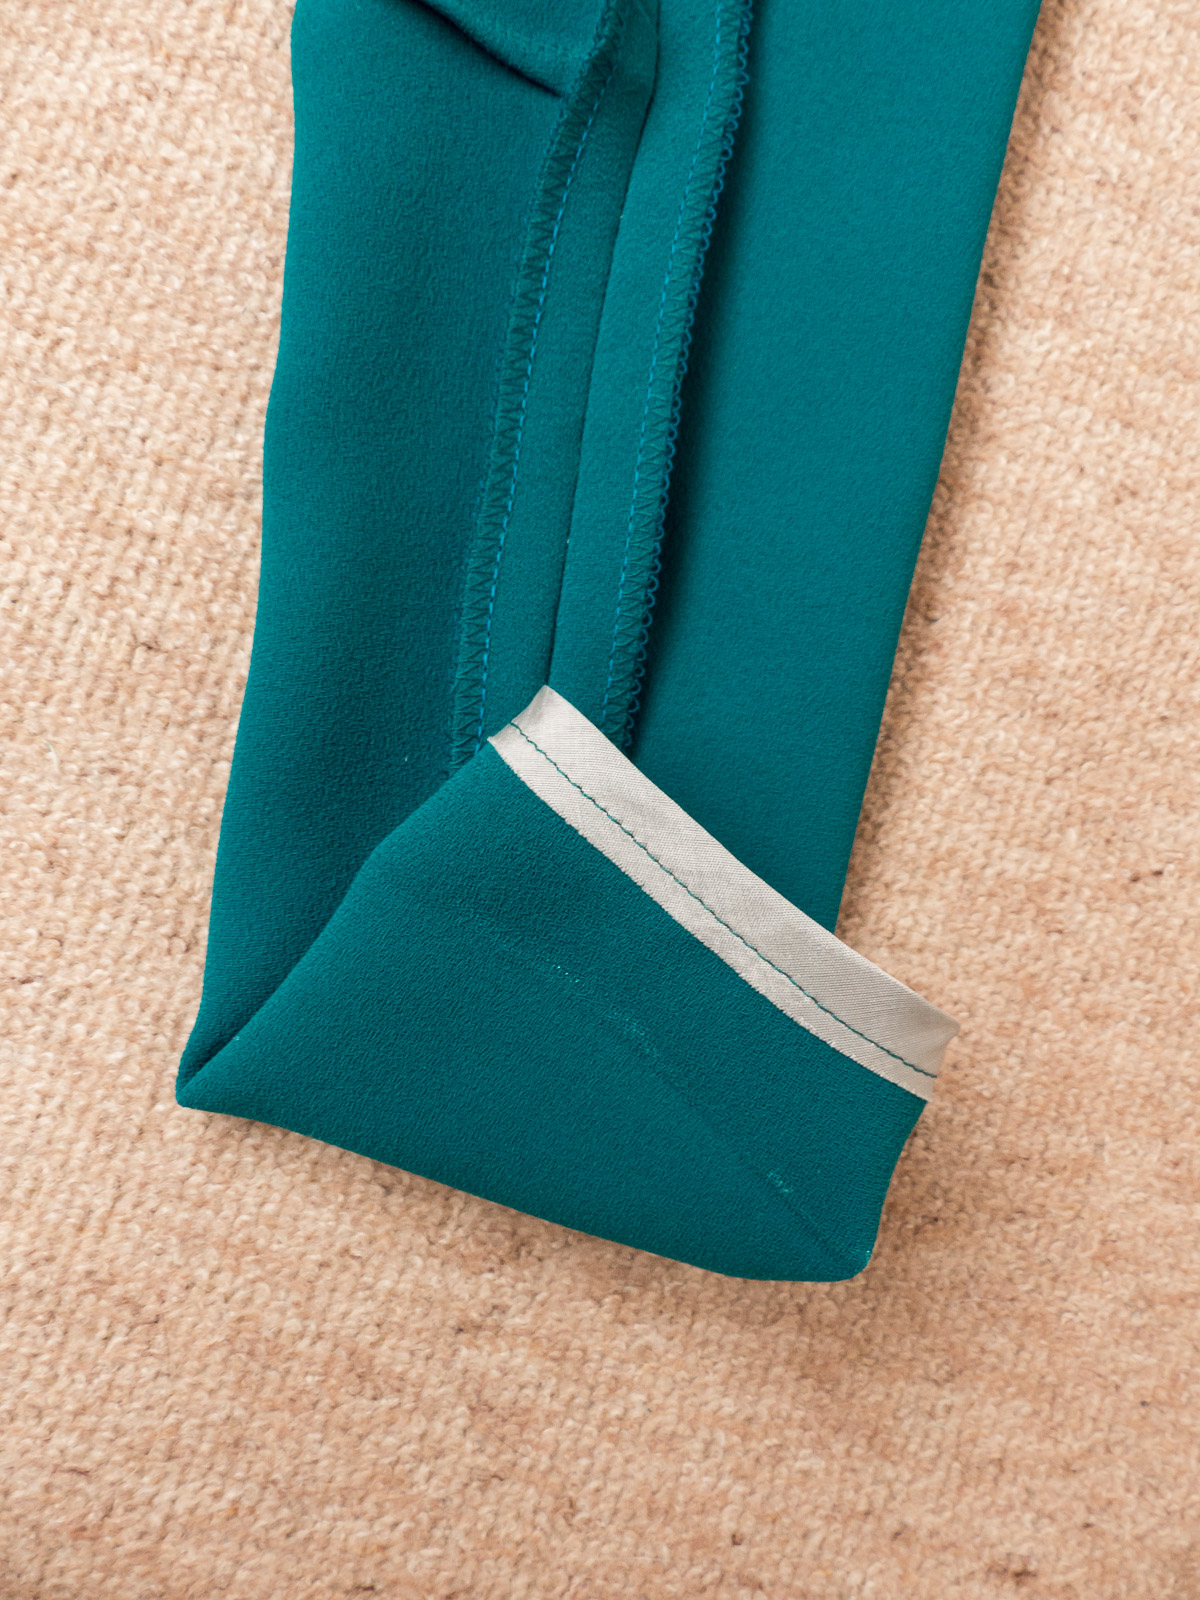
So far I’ve constructed the sleeves and added a lovely Hong Kong binding to the sleeve hems. See here:

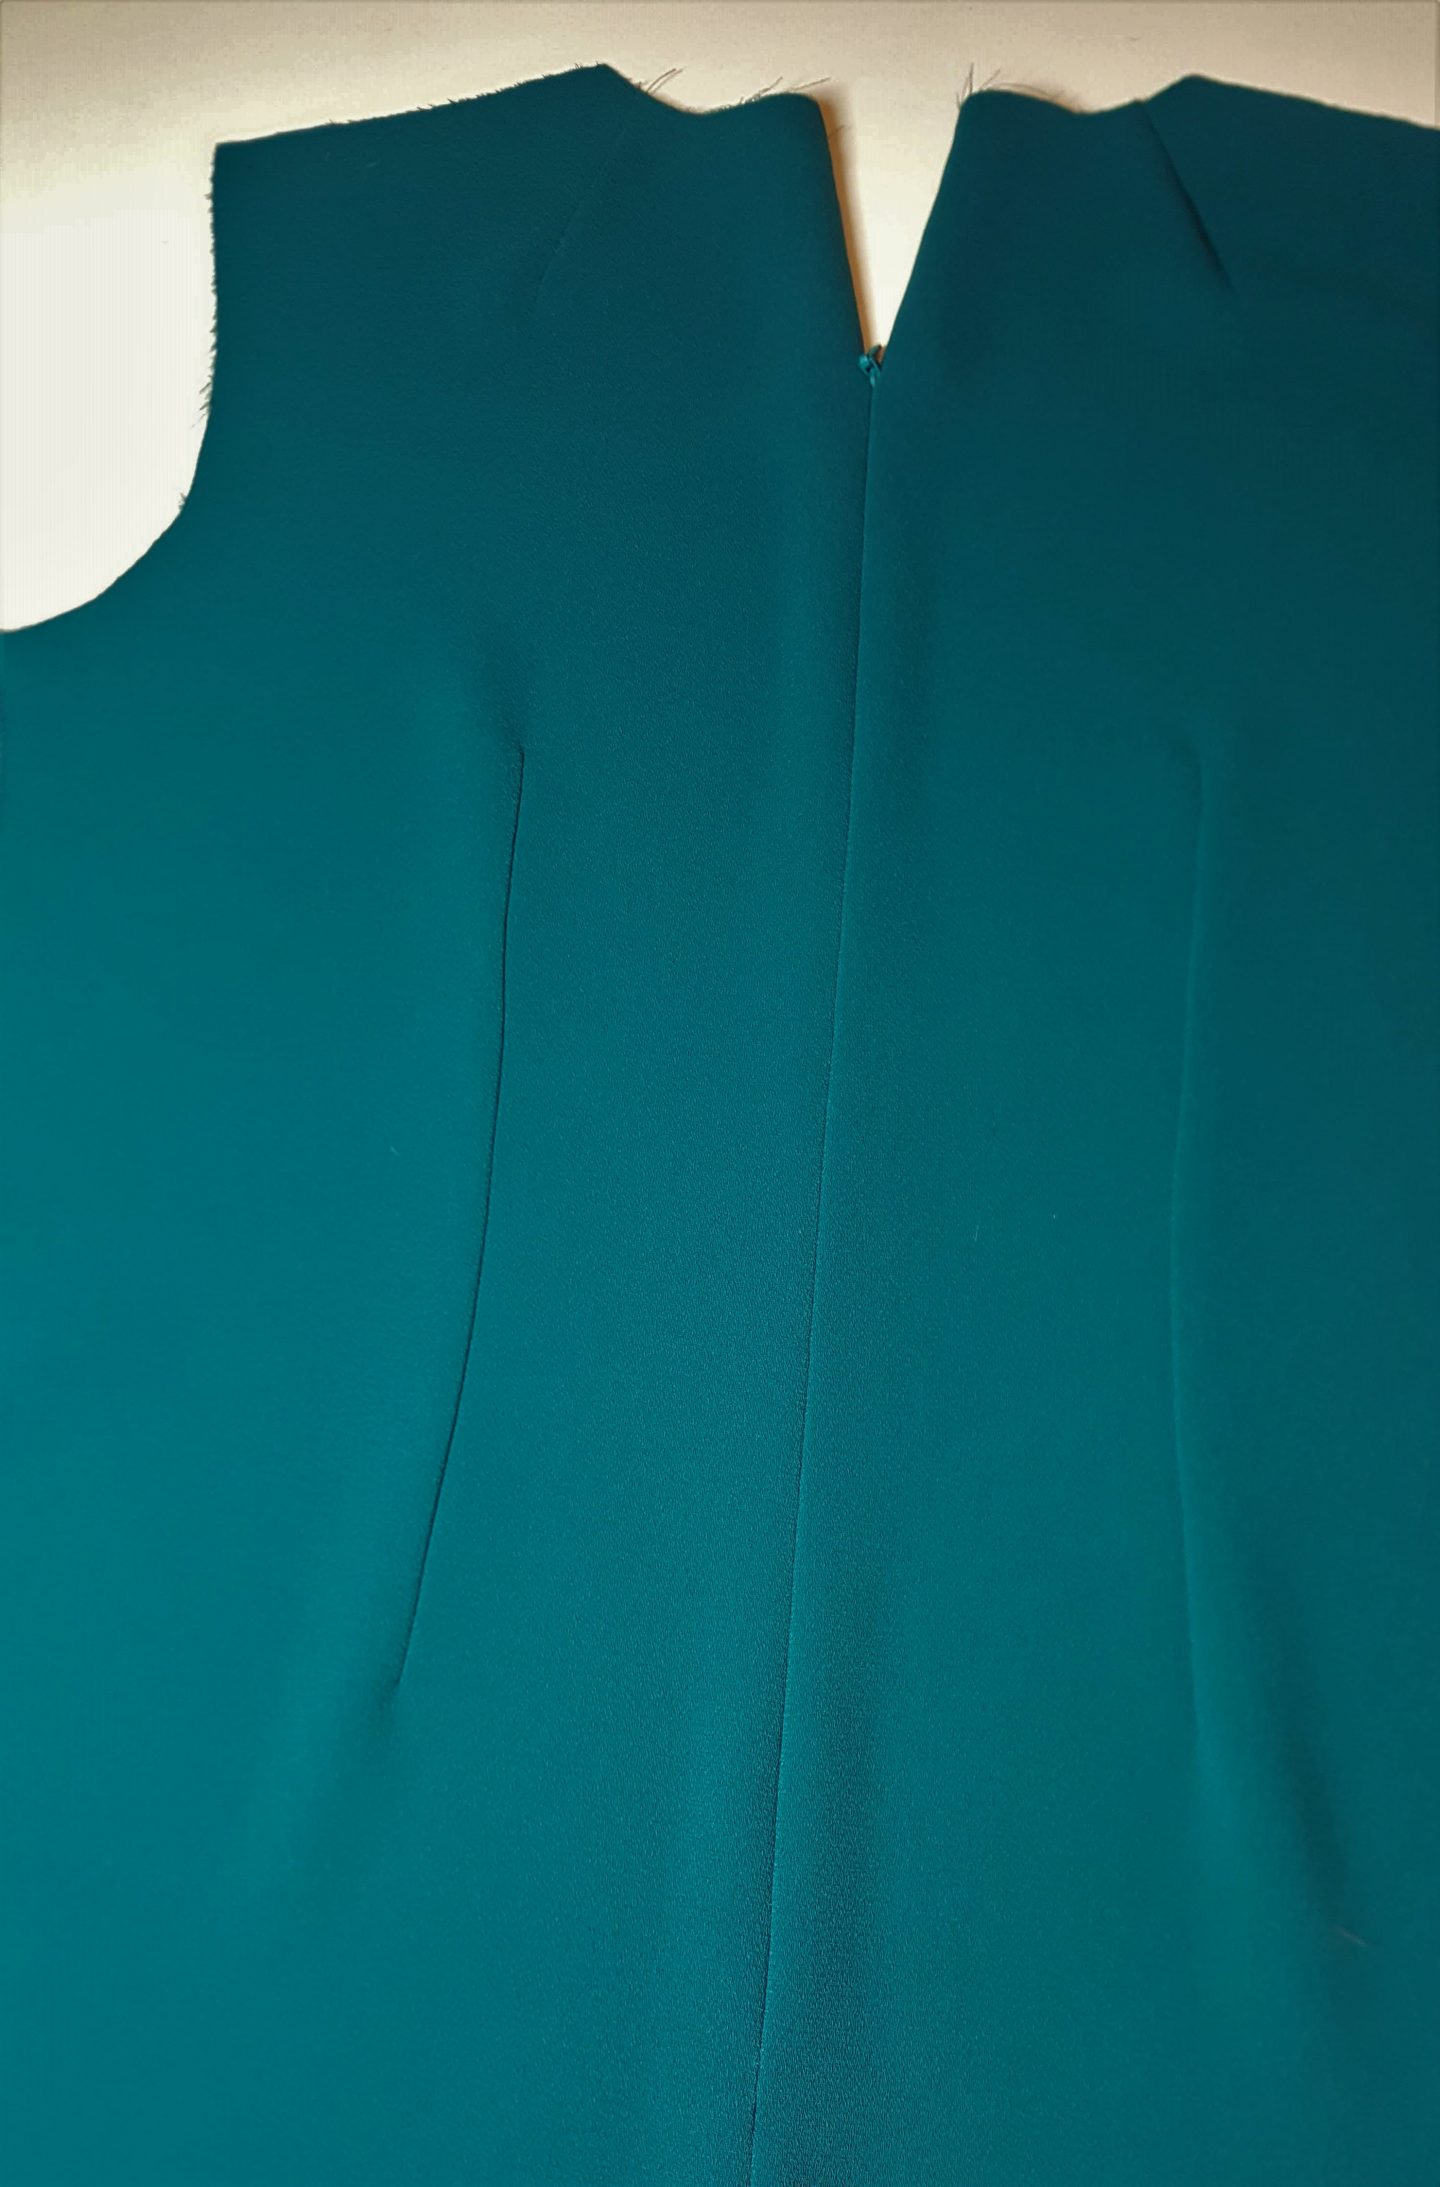
The body of the dress is also going together well. I’ve ironed on some Vilene stitch reinforced iron-on bias tape around the armholes, necklines, centre back seam and inner curve of the flounce seam. The concealed zip is done (zip tutorial here) and I’m now starting on the fun bit of attaching the flounce, though I’ve yet to decide on the best way to hem the flounce and whether or not I have it a little too wide.


Come back in a few days to see the finished dress and the rest of the construction. I promise lots of close-ups 🙂 So stay tuned folks!


You are such an inspiration. Beautiful work and will look fabulous when finished.
Author
That’s really kind of you Chris, Thank you!
Great post! Enjoyed reading how you’re working out the seamlines, grain and hem curves. Eagerly waiting to see the finished dress 🙂
Author
Thank you so much, Samina! I’ve really been enjoying this project so far. Glad you like this first post.
I love the Teal green! It’s a fabulous colour and will be lovely on you! 😍 thanks for the tips and instructions. Can’t wait to see the finished work!
Author
It’s a gorgeous colour, isn’t it? Thanks, Linda!
How interesting about the grain line! It’s a beautiful dress and deceptively simple. Really looking forwards to seeing your version finished.
Author
Cheers Catherine. Yeah, I mean I’m not sure whether my grainline position is the same as the designer version but it seems to work and I also noticed how the fabric kind of folds in a little around the curve on the designer version, so to achieve it the inner curve of the flounce is gentler than the seam that it’s inserting into.
I am fascinated with your process so far. Thank you for all the details! I’m anxious to see your completed dress.
Author
Thank you, Karen! I wondered whether this type of post might be well received. Maybe I should show more progress and ‘behind the seams’ posts…
Can’t wait to see the completed dress! The color is lovely.
I’m curious, what is the fabric content? It presses so nicely.
Author
Thanks, Kathy! It does press beautifully doesn’t it? I just checked and it’s Polyester though doesn’t seem static-y at all. It sews and handles well. I used my silk organza press cloth and some steam. Be sure to use a clapper or your fingers and press for a few seconds to set the press. I just noticed they have some other colours too. Damn…why did I have to look?? 🙂
This is going to be a beautiful dress. Thank you for sharing the process with us — very inspiring! Your zip tutorial is wonderful. Thank you for that also. The bottom of my invisible zips frequently look horrible! Now I have a solution.
Author
Thank you, Karen! I’m so glad you’ve enjoyed my musings and progress so far and I’m pleased you find the zip tutorial helpful too 🙂
What a fabulous dress you are making! I really enjoyed this post to learn more about your thought process behind the project and stepping us through some of the construction steps and modifications to get the design you envision. Your invisible zip insertions are, as always, so enviable!
Author
Aww, thank you, Lisa! It’s been great fun working through the design to get it how I want and it’s good to hear you enjoy reading about it too.
Lovely post and I have a serious case of fabric envy over here! I love design in’ December and can’t wait to see your finished masterpiece!
Author
Thanks ever so much, Linda!so glad yoi like it. Are you taking part in the challenge?
Great post Diane. Enjoyed reading all
Author
Thanks so much for stopping by for a read Ersan! So glad you enjoyed my post xx