If you’re familiar with the sewing community on Instagram then you’ll know all about the Summer challenge to sew a shirtdress (#sewtogetherforsummer). The challenge is hosted by my lovely sewing friends Sarah who blogs over at SewSarahSmith, Monika (IG @rocco.sienna) and Suzy (IG @sewing_in_spain). The deadline for entries is June 21st, with a shed-load of fab prizes being offered…. and I’m thrilled to be able to share my entry with you today.

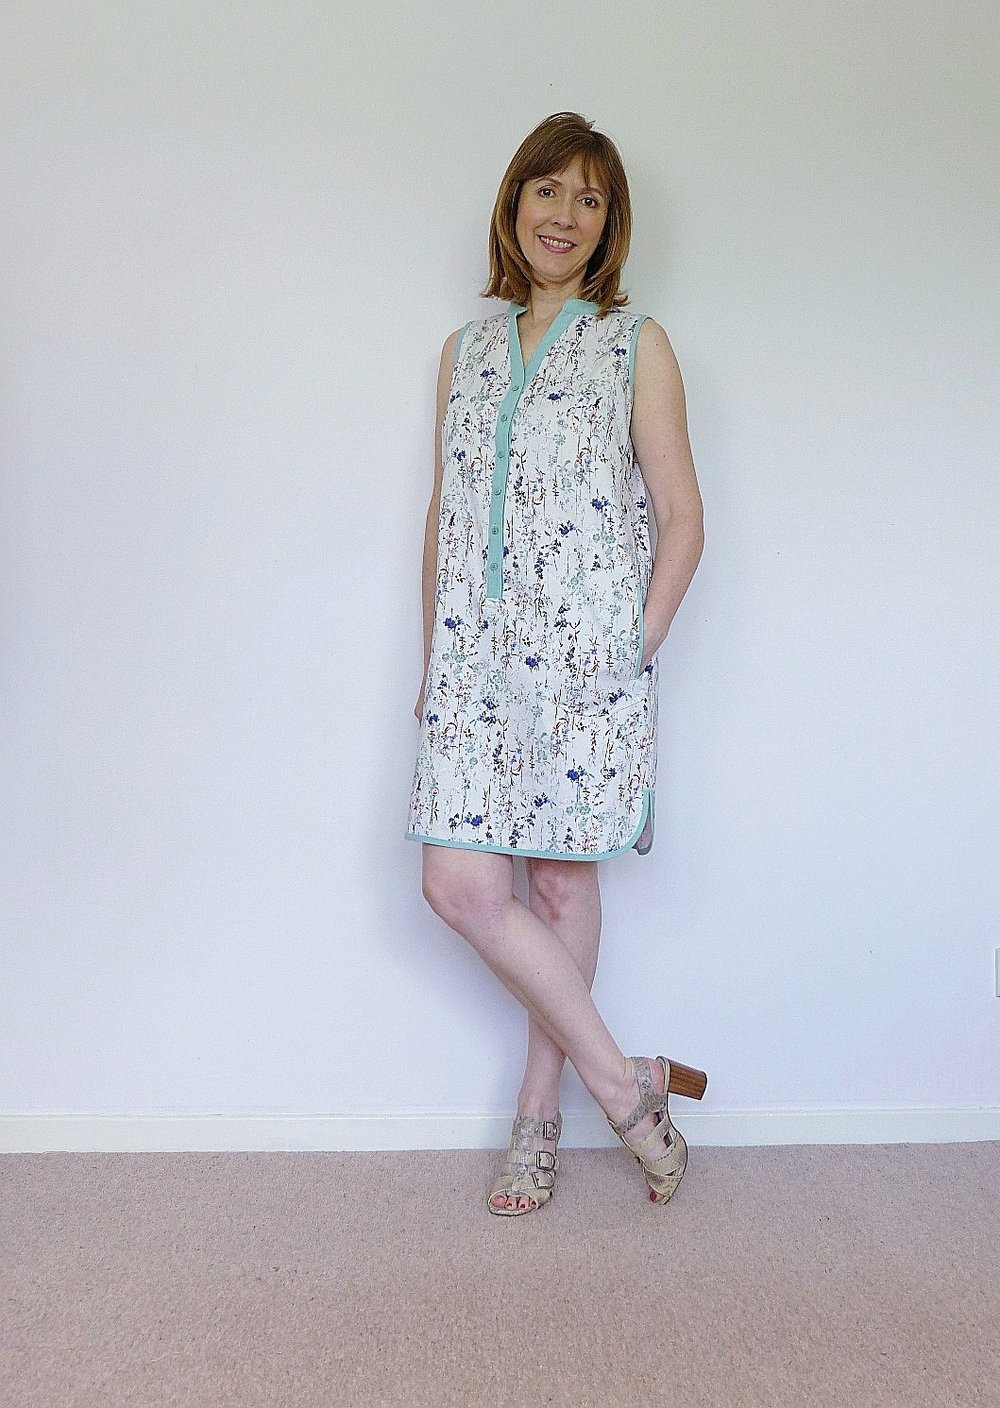
First off, let me tell you that I never wear shirts. I just don’t feel like me in a classic shirt with a collar and collar stand….so enter the cut-away mandarin/grandad style collar and no sleeves silhouette. This dress was based loosely on a RTW one that I already have from Next. It’s such a comfy breezy style to wear (if the weather ever warms up!) I was originally going to do a dropped waist and pocket shape like my Next dress but after a bit of procrastinating I ended up with the style you see me wearing in these blog photos.
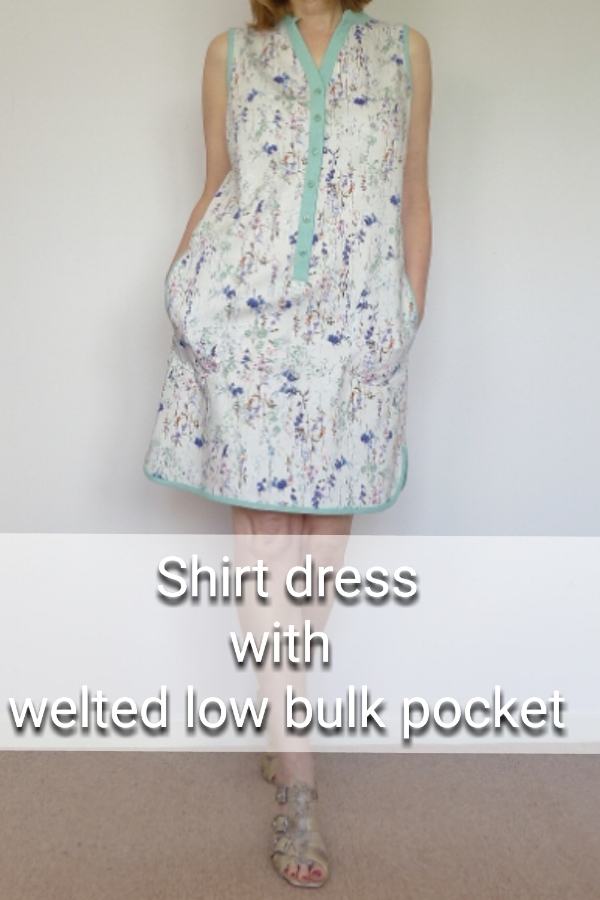
Can we just talk about the two fabrics I used?….They are beeeeuuutiful quality! I got both of them from Ditto fabrics. The mint colour is linen and the gorgeous meadow print is a stretch cotton with a decent bit of body to it. Lemme tell you they are sublime to sew!
So what I’m about to tell you maybe should come with one of those warnings that goes something like this: “don’t try this at home folks!”… you see the method (method! What method??) ahem….as I was saying… the method that I used to get the pattern shapes cut was very much make-it-up-as-you-go-along-and-hope-for-the-best. I literally took a few measurements of the dress I was copying and then ‘drew’ a few lines on the wrong side of my fabric. I also just laid the dress on top of the fabric and drew around the armhole curves and the neck shape. I knew the RTW fitted just fine so as long as I was pretty close to the width and length measurement, then I couldn’t go far wrong as it was a fairly simple shape. I did keep re-checking measurements as I went…promise!
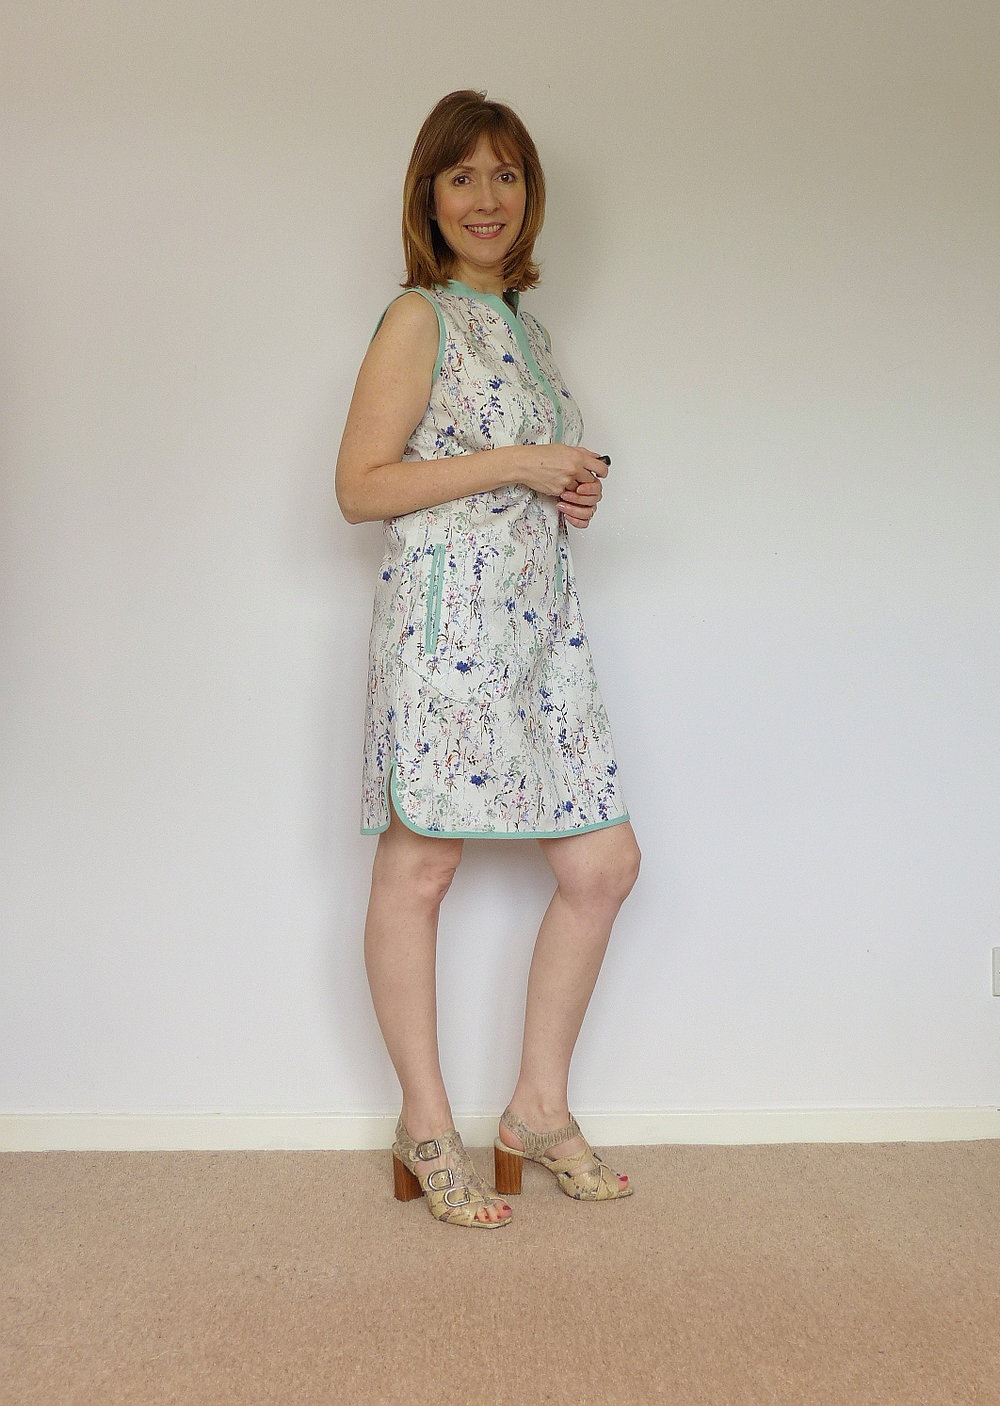
Onto the low bulk pockets now (you can read about another pocket method on these jeans…. I knew I wanted some kind of edging treatment on them with the mint linen, so I decided on a patch pocket with the opening built-in and edged with it. I cut the pattern out in the shape of a ‘D’ so that one edge would be sewn into the sides of the dress. Towards the outer(side) edge on the wrong side of the fabric, I ironed on a piece of interfacing, then I drew a vertical letterbox shape of just over 1cm wide and 15.5cm long. Next, I drew a line down the middle and into each corner. At this point you can machine stitch just around each end to reinforce the corners; I just added a dab of Fraycheck, but other fabrics may need more careful preparation and strengthening. The next step was to cut carefully down the middle line and right into each corner, then to press the edges back to make a letterbox hole. I then folded two strips of linen (straight grain) fabric and pressed and basted them loosely together after that I laid the patch pocket opening over the strips and topstitched all the way around through all layers. On the inside, I overlocked the raw edges and then did a narrow zig-zag stitch across each end of the opening to add even more strength. Finally after pressing the seam allowance under I simply topstitched the pockets onto the dress.


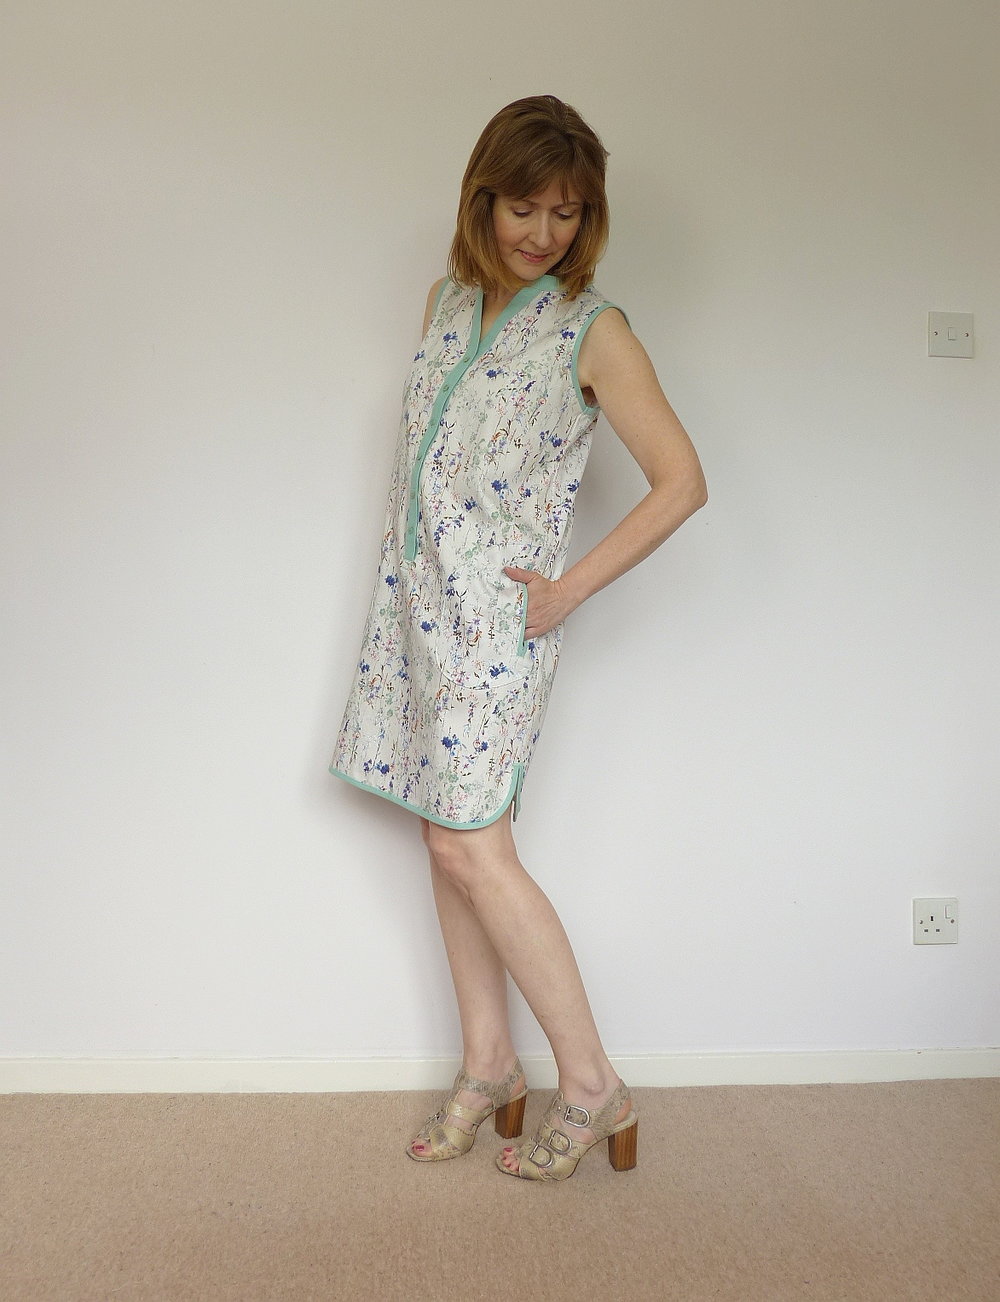
The armholes and hem are bound with bias binding that I made with one of those fab little bias makers and the main dress opening is finished with a long placket and buttons.
Here’s how the placket worked: the dress is cut down the centre front and then into two corners like the pocket openings. The corners are reinforced again with interfacing and Fraycheck/stitching. Each long placket piece is stitched on and then the little triangular-shaped bit of fabric is stitched across on the wrong side like these photos:


On the outside, you do some stitching across the bottom and in a decorative square shape to hold the ends of the placket securely. It makes for a sturdy finish. The small mandarin collar then tops things off nicely. And there you have it. My new shirtdress which I know will definitely be in my case when I travel to Greece at the end of July and of course, it would be so nice if I could wear it in the UK…come on sunshine!
Till next time, sewists x
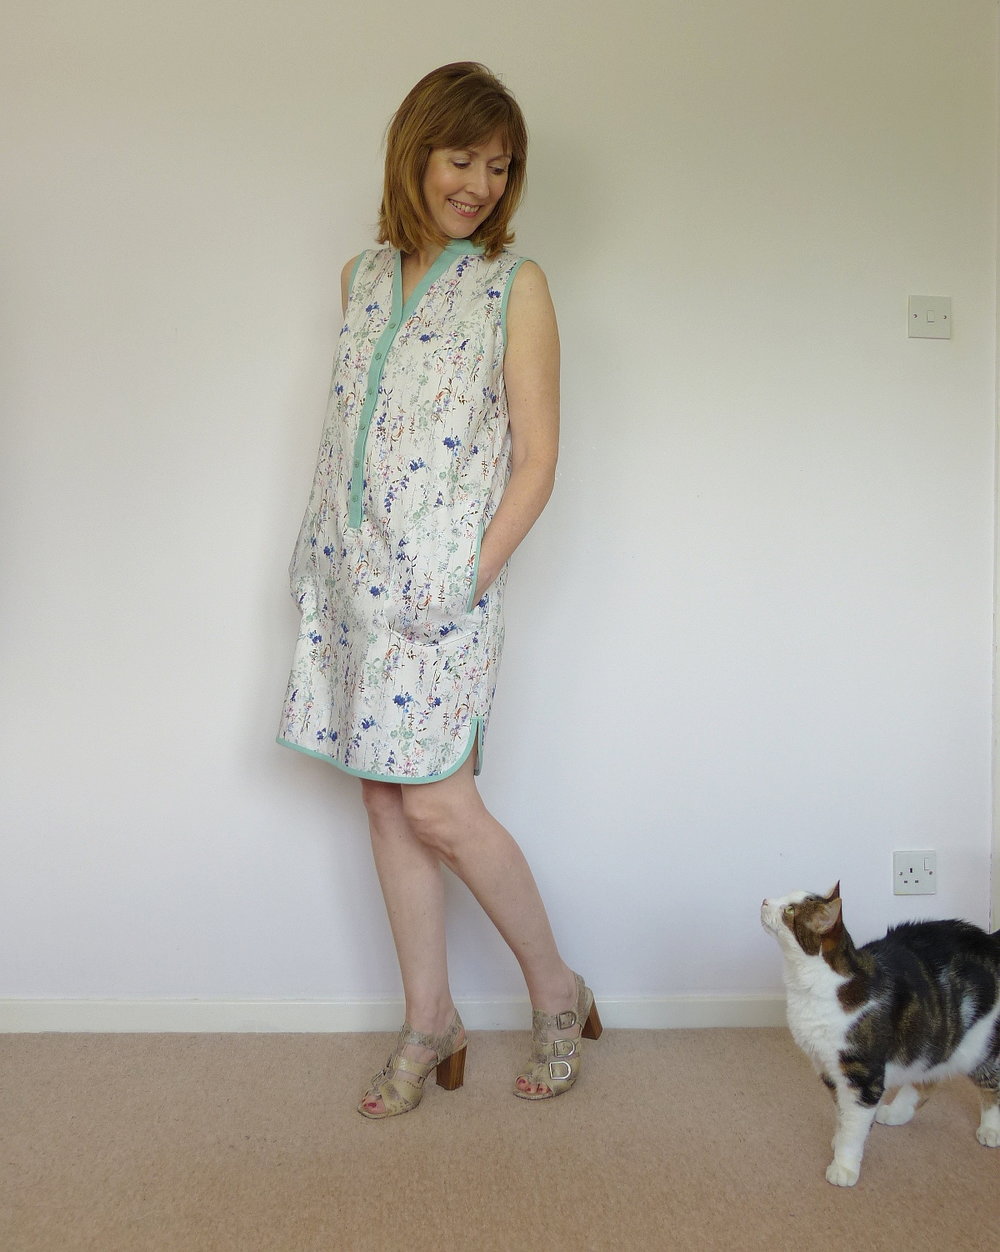
PS. Bilbo was determined to get in on the action….again! :
Pin for later!

That pocket treatment is genius! I had to read it twice before it sunk in that they were topstitched on the OUTSIDE , lol!! I need more coffee😁 A lovely dress!
Thank you so much Barb….hehe, yes, I stitched them on as patch pockets. Enjoy your coffee 😉
Oh this is a beautiful dress…and I love the pockets 🙂 xx
You’re so kind, thanks She x
There’s such artistry goes into your sewing Diane! You really know your craft! I love your dress (and thanks got the shout out too my love,y sewing buddy xxx)
Thank you Sarah x And the shoutout is my pleasure….it’s been a brill challenge. 👏👏👏
Beautiful, Diane! I’m excited to see your pocket and placket tutorials. Brilliant! The pocket is so much easier (and gives better looking results!) than the method I’ve been using.
So nice to hear from you Sharan! And it’s even nicer that you find the tutorials useful. I’m so glad.
Beautifully done sewing,love your summertime dress whitch has a perfect fit.
Inga
That’s so kind. Thanks Inga, so glad you like it. And I’m wearing it today in the UK Summer that we finally have!
Great detain on pocket, loved it. Thanks for sharing.
I’m pleased you like it Karon. Thanks!
One of my fav dresses made by you so far. This one just screams SUMMER!!!
Author
I thought you might like it hun 😁 Thanks so much Maneera x
And of course it’s going on holiday with me 😊