
I’m back from Greece! We had a fabulous time in the resort of Tsilivi on Zakynthos Island (oh the bliss of blue skies, sandy beaches, lots of R and R and plenty of yummy food) and today I have another of my holiday makes to show you. As promised here’s the red and white striped linen that I mentioned in this post.
Oh, and before you get engrossed in my post, I just want to say that all of the photos except for two detail shots were taken by my 15-year-old son with my phone on location around the resort and our apartment. He may not have held the camera as still as I would like but I love them anyway so I hope you like them too (I didn’t ask hubby to step in as he’s pretty rubbish at taking photos…sorry darling, but it’s true!!)

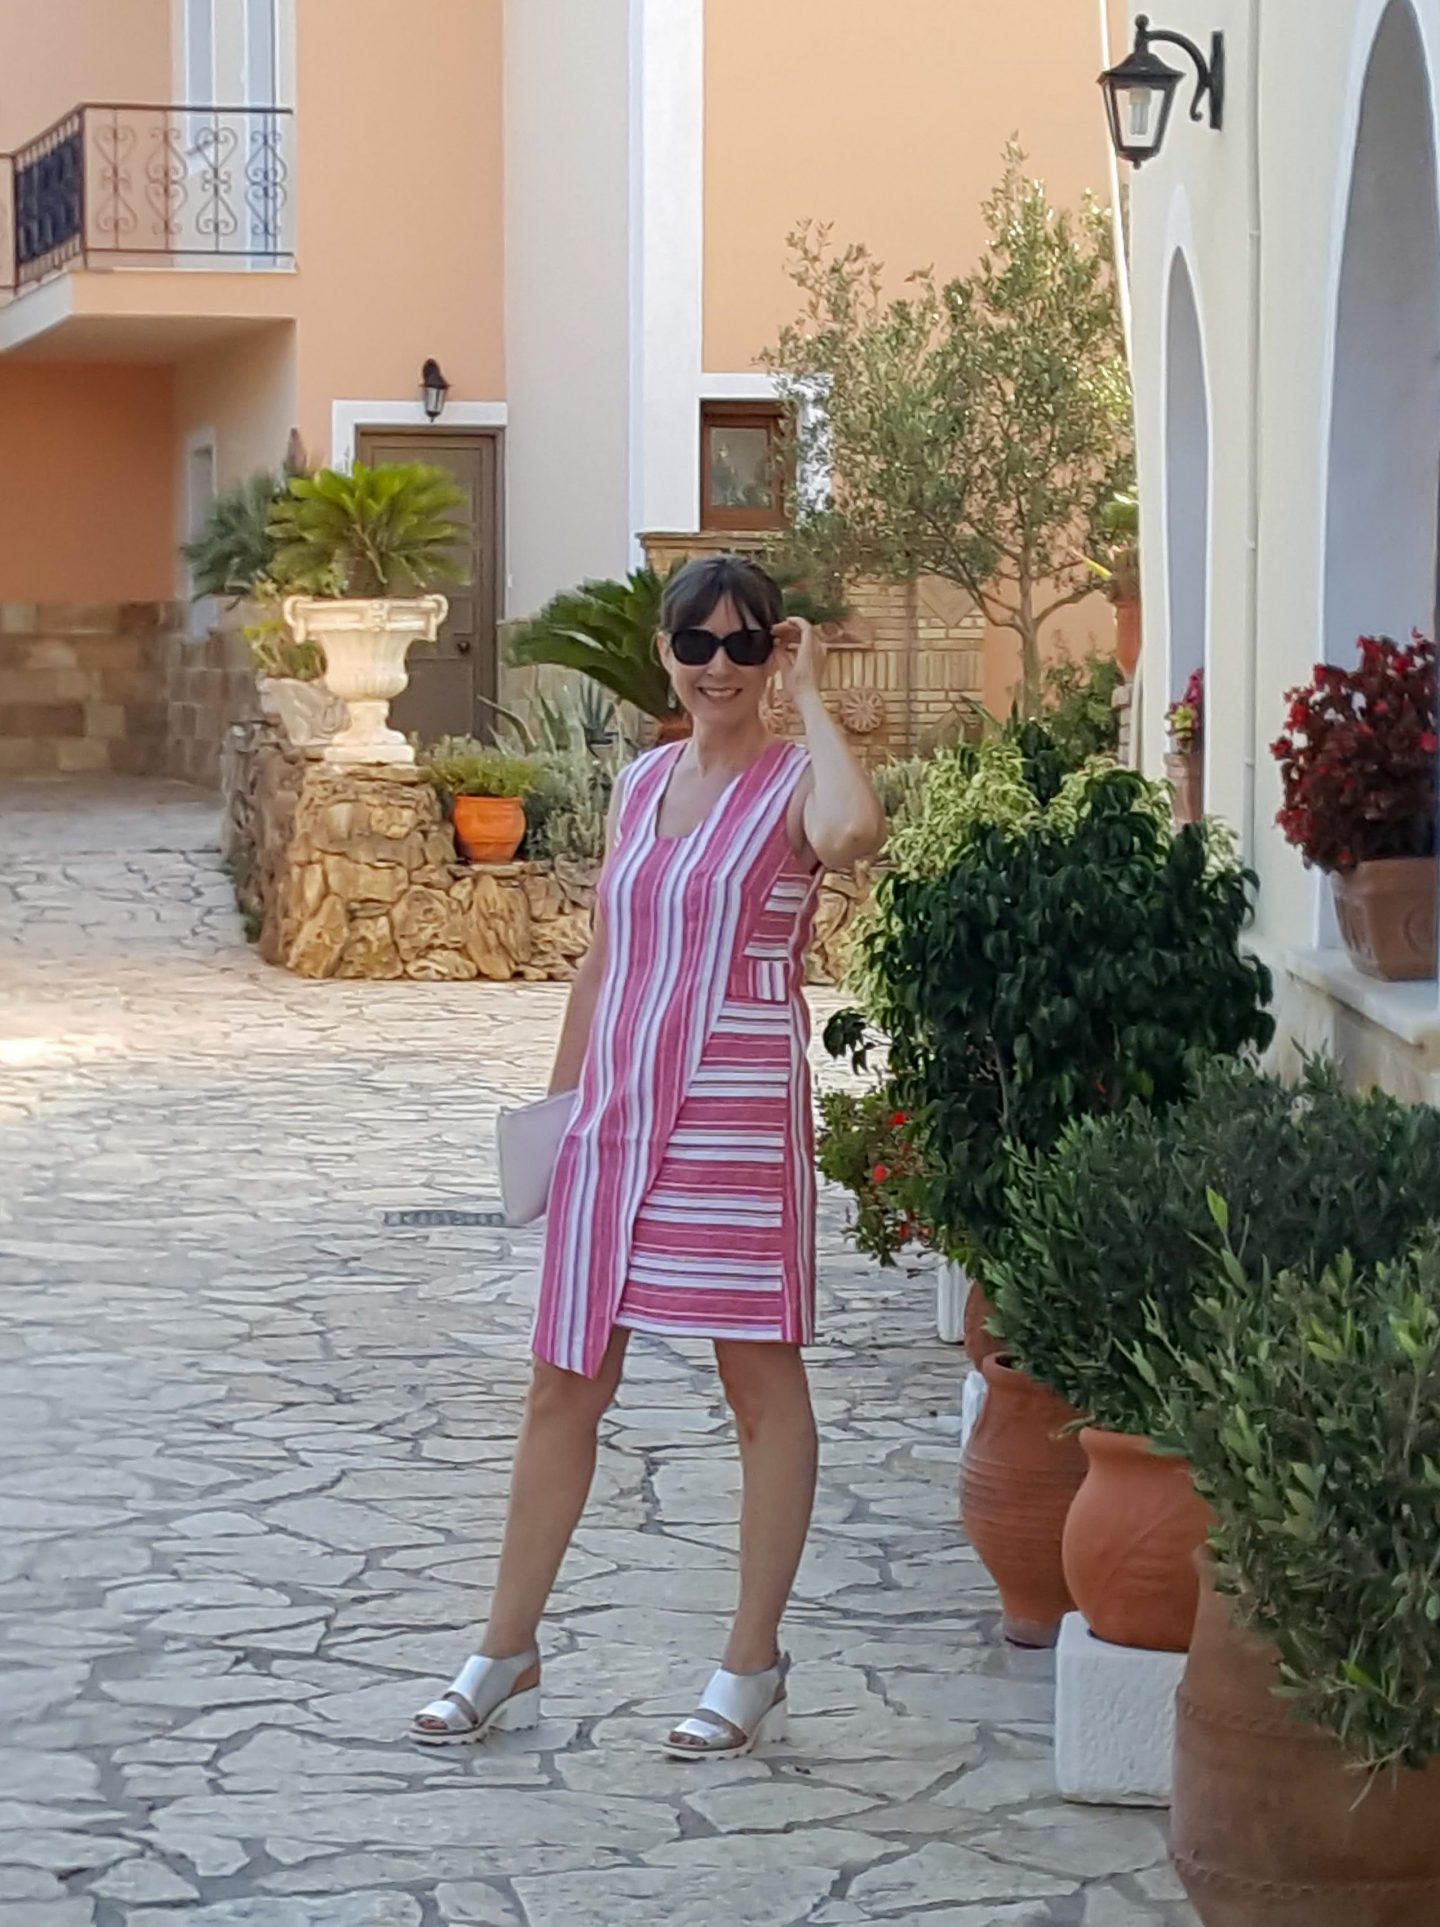
DIY Asymmetric Linen Dress
So, back to the dress, well I bought both green and red colourways of the Antrim Irish linen from Patterns and Plains and it really is lovely quality. For this delicious strawberry colour, I decided to try out a Burda dress pattern that I’d had pinned on one of my Pinterest boards for ages. I imagined how fab it could look if the left side of the dress had the stripes going in a different direction to the rest of the dress to take advantage of the asymmetry. As luck would have it I had the BurdaStyle magazine with the pattern in it. It’s number 116 from 07/2017

Pattern Changes Ahead…
The pattern has back and right waistline seams and the left front laps right underneath for a full wrap effect…But, I ended up doing a few changes, which were:
- Eliminated the back waist seam
- Eliminated front waist seam
- Cut off the left underlap in order to seam it to the right side for a mock-wrap effect. I also cut this left-side pattern piece on the cross-grain
- I needed more length at the front so I added ½” through the bust dart itself for more bust depth and ¾” just above waistline level. I didn’t need so much at the sides so tapered to less there and just added ½” to the back waist length.
- Squared off the bottom of the ‘V’ neck because I’m not a huge fan of ‘V’ necks.
- Straightened the back shoulder line and sloped the front more for my forward rolling shoulders.
Getting rid of the waist seams actually meant a bit less sewing work which sort of cancels out the extra time taken to adjust the pattern itself. Plus it was a simple as just pinning the pattern pieces together at the waist seam lines.
The sewing actually went really well. I love to sew with linen! And my machine loves it too, so everyone’s happy 🙂
The only tricky bit was the way the left side meets the right front at waist level because of the fact that I wanted a bit of a mock-wrap effect so I needed to create a small underlap on the left and right edges. All this is to say that it made for an awkward intersection which needs to be clipped. See here:


On the second photo above you can also see how the seams meet and also the mitred corner for the asymmetric hemline.


An all-in-one facing finished off the neckline and armholes at the top of the dress and I love this kind of finish because it helps to stop facings from flipping up. Oh. and I always, always understitch my facings.


I think this dress pattern is a really cool design and would love to try it in a couple of plain colours for a colour-blocked look. I bet it would also be fab as a pinafore style to layer with for winter…maybe in a stable Ponte knit…oooh yes, must try that!


Thanks for reading my sewing friends and I’ll catch you soon. Don’t forget to drop me a comment as I love to read them and always reply xx

Pin For Later


I adore everything about this dress! You have a marvelous gift for design.
Author
Thanks Karen! What a lovely thing to say xx
Well, first I have to say that your son did a brilliant job with the photos! I love this dress, and the way you’ve played with the stripes. You definitely should make a colour blocked one as it’s a really stunning shape.
Author
My son thanks you, Sue 🙂 And thanks for the dress love. I think this pattern definitely needs to be made again.
Beautiful, I love how you make it unique. Thanks for showing your process. You inspire me to think outside the box.
Author
Thank you, Pat. I love comments like yours because it means that I’ve succeeded in what I hope to achieve with my blog posts. I love making people think on different lines and to feel inspired 🙂
Fabulous dress and it looks so cool. You keep on inspiring me to think outside the box too. Your son did a good job on the photos.
Author
Thanks ever so much, Chris! That’s good to hear…and my son thanks you too 🙂
Love the play on stripes. Looks fab. Your neckline looks different from the pattern. Yours is much more interesting
Author
Thanks! Glad you like it, Vick. And I’m not a massive fan of V necks (though I have worn them) I wanted to make more of an angled square because I adore square necks and they aren’t hugely common. I love to be different 🙂
WOW…this really is a lovely and interesting pattern. And what you’ve done with the stripes placement takes it to next level! It’s gorgeous! I take it that the back is vertical stripes, yes?
Your photographer should be charging professional rates…he’s very good!
I’ll be day dreaming of Greece for the remainder of the afternoon…your trip sounds fabulous!
Author
Thank you so much for your lovely comment, Sue! Yes, that’s right, the back is just vertical stripes.