
I was nearly at the end of this project when I decided to give my sewing room a makeover. I’m really happy with how my room looks now, but once it was done, I could finally get back to finishing the Cheryl quilted coat by Vikisews which means I can now chat about all the details with you lovely lot.
My lovely honey-coloured camel fabric is a faux suede which came from minerva.com it’s a midweight fabric with a lovely texture to it. The gorgeous, fancy printed lining came from Croft Mill and it appears to be a polyester acetate blend.
The Vikisews Cheryl is designed to be oversized and boxy… And when I say oversized I mean very oversized. So you know what I’m going to say now, don’t you? Yes, that’s right… I sized down… a lot. I bought the smallest size and still took some width out at the back and some down the sides. The sizes come in XS-S, M-L and XL. Do bear in mind that there’s a lot of added wearing ease to this style if you decide to give it a go yourself
The construction idea of this coat is that you cut out a piece of fabric, a piece of wadding and a piece of lining. All three are layered together with the wadding in the middle and you sew your own quilting lines using the guide printed on the pattern pieces. You have to cut all pieces bigger to start with because the quilting process can have a shrinking effect on them, so they all have to be cut to the correct size afterwards.

Now, this whole process would have gone very well for me had I not been full of indecision when I started on this coat. When my wadding arrived, although it was already a thicker one than was recommended on the pattern, silly old me thought that the coat would not be warm enough with one layer and that I should make it 2 layers instead. So I forged on with the process (always with a little nagging voice of doubt at the back of my mind).
I marked and basted all of my quilting lines and I even got as far as machine stitching the lines on two of the pattern pieces…thankfully, at last, common sense prevailed and I realised I’d made a huge mistake. With two wadding layers, it was way too thick and bulky. In fact, I don’t think I’d have been able to move in it!
So with gritted teeth, I unpicked all the basting and the stitching from the pieces that I’d already done which took me ages. What a pity I wasted so much time but better that it happened then than further along in the process.

Most of the coat instructions were absolutely fine as is usually the case with Vikisews patterns, but I feel that the way the pockets are constructed to be unnecessarily complicated. I can’t describe exactly which bits didn’t seem to work because I started to go through the process and as I got to different steps I kept thinking things like “oh, why was this bit not cut on the fold” and “oh, shouldn’t there be a bit more fabric allowed on this part?” Anyway, suffice it to say that ultimately I went my own way with the process and actually prefer what I ended up doing but don’t ask me to try and explain as I don’t think I could! I can tell you that I ended up using a bias binding around the edge of my pocket bags instead of following the instructions and I actually prefer how mine look.
**if you want to make this coat but don’t want to sew the welt pockets why not add big patch pockets instead?**


Well despite that this project was a bit of a fight from start to finish, now that it’s done I actually love it! Every seam on the inside is bound in lining fabric and there’s a self-fabric binding all around the outer edges. The front is fastened with giant gold poppers and at the back neck I added a little extra flourish with the addition of a triangle of suede fabric with extra quilting lines all topped off with a hanging loop.
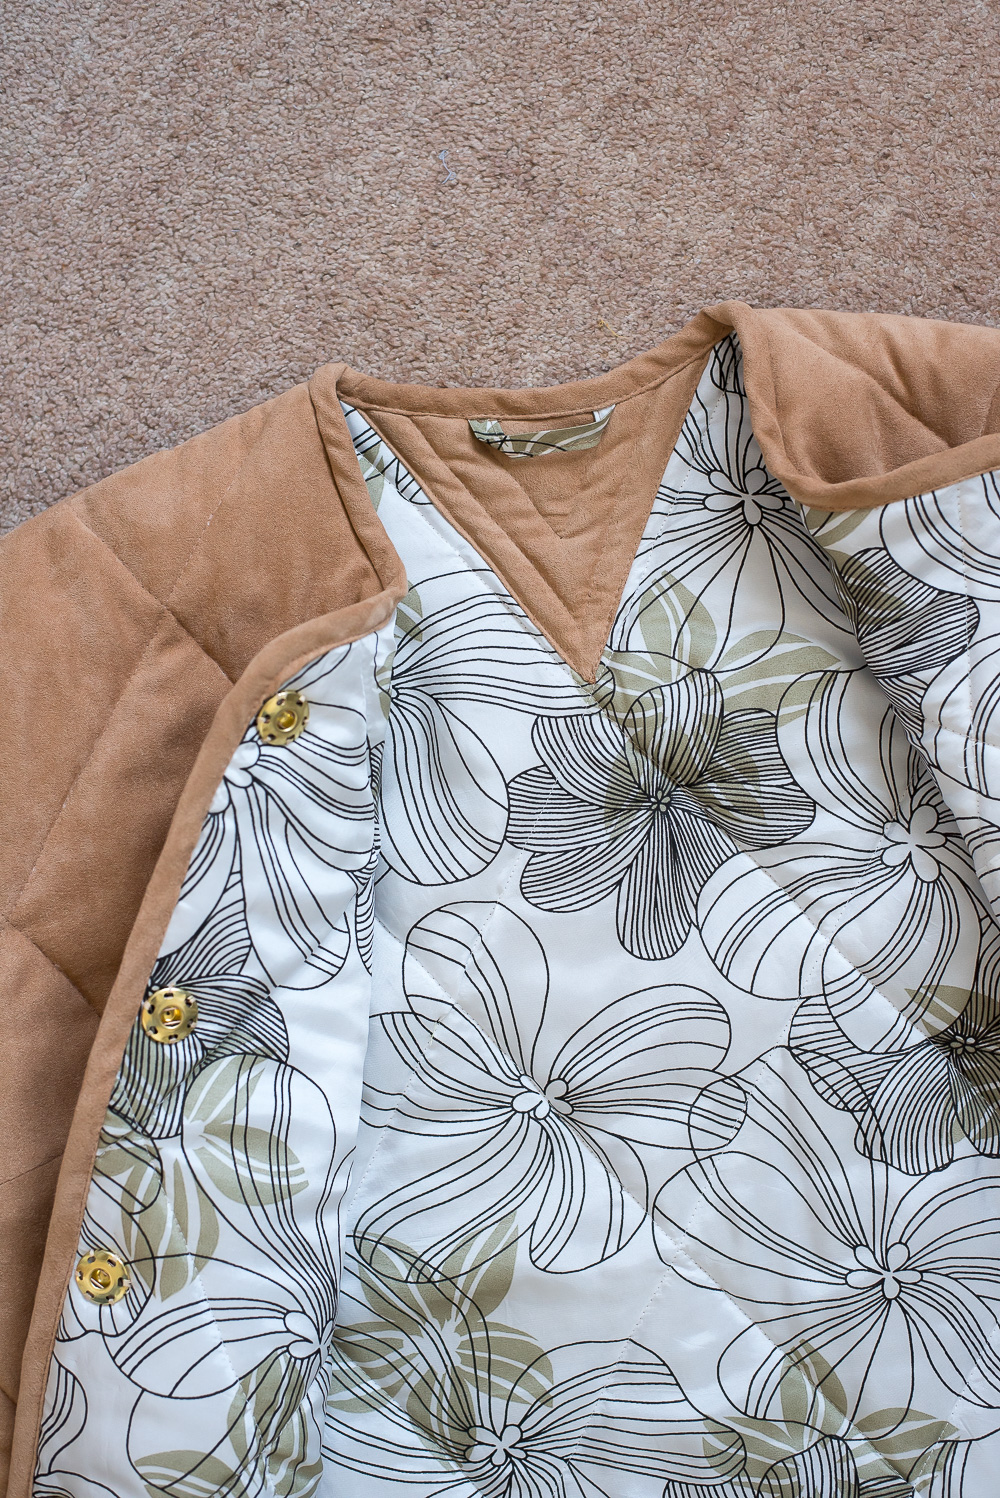


As this coat doesn’t have a collar, I’ll mostly wear it with a scarf but in some of the photos I’ve left that off so that you can see the neckline shape properly.
It would also look great with a hooded top or a turtle neck and I like that I can layer a lot of cosy knits underneath. I think it’s going to be a useful wardrobe addition.
Well, thanks for stopping by and I’ll see you soon!


Love it. That triangle at the back is a very nice added detail.
Author
Ohh, thanks, Vicki! And I’m glad you love my little extra bit of interest
I was going to comment on the inside triangle too! Looks like a very handy cozy jacket to have in your wardrobe!
Author
Thank you, Linda! I couldn’t resist adding that little extra touch and despite some of the indecisions and hassles I love how this coat turned out. Can’t wait to wear it.
An excellent lesson in perseverance resulting in an amazing achievement. Be very proud, Diane!
Author
You’re too kind, Heather, thank you!
What a great project! Your coat is gorgeous but then your makes usually are! Thanks for sharing. And, yes, adding the triangle at back neck is brilliant!
Author
Ohhh, thanks ever so much Fran! I’m so glad I persevered with this project and I think having that midway break to makeover my sewing space helped to clear my mind.
Love this jacket, Diane: it looks great on you and super comfy! Yes, wonderful to wear with big collars that don’t fit well in collared coats! Love your finishing details.
Aren’t those little nagging voices something?! I am sure it was annoying as can be to undo all of your basting and stitching to go back to one layer of batting (U.S.) / wadding (U.K.), but you have amazing determination and follow-through, and reading about it helps me persevere in my own projects!
Author
Thanks so much, Joan. Glad you like my new coat. I’m glad I persevered with it and glad to hear that you feel encouraged to do the same with some of your projects.