
I’ve been sewing the Vikisews Emmanuelle coat in olive wool fabric over the last couple of weeks and in my first post about the coat, I shared inspiration, fabric choices and pattern alterations.
Now it’s time to chat more about my making process and to show you the finished coat…spoiler alert…I love it!
Before I get going, I just want to say that I went my own way a lot of the time rather than following the Vikisews instructions to the letter. I used slightly more traditional tailoring techniques on some of the stages.
So, after completing the back and the front with the flap pockets I got cracking on the fronts and lapels. I used a hair canvas over the whole of the coat fronts and attached it following methods outlined by Kenneth D King in his ‘Smart Tailoring’ DVDs that I mentioned in a previous post (I’m not sure if they are still available to buy anymore I got a second-hand version from eBay). Each piece of canvas is mounted on some cotton muslin. The muslin is attached with a serpentine stitch and then the muslin is trimmed back to the stitches. The hair canvas stops short of the main construction seams so that only the muslin is held in the seams of the coat and the canvas ‘hangs’ from the muslin edges. I love how this cuts down on bulk.
After cutting and lapping the waist dart and I basted the canvas to the front pieces. Then I prepared it for pad-stitching…


I did a Reel for Instagram with my pad-stitch technique for the collar so I thought I’d include it here. It’d been a long time since I did pad-stitching but it soon came back to me:
Next, I moved onto making up the collar and again I pad-stitched this. I love how the fabric and canvas mould to a lovely shape.
And here’s the finished collar ready to attach to the coat.


At this point, I had a proper try on of my half-done coat and I realised that not adding interfacing all the way to the hem of the back pieces was a mistake. It just looked a bit too fluid in the way it hung and it needed more body. I ended up unpicking the back seams from waist down and ironing on more interfacing before stitching back up again…lesson learned.
I could now get onto the next step which was to sew up the lining and attach it to the facing. For a little extra prettiness, I made a flat bias binding insert between the lining and facing. I love how harmonious the colours all look together 🙂

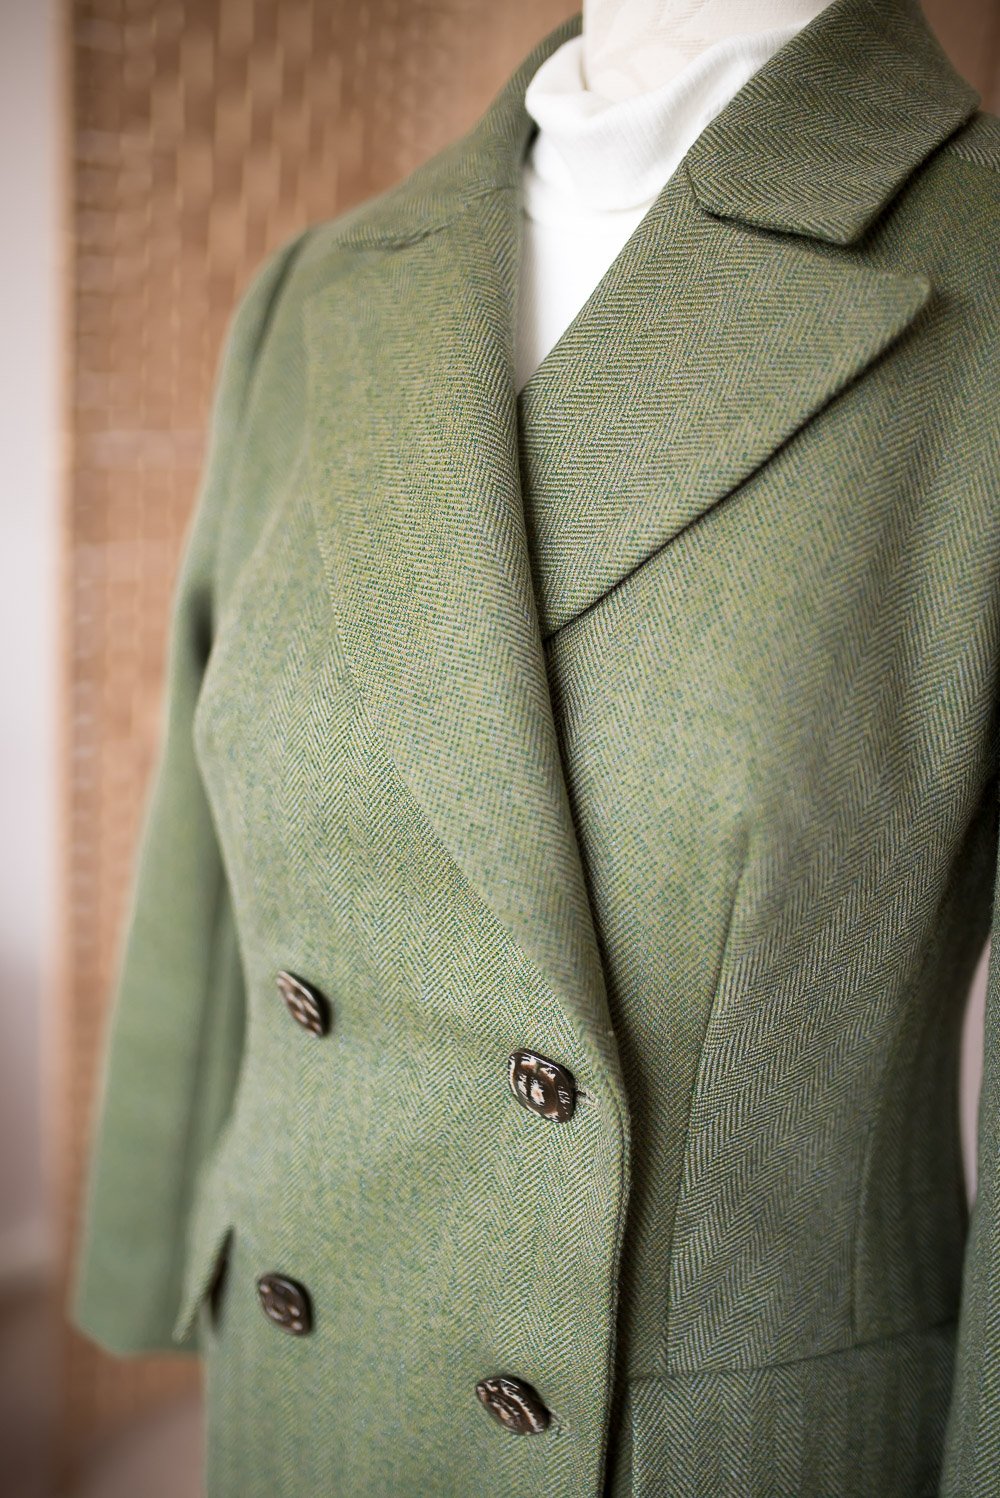
Once I had attached the collar and facings to the body of the coat it finally started to look like a proper garment, yay!
Again I broke away from the instructions and before I stitched the sleeves in I sewed the lining to them at the hems. After sewing the sleeves in I added some sleeve head roll and shoulder pads, then I stitched the armhole of the lining all around the armhole of the main fabric. Finally, after hemming up the sleeves, I pulled the sleeve lining into place and slip-stitched it to the armhole. Again, this is more of a traditional tailoring technique.


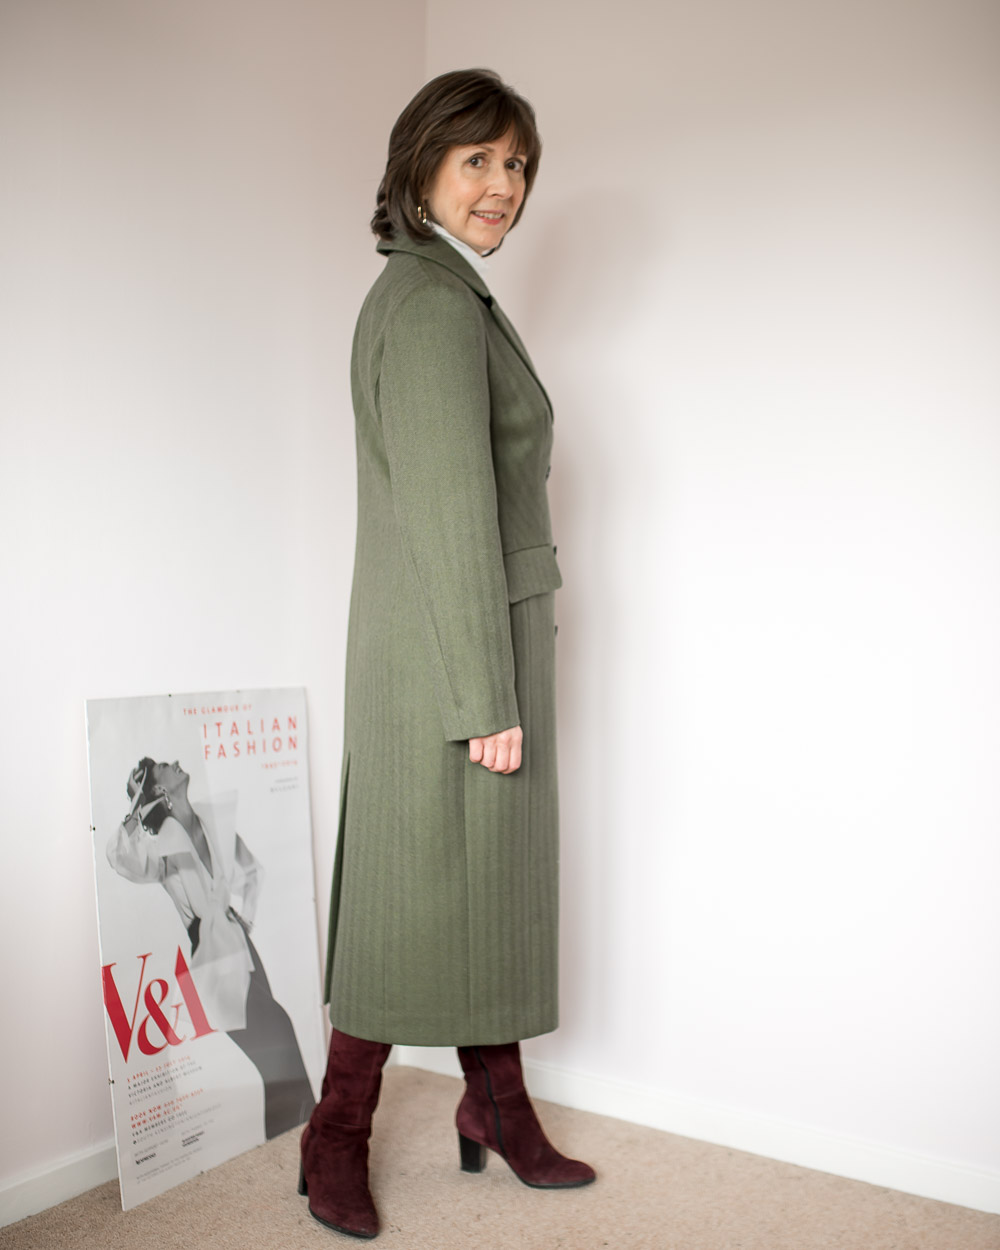
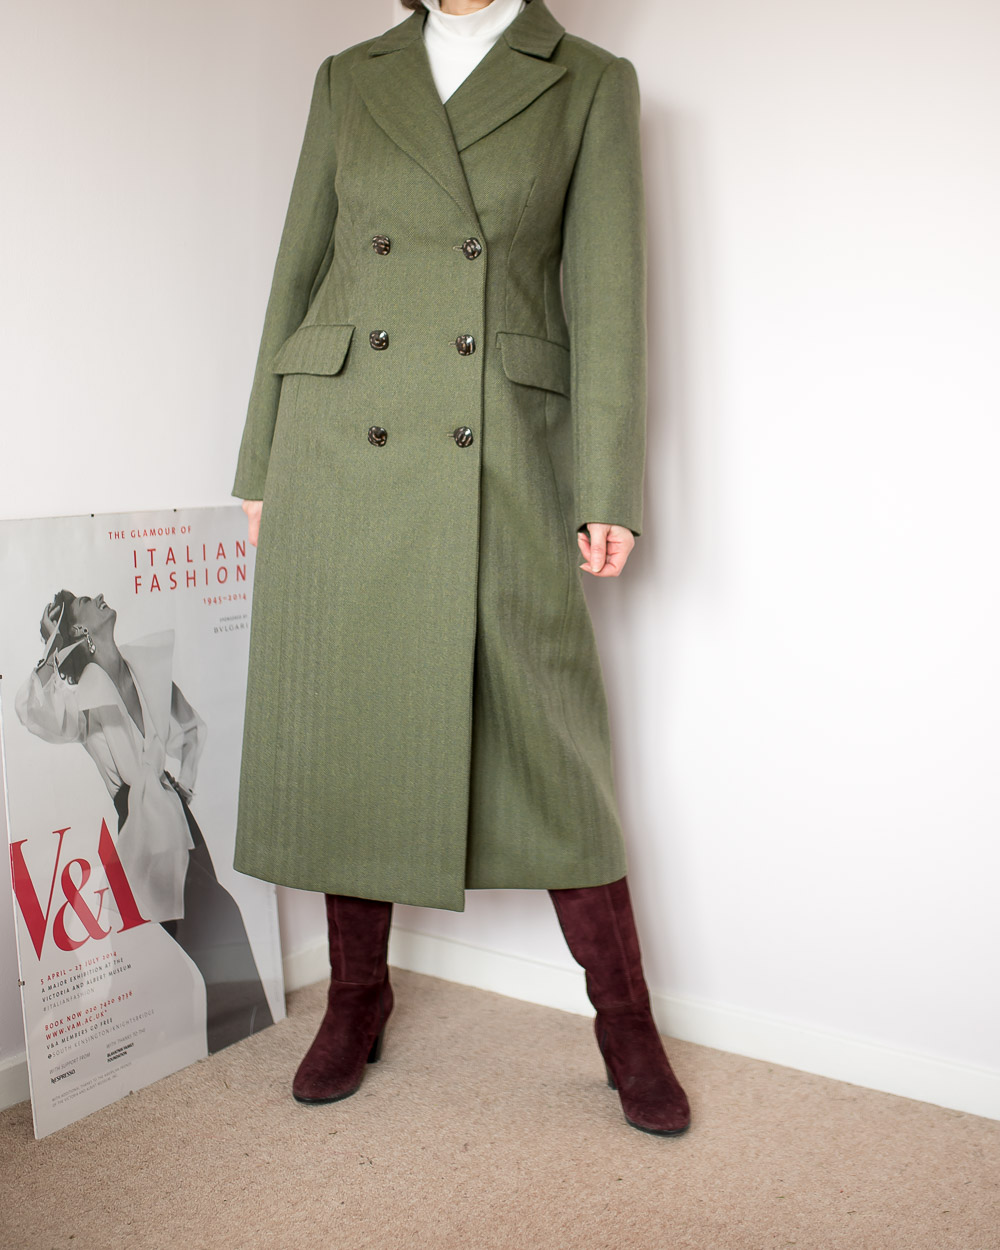
After doing the hems and buttonholes my Emmanuelle coat was finally done! It was a big project, but I’m glad I chose a great pattern. It was well drafted and apart from needing a bit length over my bust it was pretty true to size.


The whole coat feels really substantial and quite warm too. I didn’t overfit it because I wanted a bit of room to layer thick sweaters under if I need to. I’ve also left plenty of length on it which may take a bit of getting used to, but I’m enjoying a different silhouette for now and it’s an easy fix if I want to go shorter later. In fact it feels pretty good!. I’m guessing I’ll have it in my wardrobe for years to come.

Well, that completes the epic coat saga. I feel like I’m in need of a quicker sew for my next project…and funnlily enough that’s just what I’ll be doing. In fact I’m back a bit sooner than usual next week, Wednesday to be precise with something for you in pure silk, so stay tuned for that.
In the meantime, thank you so much for reading, stay well, stay safe and I’ll see you soon.

PIN FOR LATER


great result and it’s such a pleasure to work with beautiful wool. A lovely coat you will wear for years to come. love those crisp lapels 🙂
Spectacular work, Diane! Just, really gorgeous.
Author
You’re so kind, thank you, Cathy!
Author
Thank you so much, Beth! Oh, totally agree, wool is so lovely to work with.
Beautiful. I’m not surprised you needed to interface the whole back. The fabric is so fine. Really stunning work, thanks for sharing.
Author
Ohhh, thanks ever so much, Vicki. Yup so glad I saw sense and added the extra interfacing 🙂
Beautiful finishes. I always appreciate seeing some traditional tailoring. Five stars
Author
So glad you love it, thank you!
Absolutely gorgeous. I love the effort you put in to get the fantastic results you do. I like the length.
Author
That’s lovely of you to say, thanks Maggie x
Stunning. So perfect on You. The style, the length, the lining, the colour, the fabric and your patience and skill, produced a beautiful custom made coat. Thank you for sharing.
Author
Thanks for your lovely comment, Pat!
Truly perfection — and inspiring, too!
Author
Thank you, Kate!
Fabulous – it’s so elegant and your sewing is impeccable.
Author
Thank you so much, Amy!
Stunningly beautiful! The fabric is gorgeous and your choice of lining is perfect! I’m so impressed by the fit you achieved and your tailoring skills, Diane. Oh, and you always have the best boots!
Author
Ohh, thanks, Sandra!
And I’m partial to a great boot 🙂
Gorgeous coat that looks wonderful on you, Diane! You definitely made the right choice to do hand pad-stitching and to open up the back to add more interfacing: it hangs beautifully. Worth the time for a classic coat that will be in your wardrobe a long while.
Love your fabric, lining and buttons!
Anything more tricky than you expected?
Author
Ooh thanks, Joan, so glad you like it… and my fabric and button choices.
Hmmm, well, I expected the time and patience you’d expected with a coat. Probably getting the collar even on both sides was probably the biggest challenge with being accurate.
What a fabulous coat. It was also great to hear that you used some traditional tailoring techniques which in my view add to the perfection of this wonderful coat. This will be a coat to enjoy for many years.
Author
Thank you so much, Chris! I’m sure I will.
I am so impressed! Your coat is beautiful. Traditional tailoring is something I’ve never attempted, but the results certainly are visible in this garment. Hats off to you for producing such a timeless garment. And for sharing the process with us. Thank you, Diane
Author
Ahhh, thank you so much, Karen. It was nice to get re-acquainted with the tailoring techniques and also to learn some new ones. Glad you enjoyed seeing my processes though 🙂
That coat is gorgeous!
I’ve been going through your old posts, and really appreciate how you took the time to find your flattering colours and silhouettes instead of jumping on whichever patten was trending. Really enjoyed reading your blog!
Author
Thank you, Onkuri! Yes, I’ve never really been one to follow the crowd that much…I prefer to do ‘me’ but if a trending pattern catches my eye then I might try it 🙂
It’s absolutely gorgeous Diane. Interesting technique too with the canvas and muslin. Thanks for sharing. Enjoy it!
Author
Awww, thanks lovely! Yeah, that’s such a great way to do the canvas with the muslin edges. I have a blazer to make for spring so I might try it again.
This coat is a work of art, it’s always a mission to make a garment of this standard. Loved reading about your thinking and the process. Truly beautiful, a credit to you.
Glenis Ebbett xxx
Author
Such a lovely comment, thank you, Glenis! xx
Diane this is a stunning piece of work – the fit and the finish are just first class – and it’s so ‘you’! I love the fitted front darting and the cut of the collar is wonderful – it has a real mid-century look and feel when it’s turned up – but without being overtly ‘vintage’. A classic piece of tailoring 👏 Your sewjo is *definitely* back in the house! (Oh, and that wool herringbone 😍)
Author
Ahhh, thank you, Alice xx Oh yes, I see the mid-century vibe too! I love that!
This is such a helpful process. Thank you for describing it so well with pictures.
Author
I’m so glad you’ve enjoyed it and found it helpful too 🙂
I’ll happily join the chorus – it’s a spectacular coat! Your projects are always an inspiration to me.
Author
That’s lovely fo you to say, thank you, Leanna x