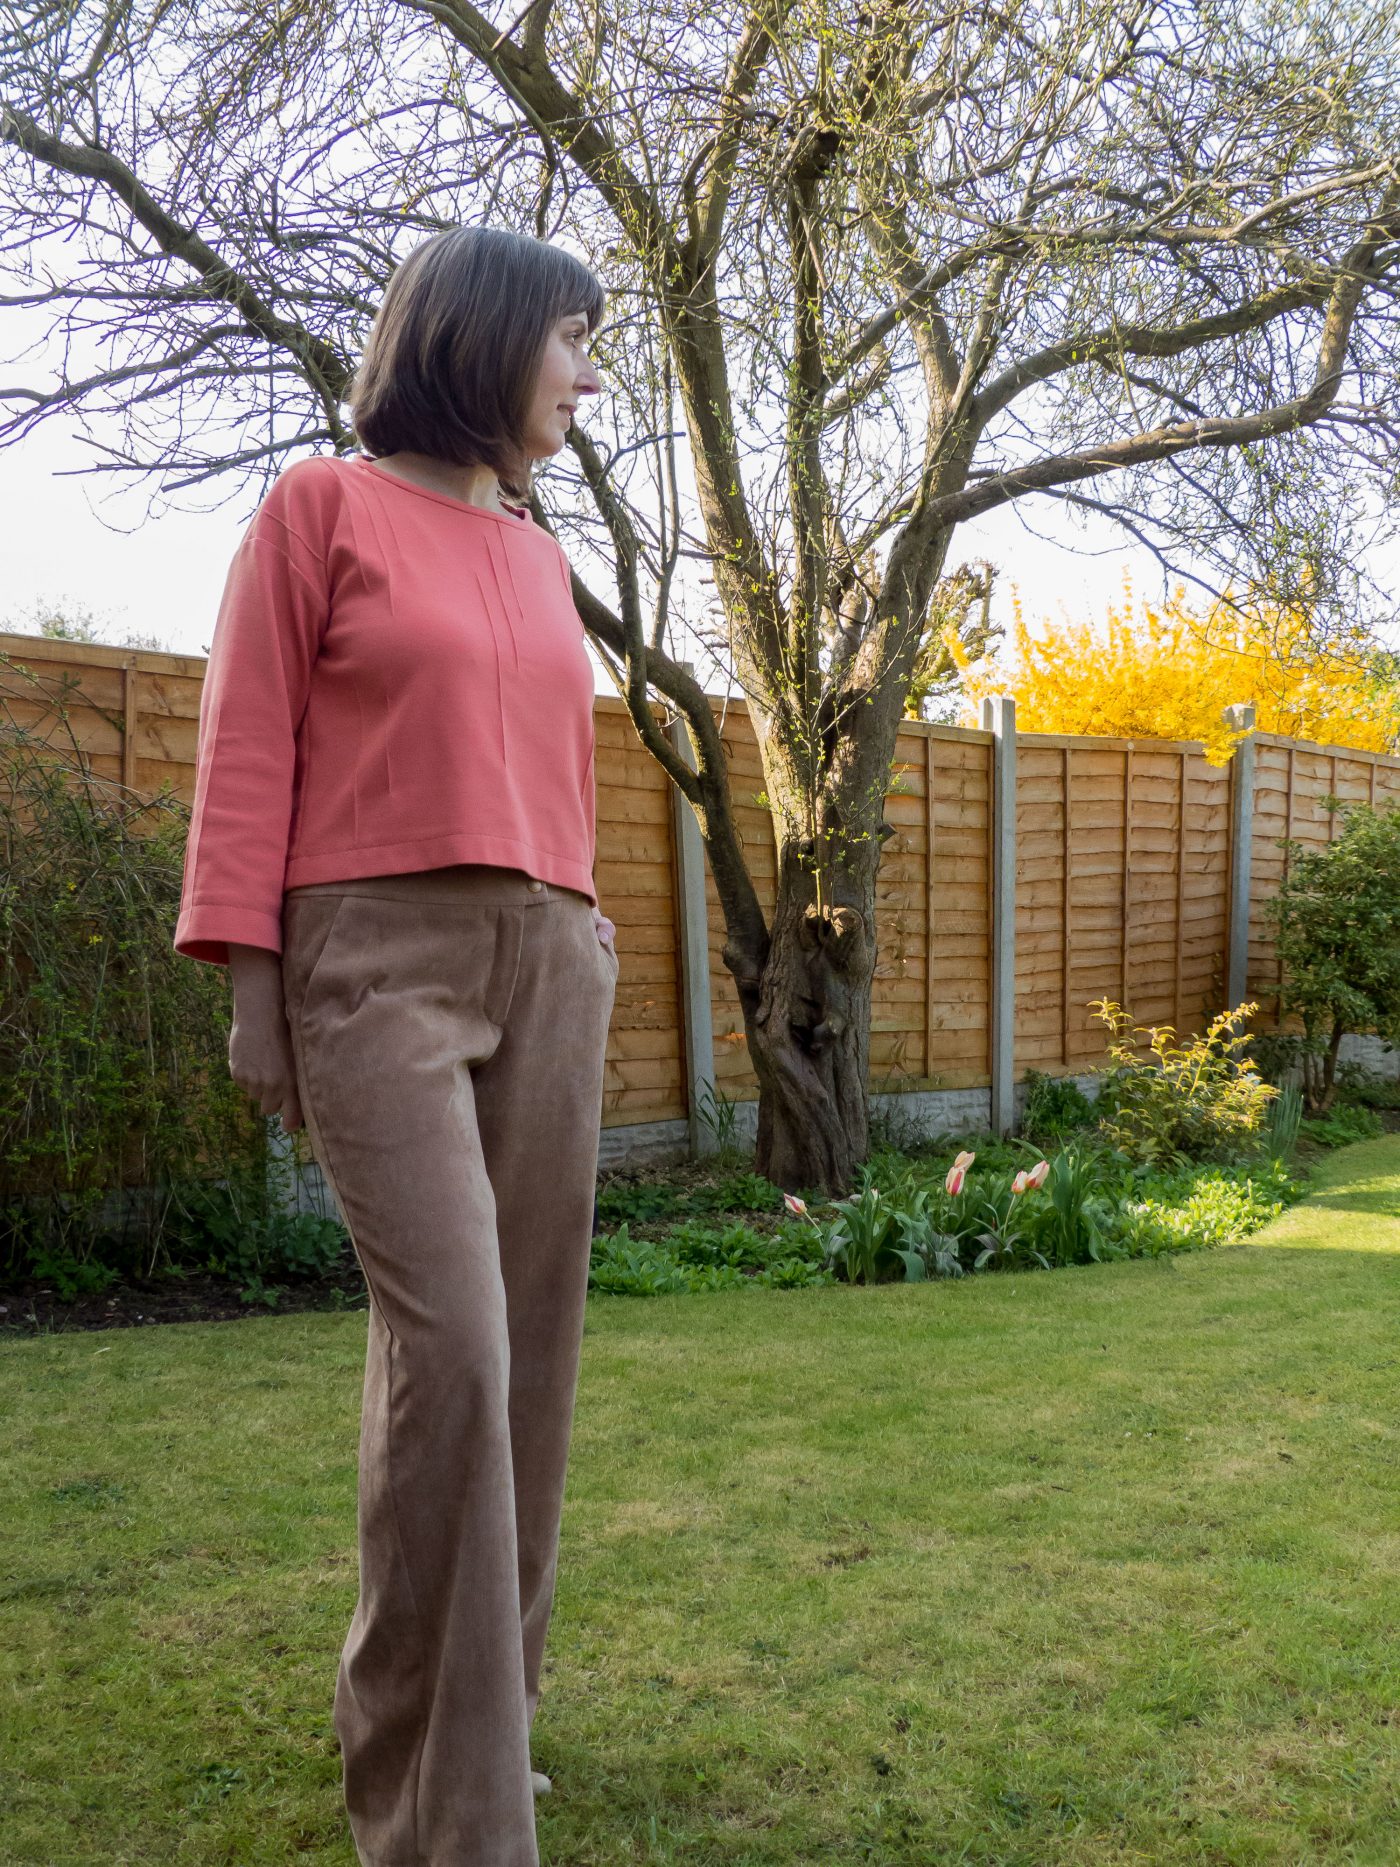
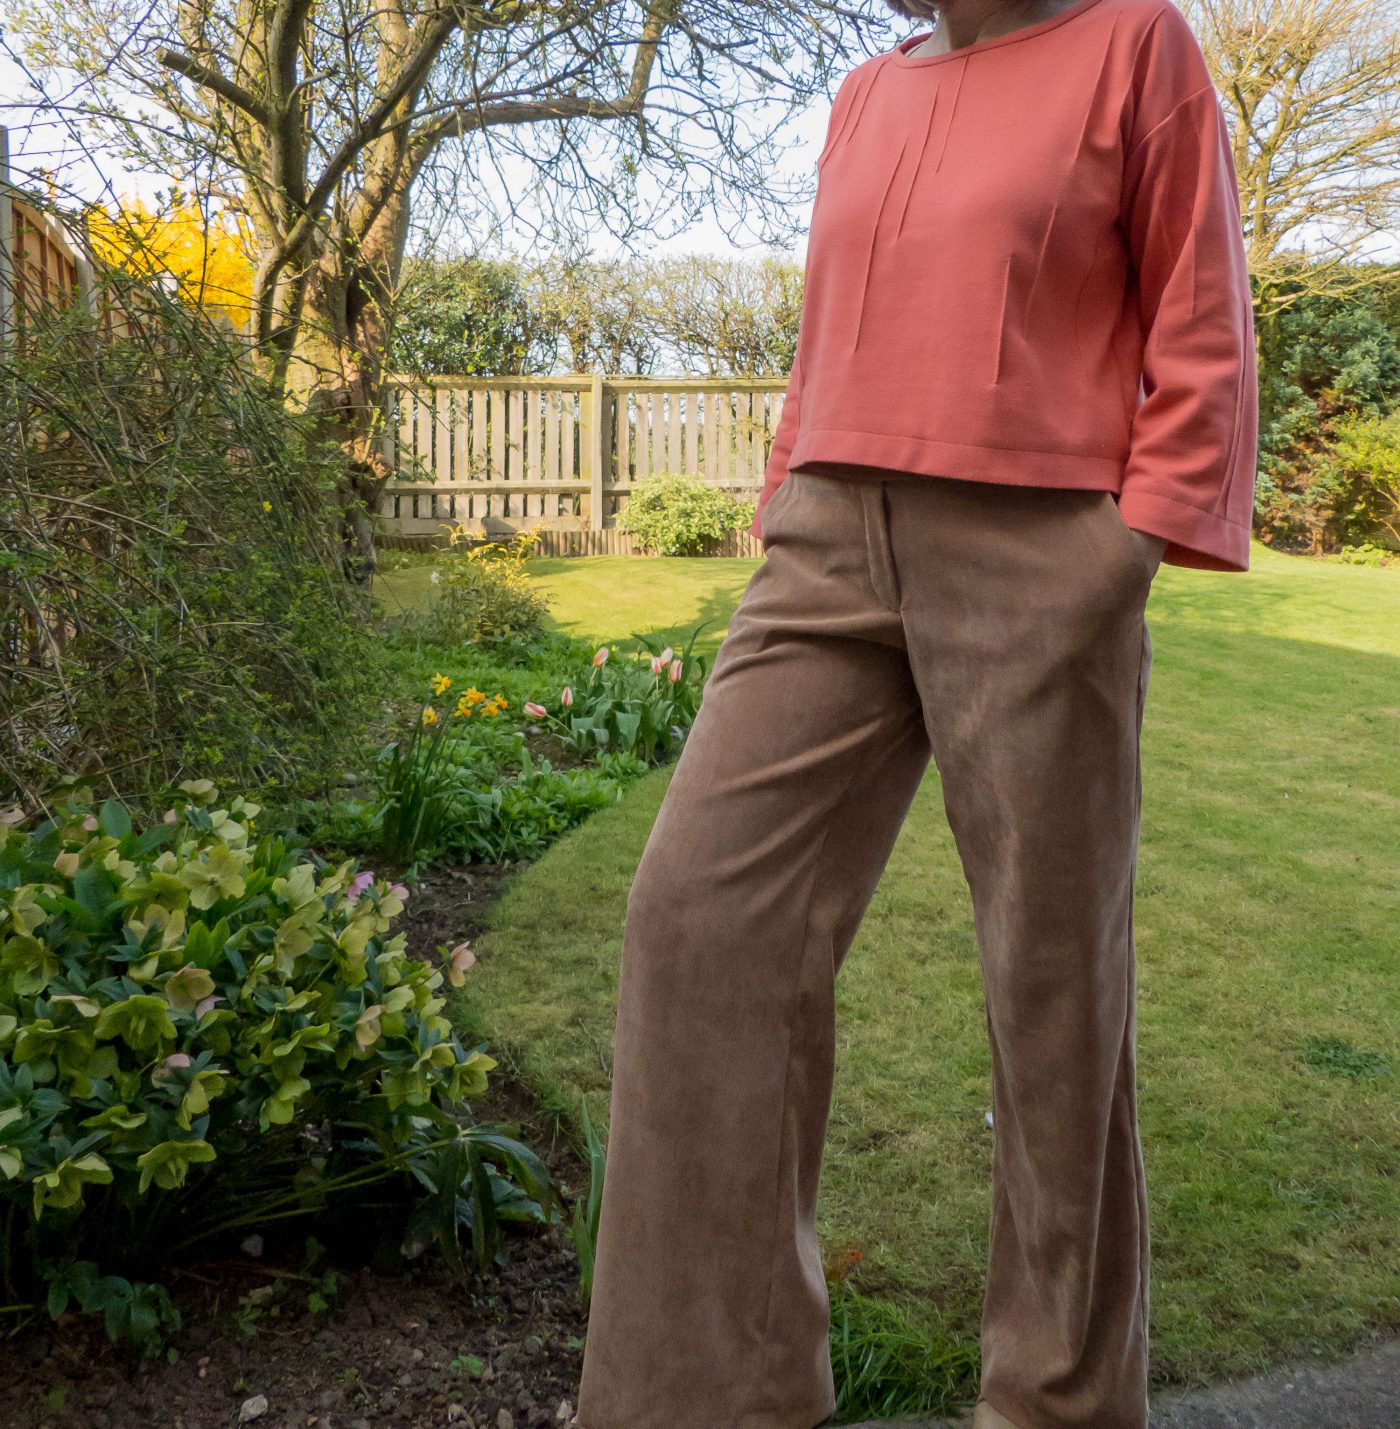
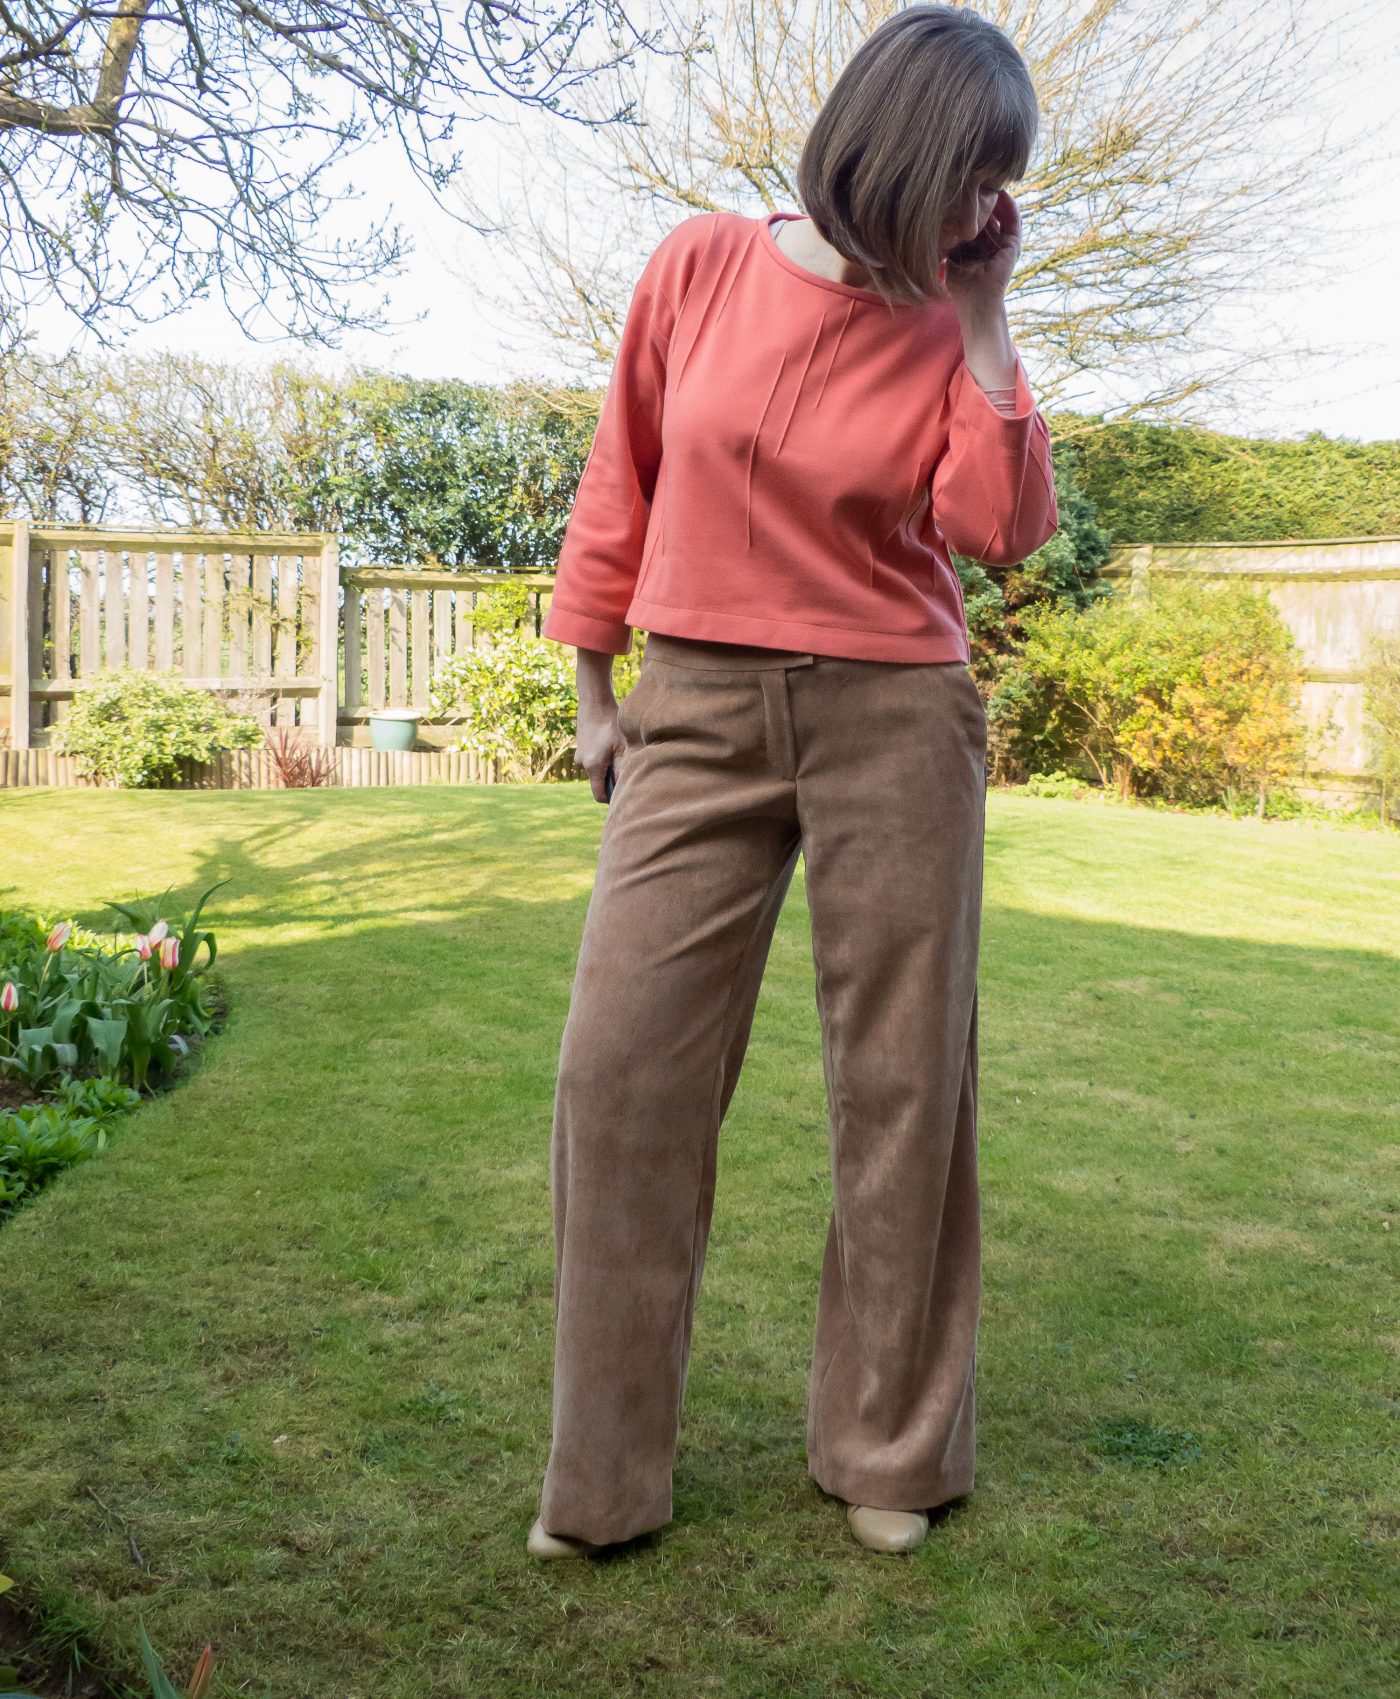
Ok, so you know how we Brits just love to talk about the weather a lot…well I’m sorry but I’m going to have to mention the fact that it’s really cold today! I swear we’re in a time warp because a week or so ago it felt like early Summer and now it’s more like November…brrr! Thank goodness I have my new corduroy wide-leg pants to keep my legs warm.
By the way, don’t let the sun in my photos fool you into thinking it was a warm day…it was our only bright day this week and it was very chilly indeed, and my nose kept running (TMI, I know!). I needed a hot cuppa to warm up afterwards. #suffering for art, lol!
I only finished making my new pants just this last weekend. I really took my time over them and spread and out the sewing over about 10 days and I’m as pleased as punch with them. I’ve revisited BurdaStyle 102 from the May 2017 BurdaStyle collection. I made the pattern up for the first time last year in some lightweight denim and in the shorter culotte length.
As I said earlier, I’ve used corduroy for my project and lets for a minute oooh and
Right, let’s get on to the nitty-gritty of the sewing bit.
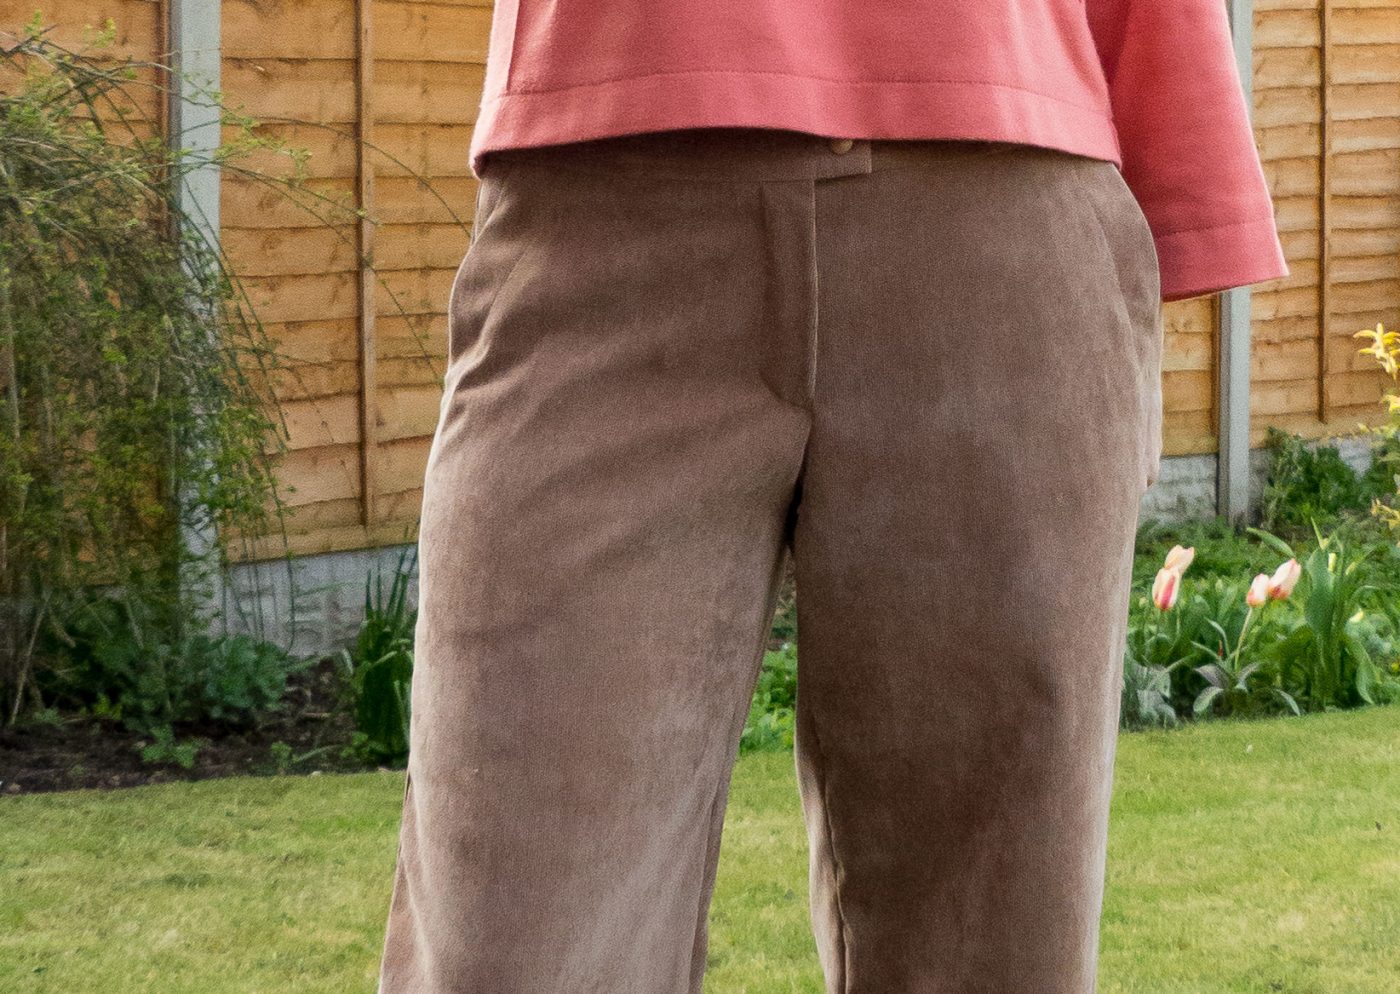
So, as I said, I lengthened the pattern to full-length and I simply extended down by several inches…easy. I also made a few changes to the design and the two main ones are: First that I added a ¾ lining to the fronts and secondly, that I moved the zip from the side seam to the centre front and changed it to a fly front design. The lining adds extra warmth and as for the fly front zip, well there are many, many good tutorials online for how to do them, so I won’t go into detail about that here.

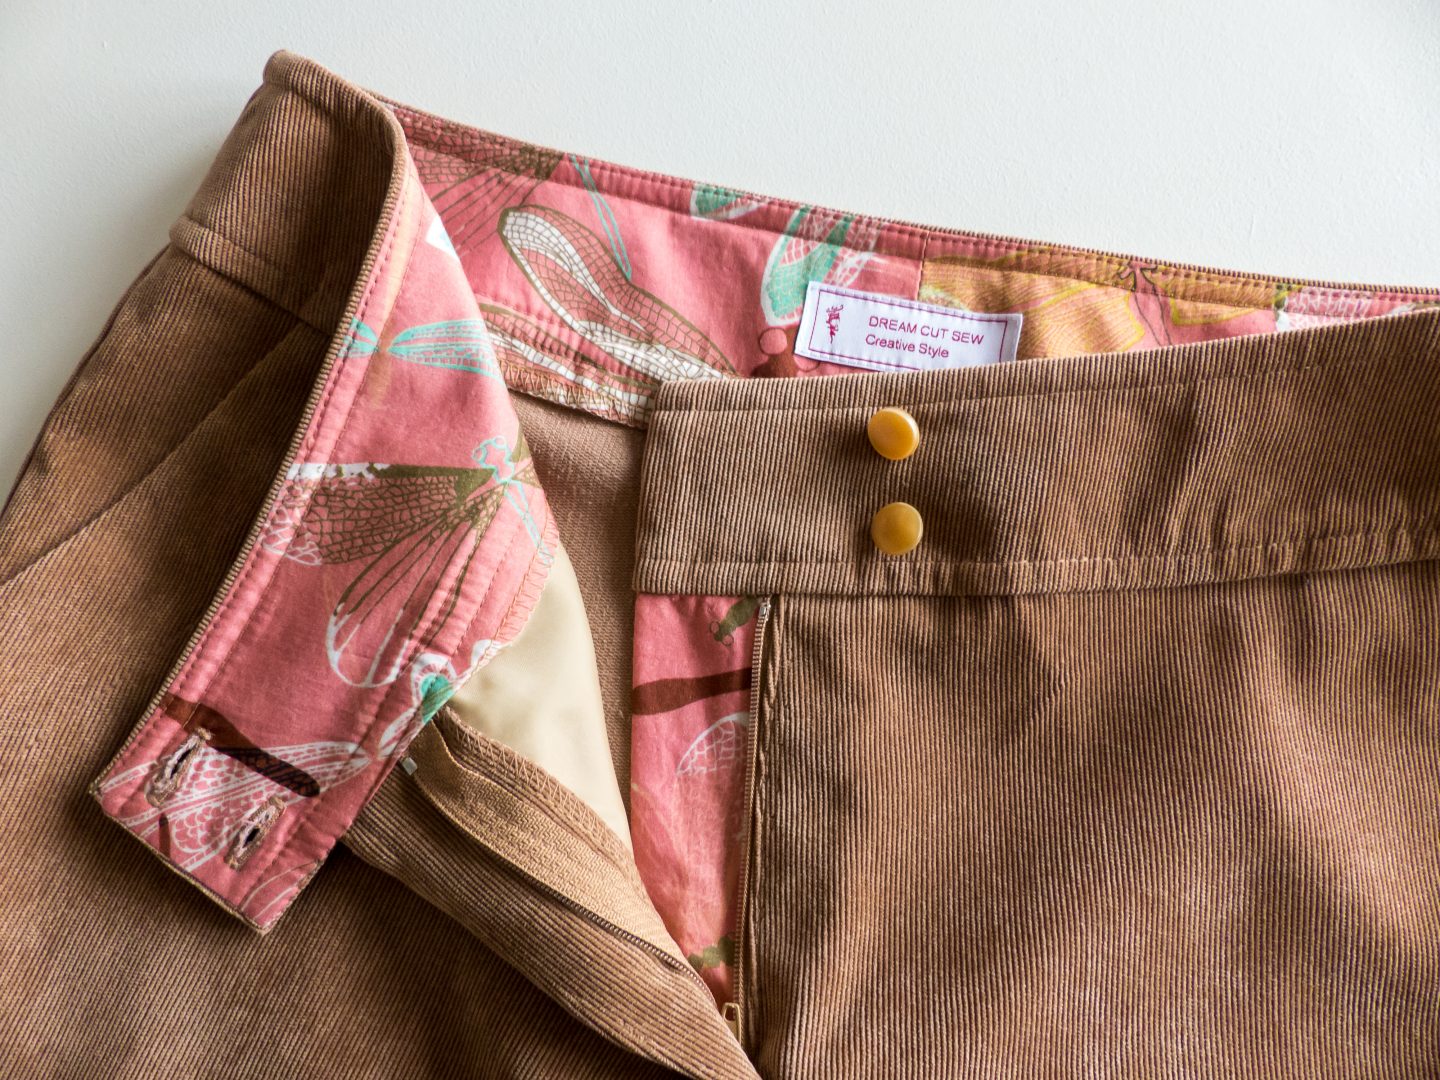
I started off by sewing the pockets and for the pocket bags I used a scrap of pretty cotton lawn that looks great next to the camel colour. The pocket bag design on this pattern extends across the full front, but because I put a centre zip I chopped off the extension. See the red line on this photo:

Next up, after cutting out and hemming the bottom of the lining I basted it in place down the centre crotch seam and along all of the other edges of the corduroy. Then I sewed in the zip, complete with colourful zip guard. Here’s a couple of photos showing some inside deets:

I think I ought to mention a bit about sewing corduroy at this point…
My fabric has a very short pile and not a very distinctive nap. It was easy to sew with a standard 70 needle and it didn’t shift along. This may not be the case with all cord fabrics though. If you have some cord with a deep pile and a definite nap (more like velvet) you might need to use a walking foot to sew with to prevent any slippage and I would recommend always pressing carefully on the wrong side too.

As you saw in the photos of the insides I also used the cotton print for the inner waistband for some extra colour. I know I’ll be the only one that knows it’s there when I’m wearing my cords but it gives me great pleasure knowing about the pretty insides :). The cotton fabric is quite lightweight so I interfaced both the inner and outer waistband pieces and also ironed a stabilising tape around the upper edge to stop any stretching out of the waist. The result is nice and crisp and keeps its shape.
Some topstitching using two strands of Guttermann run together finishes off the waistband, pockets and hems. Two strands show up better on the corduroy texture.

And that’s it! These actually turned out even better than I expected and the fabric was a joy to sew, plus it feels very strokable. I don’t think I’m finished with this Burda pattern yet, because I love the design and I could easily see me sewing more in my future…
As always, thanks so much for stopping by my blog…please don’t be a stranger and why not consider signing up for email updates so that you never miss a post…Cheers!

Pin For Later:


These look lovely and it’s interesting to see how you changed from a side zip to a fly front with this pattern. Thanks for giving such detailed instructions. After seeing your use of this pattern I purchased and made them up in black linen and they are such a beautiful fit without any faffing.
Author
Thanks for the kind words Chris xx. Isn’t it a fab pattern? I’m so pleased that you’ve enjoyed making it up too.
I know I’ve already mentioned before that you are one of my trouser/pant muses. Love your makes.
Author
Thank you Faye! I’m honoured to be your muse xx
These look great on you Dianne! But again I love your added touches like your facings and pockets which ensure your makes are really superb!
Author
Thanks, lovely! Lately I’ve been enjoying putting more effort int pretty insides 🙂
The pants look lovely, you can almost feel the softness in the photo. I love the touch of color on the inside with the cotton print fabric.
Author
Thanks so much, Celeste. I’m actually wearing them now as I type and they are soooo comfy, and I just keep stroking the fabric…Might get some weird looks if I were on public transport stroking my legs, haha!
These look wonderful!
Author
Thanks ever so much, Irene!
These are a superb shape and yes, I love that camel colour too, it goes with so many things. I have some green stretch velvet in my stash that I should sew and I am now more than slightly motivated!
Author
Thanks ever so much, Sue. I love the sound of your green velvet and it would definitely be lovely in a wide leg style pant.
I remember the corduroy I had as a small child was horrible – stiff, hot, noisy! This is beautiful fabric though, I can just imagine how soft and comfortable it is. Lovely work inside and out. I like when the lining fabric is colourful!
Author
Thanks Linda! Hehe, well I’m pleased to say that this fabric is the antithesis of those childhood corduroys that you remember 🙂 It really is drapey and soft.
Looks great! I’m having a heck of a time fitting pants, these motivate me. Did you make the blouse ?
Author
Aww, thanks! Yes, I made the top too. It’s on here my blog if you tap on the search icon in the top navigation bar and search BurdaStyle boxy top.
I love your work details in these pants, beautiful inside and out 😍😍😍
Author
Thanks ever so much Hana!
Beautiful trousers Diane and perfectly styled with your lovely coral top. Thank you for also showing construction details. Always love seeing what you are doing!!!! 🙂
Author
Ah, thanks, Lisa. That’s lovely of you to say xx