
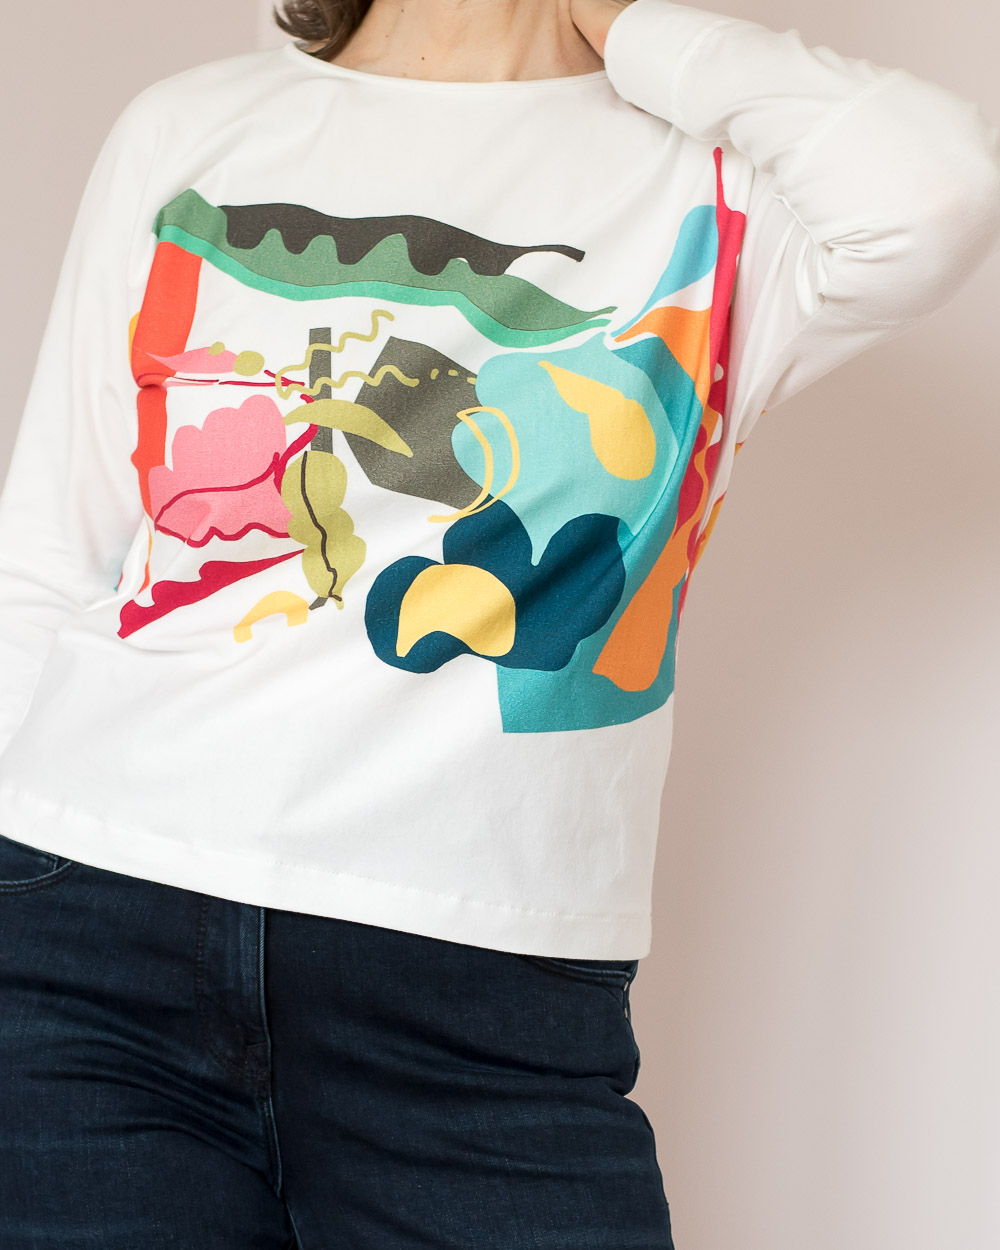
It’s all about elevated basics today and for me, my statement print tee with long sleeves really nails comfort with a pop of colour and eye-catching print.
Lately, I’ve been a lot more mindful about planning and sewing for my personal style, lifestyle and comfort. This top really fits with my style goals about what makes me feel like ‘me’ when I wear something, how items work on a day-to-day basis, and how comfortable they are.
So let’s dive into the details!
The starting point for this make was the fabric which came from Marcy Tilton Fabrics. I first heard about them via Karen (aka @intostitches on Instagram who I featured in this post). I saw her wearing some beautiful printed linen that she’d made into a blouse and I asked her where the fabric was from… of course, I had to go and browse the website and that’s when I saw this particular lovely panel print in cotton jersey.
The print has lots of my favourite colours in it and although I don’t wear many prints I just couldn’t get the fabric out of my mind (if the right print comes along, I’m sold on the idea). The fabric is sold by the panel length and each section has two prints running across the width.
Now, I knew the postage would be verrrry expensive so I took a chance and ordered just one length of the panel. It did end up quite expensive overall but at least I struck lucky and got away without a customs charge and once I saw the colours of the fabric in the flesh, I was absolutely thrilled with it.
So what pattern did I use? Well, I’m glad you asked 🙂 I wanted an easy shape without lots of extra seams on the body because I didn’t want the pattern to be broken up, so after a good search through my Burdastyle magazines, I found number 107 12/2019 which is actually meant for a woven fabric, but who am I to follow suggestions like that 😉
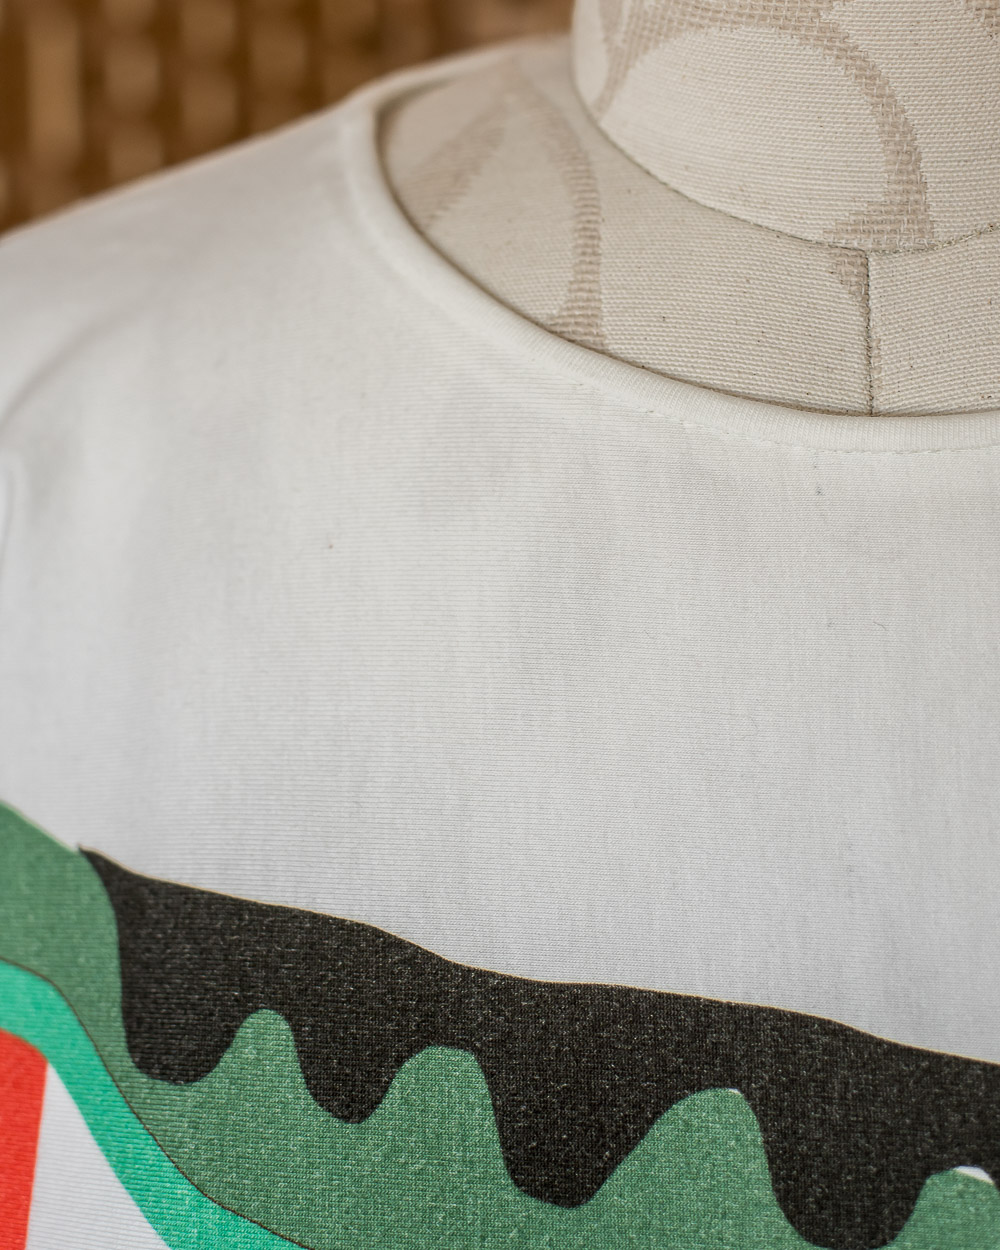
The pattern design has dolman sleeves with just a back and front piece. I’d planned on making my version fairly short, finishing at high hip length but because the print design runs more vertically I decided to cut my pieces on the cross-grain of the fabric so that I didn’t chop off any of the lovely colours.
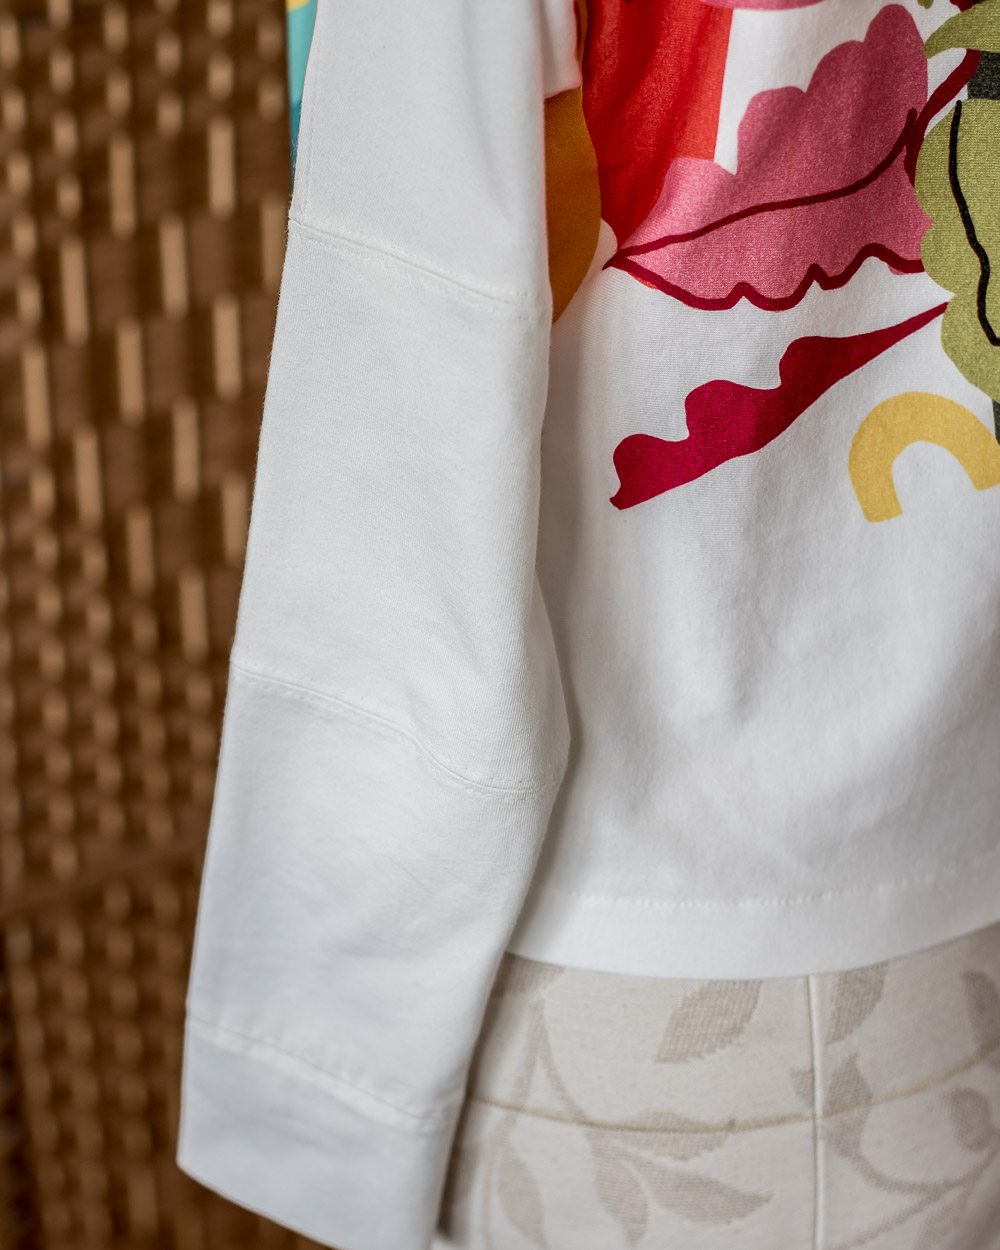
As I said, I only bought a one-panel length and that meant I had some serious pattern Tetris to do in order to cut out the sleeves. Using the cross-grain positioning meant I had a horizontal seam partway down my arm but then I also struggled to get enough fabric for the rest of the sleeves. I ended up with two more seams down each one as I used up every last little scrap of the fabric…there were literally shreds left!
Fortunately, sewing up my top was a heck of a lot easier than cutting out! For nice flat seams on the sleeve joins I stitched, pressed them open, and then topstitched either side so that they lay nice and flat.
The sides and the shoulders were overlocked and I put a very narrow binding on the neckline.


I’m really happy with this make as it’s practical, fun and a bit different. The colours are lovely and cheery too. I’m sure it’ll get a lot of wear out of it…and in fact, I’ve already ordered another print from the new range on Marcy Tilton but this time with an olive background. Can’t wait for it to arrive!
Catch you soon!

Pin For Later


Ooh lovely. I think the seams on the sleeves adds an extra designer touch.
Author
Thanks, Vicki! Yes, I guess they do 🙂
Ooh Diane – this is absolutely wonderful! Love your ‘elevated basics’ approach and well done for going out on a limb for a fabric you loved – it works so well. Amazing finishing as ever – takes it up at least a couple of notches and you’ve got something totally ‘you’ and unique too. 😍👏
Author
Ohhhh, thank you so much for the kind words, Alice. I really am loving sewing my elevated (and comfy) basics lately.
I LOVE your top to the moon and back Diane! This is just the type of top I need in my wardrobe too. I reach for these long sleeve tees frequently. They are perfect for me in the transitional seasons here on the west coast of Canada. I’ve purchased fabric from Marcy. Despite being located a hop across the strait from me :), being in Canada means super expensive shipping and customs charges in USD, the difference in our dollar etc. drives the price to eye watering heights. The fabric I have purchased I thoroughly appreciated for its quality and originality. Your story is a reminder to all of us who can be tempted however, to fabric collecting/hoarding. It’s wiser to save your money for those really special pieces and then make it up into a garment that’s sure to be worn to shreds. In the long run this approach will garner the sewist the best bang for their buck as they say 🙂 Thank for you sharing another inspiring and provocative post!
Author
I’m sooooo glad you love my top, Kathleen! Ohh, I hear you on the prices of shipping and customs etc, but I think you have a point that spending and making mindfully for pieces that get a ton of wear makes good sense. Think of the cost per were once you’ve worn it oodles of times…minimal…and I’ve never been one to buy and stash lots and lots of fabrics. I’m glad my post made you think xx
LOVE this top, Diane! I would not have thought to do the cut-on dolman sleeve, but I think it really adds to the T’s personality. And your ‘tetris’ of pieced sleeves also looks deliberate and adds detail to the simple shape: the bottom section looks like a cuff bc it is fitted to the wrist.
I have seen this fabric over and over on Marcy’s site (where I purchase TOO much fabric) and it really shines in your design. I really love what you’ve done with your panel!
What alterations did you do for this “woven” pattern to make a T? Did you sew the side/underarm seam higher than on the pattern? Any FBA? Take in the sleeve width?
Also, on your hem: did you sew a tiny zigzag or a straight stitch? I have been using my cover stitch since purchasing one, but am trying to get a handle on how much stretch I need in any seam or hem when sewing knits, and trying to decide when to use my sewing machine vs. my serger for various seams. Thank you for any advice on this!
This is also, embarrassingly, a reminder that I should invert my ratio of fabric shopping:sewing! I will be happier if I sew more and purchase less fabric!!!
Author
Thank you so much, Joan!
I did just basic minimal alterations to the pattern. I literally took a bit in at the hemline on each side and carried that on up the sides, around the curve and then tapered down the sleeves. I didn’t do an FBA due to the forgiving nature of a deeper dolman underarm curve. For my hem I overlocked(serged) along the bottom and turned it up, stitching with a straight stitch (not too long on length because more stitches=better stretch) and using a walking foot. I have been known to do a very slight zig zag too. I don’t own a coverstitch machine, but I manage 🙂
I’ve tried on a couple of dolman sleeves very recently in shops and the sleeves have been quite oversized and unflattering (too wide and deep for a shortie like me @ 5’1″/155 cm) even though I’m a bit busty, so I will have to try this style myself and slim it down in the torso and sleeve as you did!
Author
Yes and I think it helps if it’s a knit fabric too. Try bringing the underarm up by degrees and check that you still have enough arm movement…that’s what I did.
That’s awesome! I really like that you’ve got the print on the back as well as the front; if you’d bought something like this I bet it would be printed on the front only.
Author
Thanks, Catherine! Oh yes, absolutely…RTW only ever seems to have the pattern on the front.