
I’ve tentatively started some summer sewing even though we’ve been getting a chilly Spring and it’s been very hit-and-miss with a lot of dodging of showers. The top that I’ve made is the Fibremood Quilla {AD/PR} in pink linen-blend fabric and both the fabric and the pattern were gifted to me as part of a collaboration.
When a new Fibremood magazine is issued every three months I get the option to choose a pattern to sew up if one of the designs appeals to me and this time I was also offered some fabric of my choice from the latest FM collection. For the pattern, I was drawn to the sleeveless Quilla top with its swingy flare and unusual gathered side detail.
****Disclaimer: This post contains some affiliate links. This means that I may make a small commission at no cost to you if you click through and purchase something that I link to. You can read my full disclosure policy here (thank you for supporting Dream Cut Sew )
The fabric called Uzma is a linen and viscose blend and as I mentioned is part of the new range that goes along with the new designs. It’s definitely ‘my’ pink because it has that subtle warmth about it which suits my colouring. The texture of it after prewashing is incredibly soft and rather light and drapey.
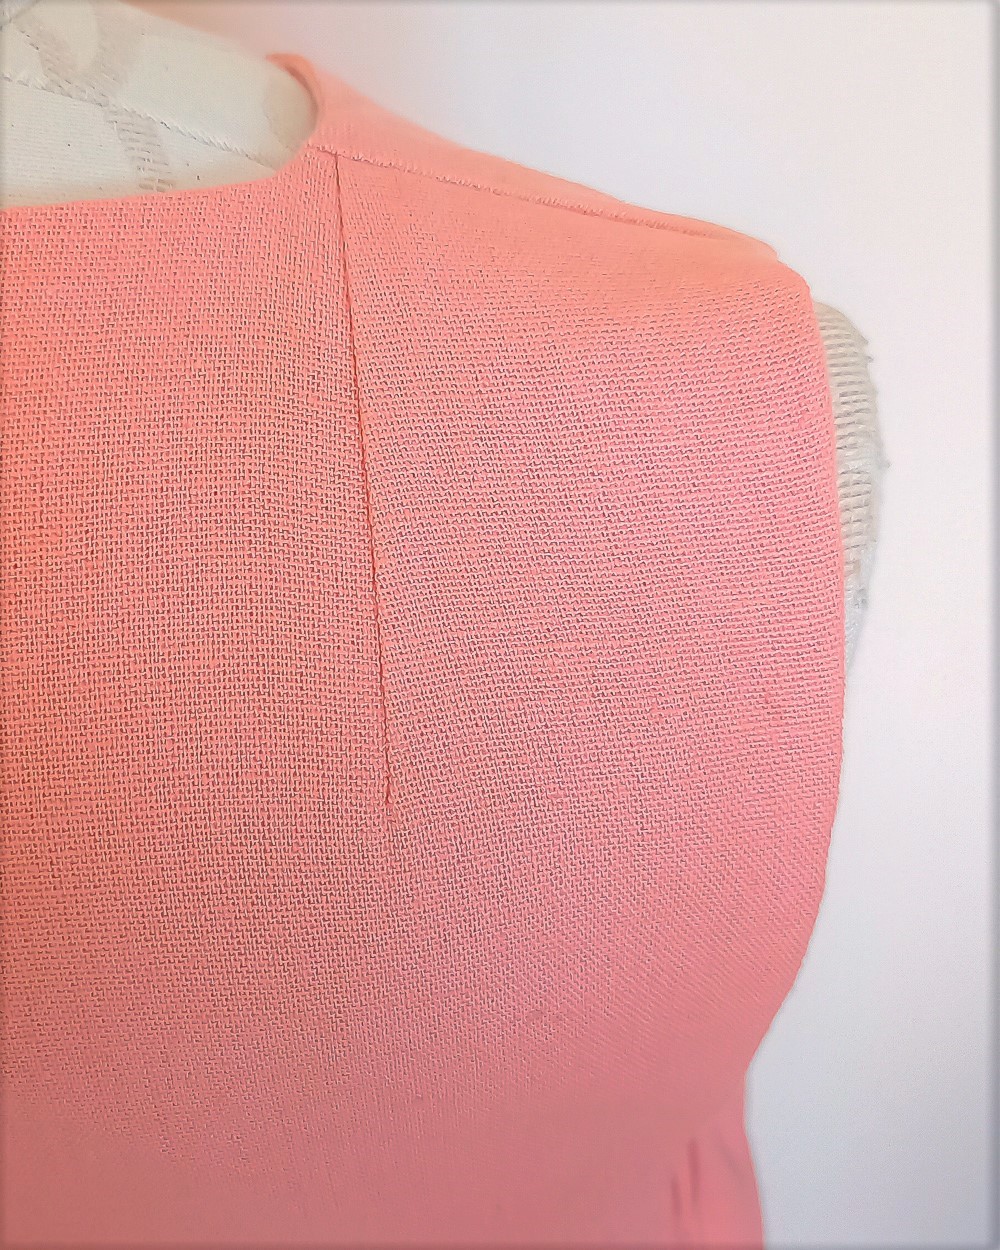
For the pattern, I chose to make a size M based on my bust measurement. I made a couple of adjustments to it as well. Firstly, I assessed the armhole depth and found both the front and back to be a bit too long for me so I folded some out of the pattern horizontally. If you get the pattern, I would check this measurement too. I also decided to take a smidge of width from the gathered side panel, but this was purely a matter of taste. You might like more fullness. I took out about 1”. And lastly to accommodate my rounded shoulders and to prevent a slight upper back armhole gaping, I added a vertical dart on the shoulder just where it meets the neckline. Oh, and I nearly forgot…I lowered the front neckline about a half inch (1cm) because high necklines make me gag (I know, I’m a bit strange eh? 🙂)
The instructions were fine and I followed them with no problem except for the rather complicated description for finishing the facing along the armholes. Ultimately, I went my own way for the process of armhole-facing application and I used the burrito method which I also used on my Fantail tank. I’m a definite convert to this method for making sleeveless tops with a combined armhole and neckline facing.

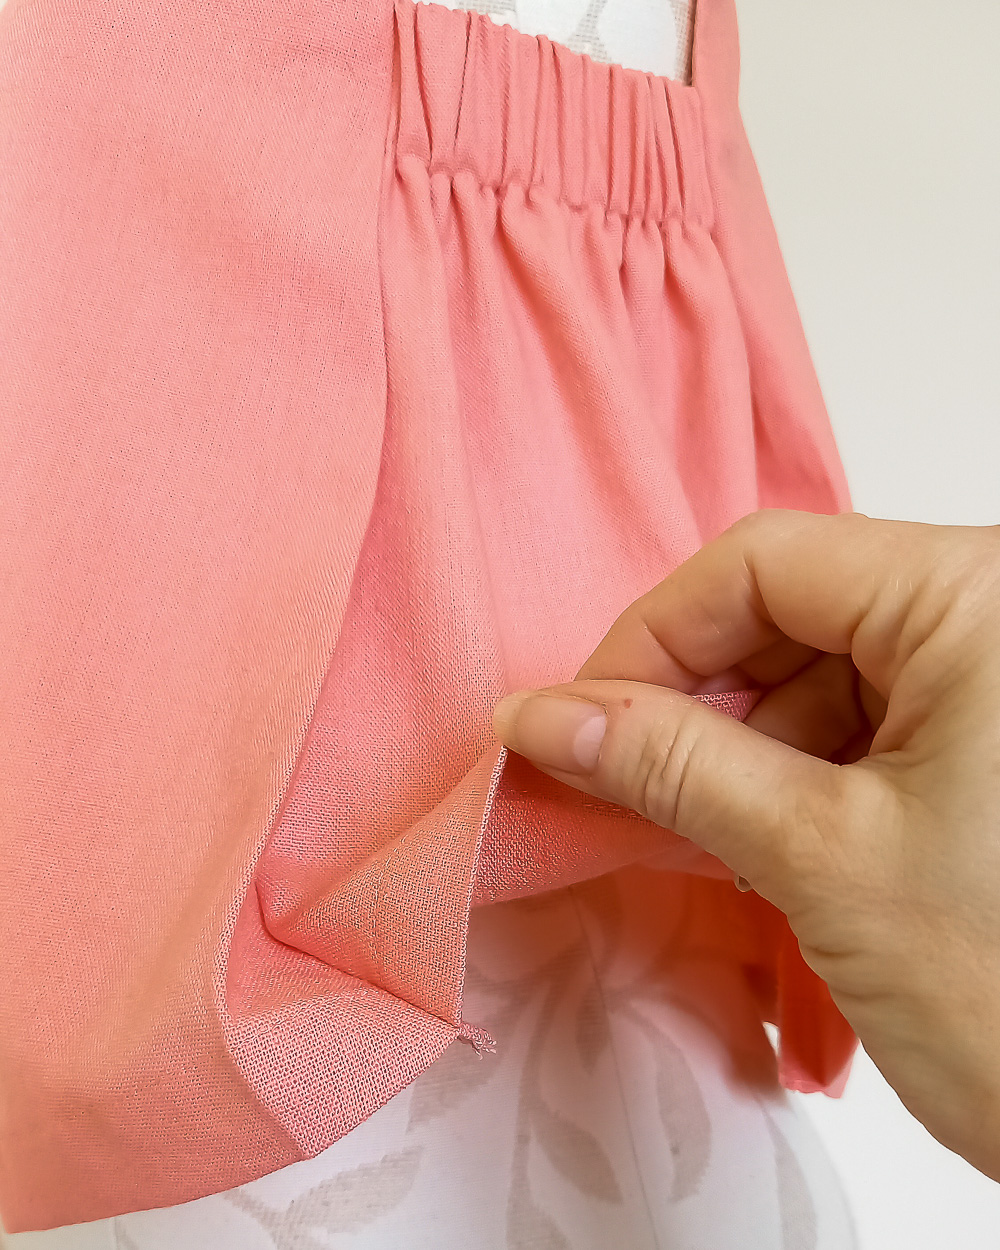
I just want a quick mention about the pleats where the side panels meet the front and back. The instructions have you finish the seams and then just hem it normally with a machined hem. If like me you want the pleat to be a bit more permanent and hold the fold more easily you could try my solution where I hemmed the bottom before finishing the seams off completely so that you can seam right through the hem to the bottom and the seam holds everything in place. See what I mean in this photo:

This is such a charming pattern and I can recommend it for a lovely addition to your summer wardrobe. I just love how my version turned out. If you do try it for yourself, make sure your fabric has some fluidity to it though because, in a stiffer fabric, it wouldn’t fall nicely from the bustline due to the shape and swingy style of the design. I’m already planning a second version in a viscose print from my stash.


Coming up in my next post is an addition to my Quilla top which completes the look for a lovely co-ord set, so do look out for that next time. In the meantime, thanks for reading and I’ll catch up with you soon.


This is lovely Diane. I’m totally with you on high necklines making me feel like I’m being choked.
Author
Thanks so much, Sam. Hehe…glad to know I’m not the only one feeling that way about high necklines.
Diane, this top is SO cute on you and so summery! Perfect with your ivory jeans! Very flattering and love the gathered side panels.
Author
Ohhh. thank you, Joan! I love it and I’m glad you do too.
I thinl your alterations & refinements make a significant difference in the Quilla’s appeal on you! It really looks meant for your figure.
Author
Thanks!
I am just now sewing a quilla. I am confused about how long to cut the piece of elastic. .27 (size large) of a yard is like 9 inches which is much longer than what it looks like in the photo. Do you have any advice?
Author
Hi, I’m so sorry for the late reply! Life took over for a while and I didn’t log onto my blog admin for ages, plus for some odd reason I no longer seem to get notification emails for comments.
Regarding the Quilla…I literally ignored the advised lengths for elastic, because let’s face it…we are all different sizes and some prefer tighter elastic and some prefer a looser fit. I suggest you roughly measure the gap under your arms on your own body and cut the elastic a bit longer. Thread it though and baste the ends, then try it on and test for fit before machine stitching.
After purchasing the Fibremood Quilla PDF pattern I had such a frustrating time trying to get the instructions. The web-site for some strange reason would not accept my password or email me in order to reset the password. Luckily they had a YouTube video and I was able to follow that. I also used the burrito method instead of their very confusing instructions. So pleased to have found you on Instagram explaining the sewing of the hemline. Thanks so much for this. Just a pity, I saw it after I had completed the sewing! Still, it’s a nice top and worth taking the time to unpick and gets the pleats to fall much better.
Author
I’m so sorry for such a late reply Sheree! I just saw that you had written this last week. I’ve been taking a bit of time off from social media and blogging to do jobs around the house.
What a pity you had a rotten time trying to get hold of the instructions, but I’m glad You tube proved useful and thanks for the kind words about my pleat solution.