
I’ve had a request from a regular reader for my take on sewing buttonholes. Happy to oblige, here I am today with my tips for creating stress-free buttonholes.
I’m going to start this off with a caveat though…I’m by no means a total expert and have had my fair share of breath-holding moments and mistakes but I’ve learned a bit over the years. So here goes…
1: Different Methods
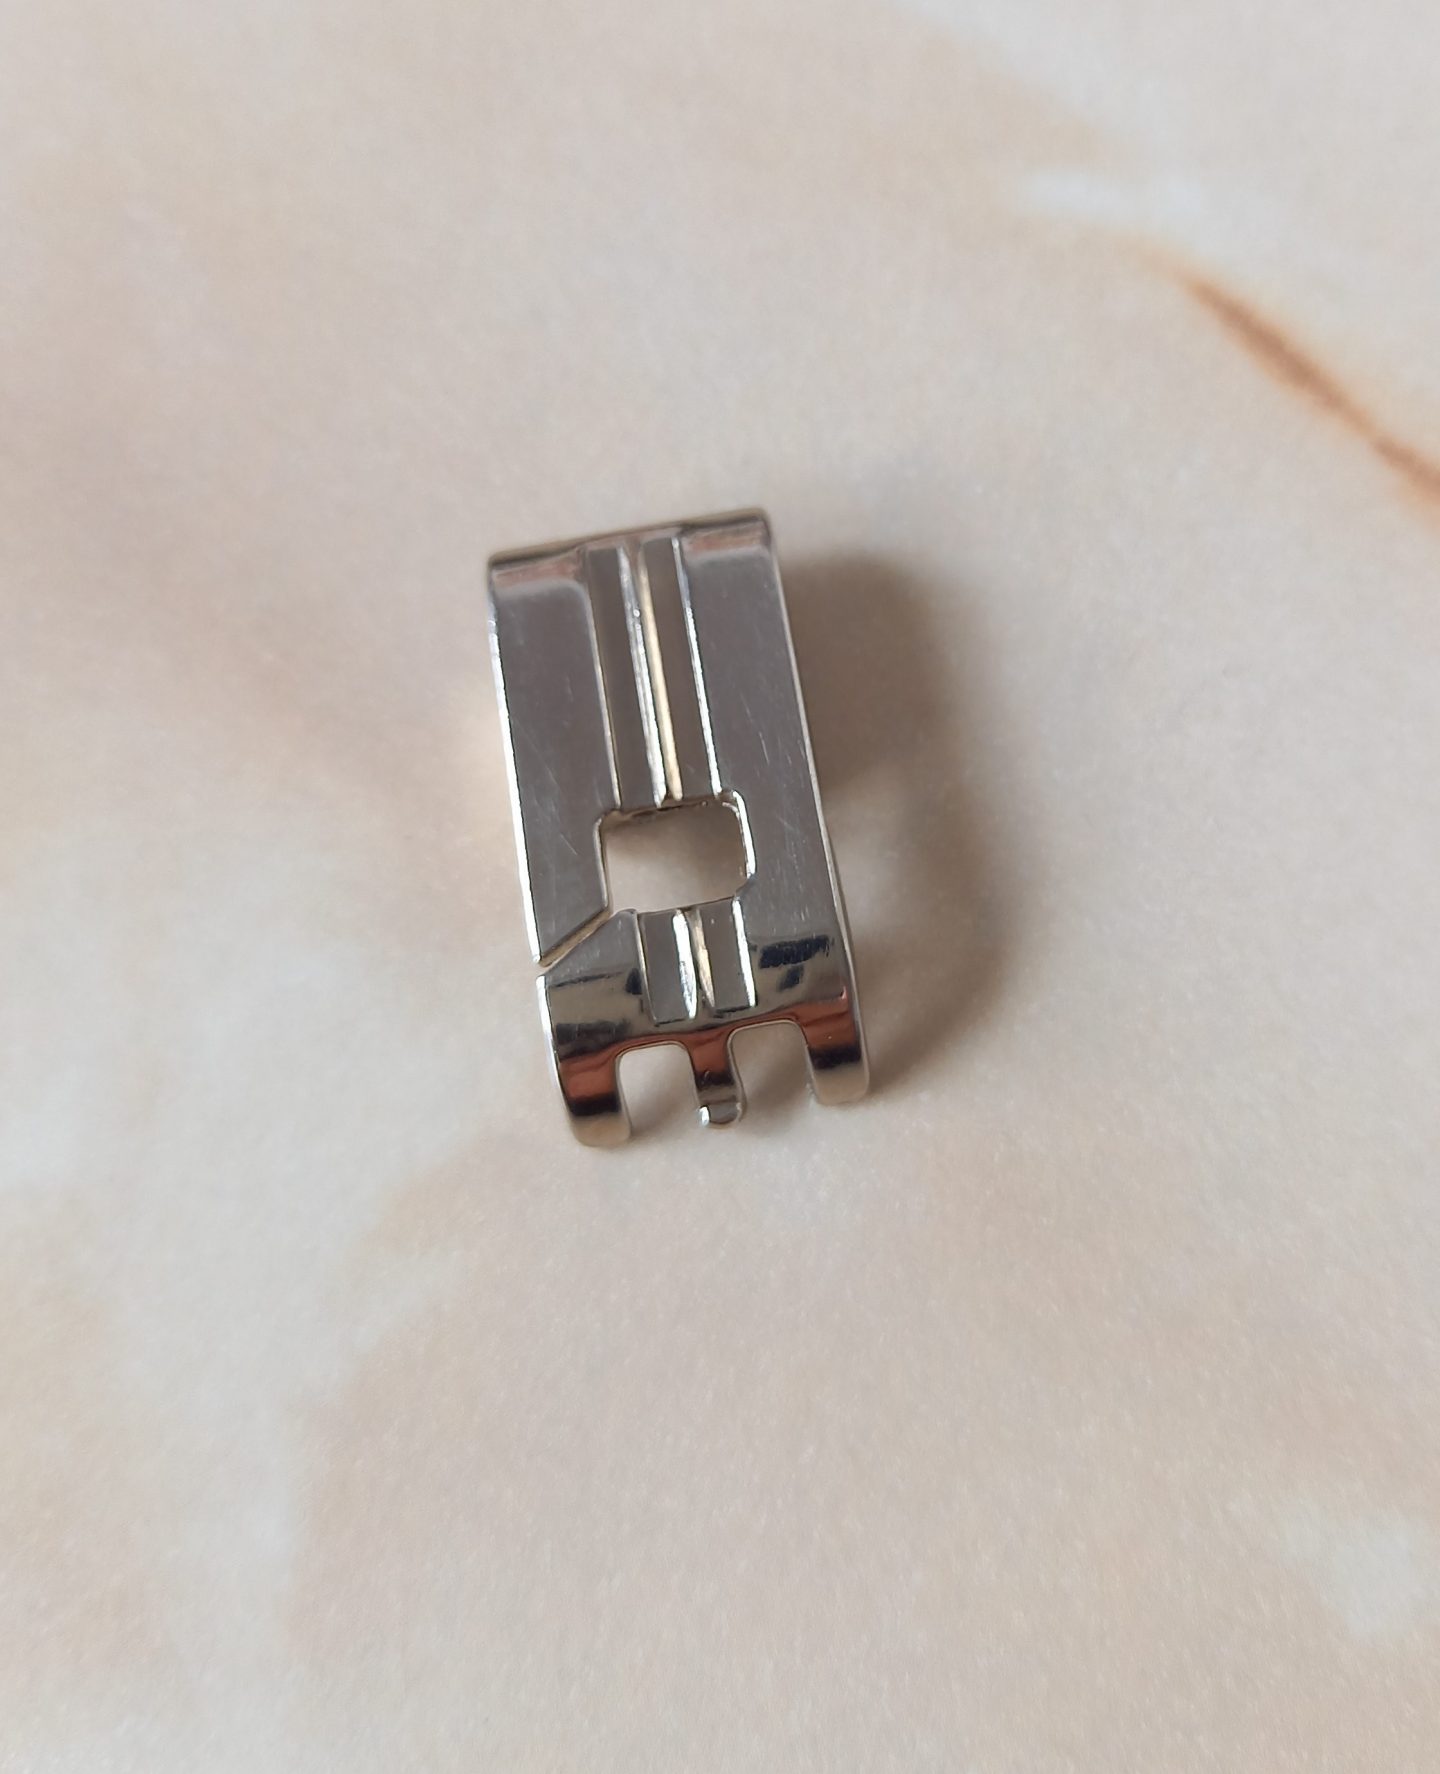
First off let’s talk about different machine buttonhole methods. All sewing machines have their own specific settings. Some do a one-step buttonhole using an automatic foot which as long as you guide the fabric through and let it do its thing, is relatively straightforward. Some machines do a 4-step one which involves changing a dial after each step. I use a mechanical Bernina 1008 machine and it does buttonholes in 6 stages. I have to set the stitch length to 0.5mm and the width is automatically selected. I then move the buttonhole dial through the sequence of the steps. My sewing machine foot has two grooves on the bottom to accommodate the stitches:

2: Needles And Tension
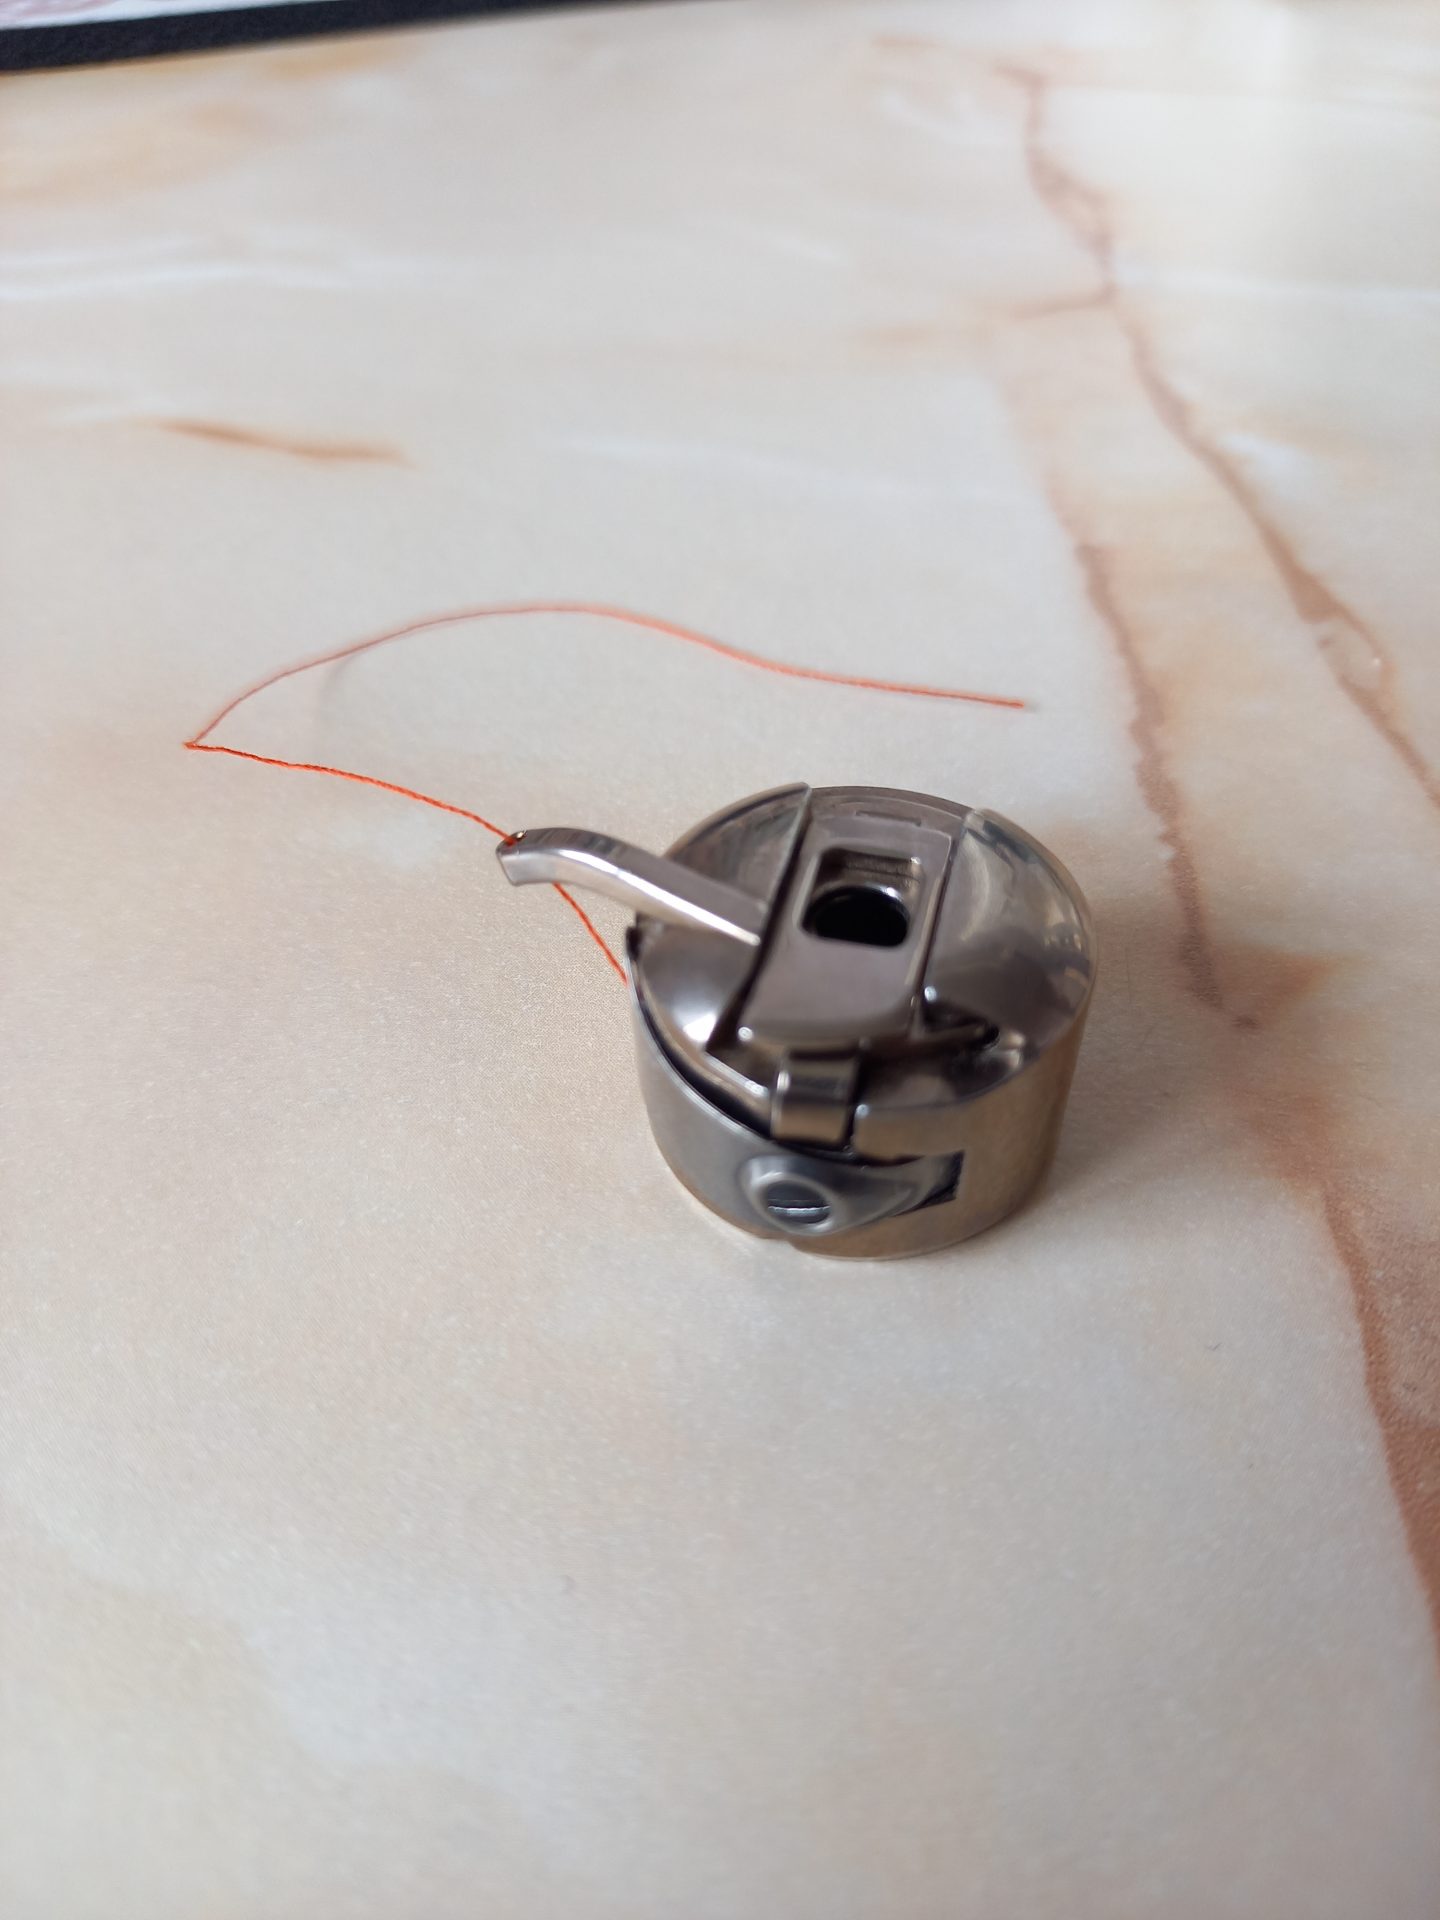
Use the correct machine needle for your fabric and increase the tension on your bobbin thread. On my Bernina, there is a small hole on the little bobbin arm which I push my thread through. If your bobbin case doesn’t have this hole, tighten the tension plate on the bobbin by turning a small screwdriver in the little slot (see photos)

3: Buttonhole Length
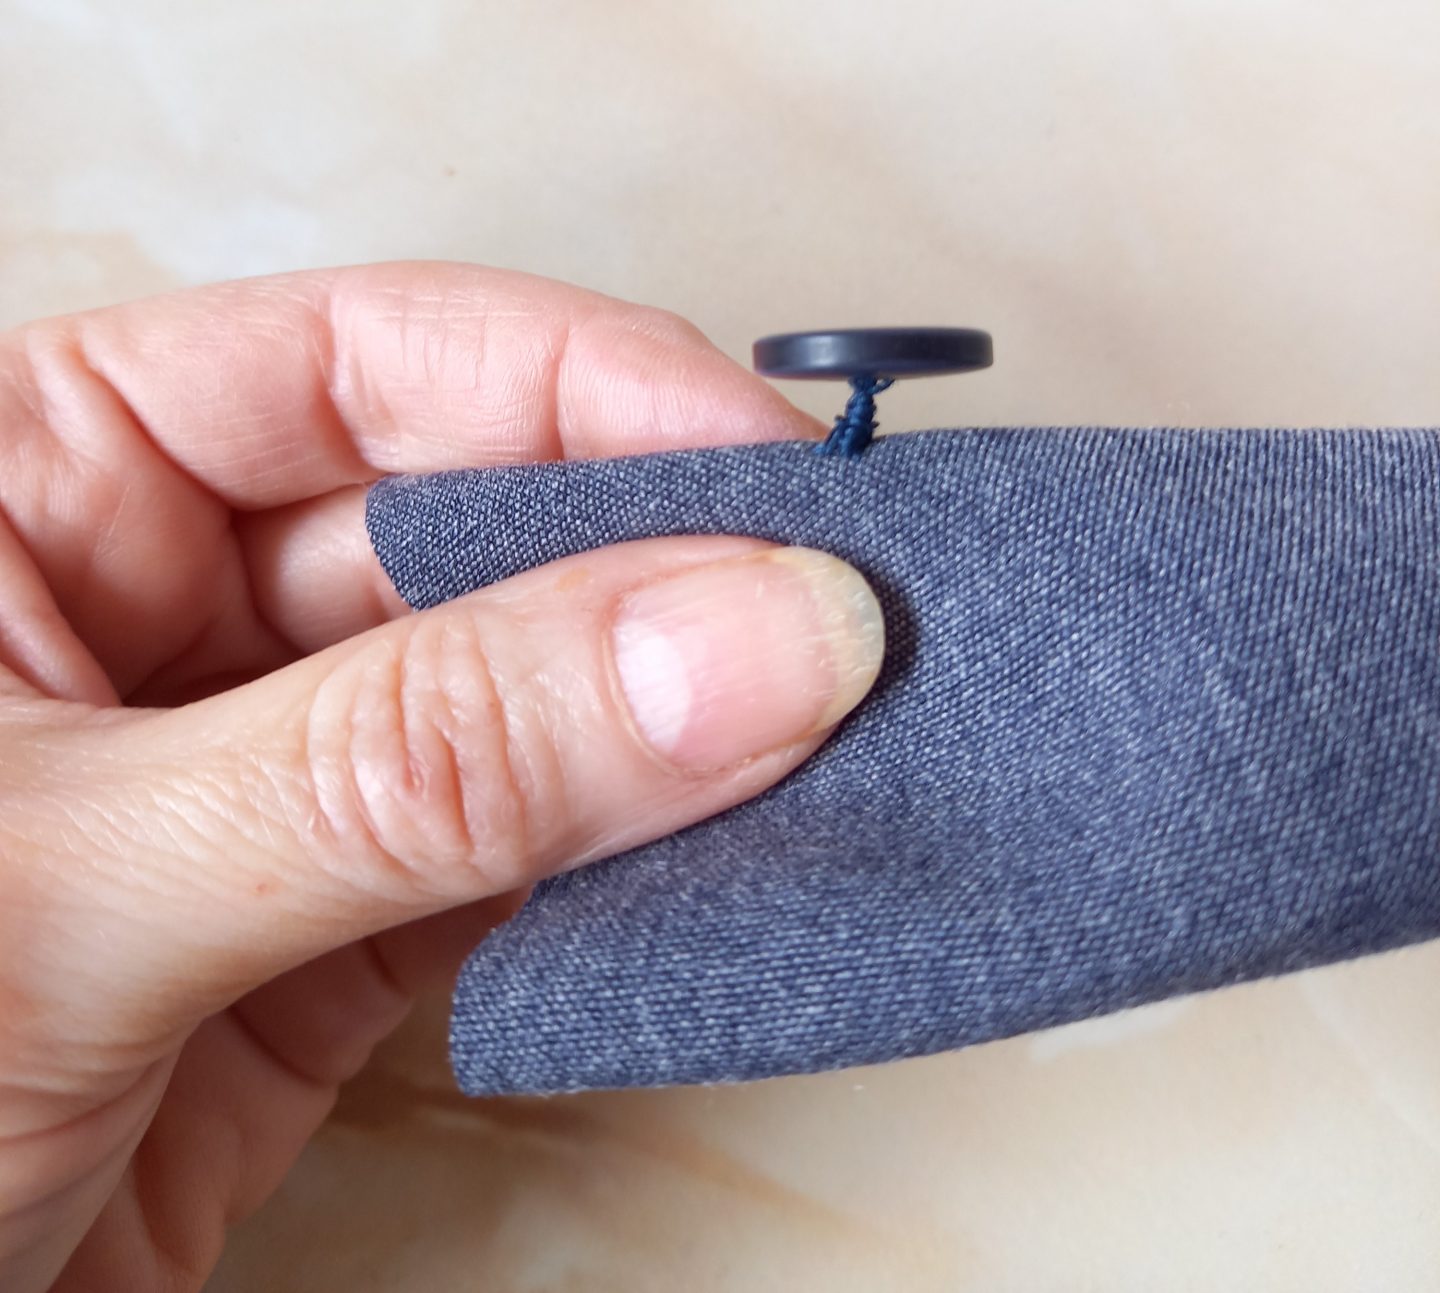
Getting correct buttonhole length… If you use an automatic one-step attachment that you insert a button into then it should create the correct length buttonhole for you. With my machine, I have to assess the length myself. As a general rule, a buttonhole length needs to be the diameter of a button plus a couple of millimetres (about ⅛”) each end. If you’re using domed buttons then I suggest you take some tape and pin it over your button as I have in the next photo. Then take half of that tape length as your button size. If you’re using domed buttons with an auto attachment that you put buttons into, I suggest you find a flat one of similar size to use in the attachment instead.

4: Practice
Practice, practice, practice. Get a scrap of fabric with the exact thickness of layers and interfacing that you’ll be making the final buttonholes on. Test different lengths out and cut open the buttonholes to see how your buttons pass through, then adjust the lengths accordingly.
5: Marking Out
Marking the buttonholes. Use whatever method works best for you. Maybe a water-soluble pen…a Frixion pen that vanishes with heat…or chalk pencil perhaps. I tend to use some basting thread and baste lines at the top and bottom of my buttonholes…sometimes a strand down the middle too. I don’t always use the suggest positions on the pattern that I’m using. I’ll often go my own way, especially if I want to use more or fewer buttons than is suggested. A Simflex gauge is a great way to get all the spacing equal if you have one in your sewing tool arsenal. On fitted blouses and shirts it’s often best to make sure one of the buttonholes is positioned where the greatest pulling stress might be i.e at bust level.

6: Cutting Buttonholes.
There are a few ways to cut buttonholes. You could use tiny sharp-pointed scissors as I do, or you could use a buttonhole chisel and block, or you could use a seam ripper. If you use the latter method I suggest you position pins across each end to prevent any accidents that might result in buttonholes a whole lot bigger than you intended!
7: Getting Neat Edges
After you’ve cut your buttonholes there might be a few little frayed strands of fabric. You can carefully trim these away with sharp scissors. A dab of Fray Check is also useful to tame the frays. On a woollen coating that might be more prone to frays, you could do what I did on my olive green coat and stitch the buttonholes a second time after the buttonholes have been cut. It helps to stop frays and reinforces the buttonholes. By the way, I don’t usually use anything other than standard Gutermann thread to sew my buttonholes.

8: Sewing On Buttons
Firstly, I always sew my buttonholes first and then line up my CF markings to get the finished position of each button. On buttonholes that are sewn vertically, I always position my buttons near the top of each buttonhole. This prevents the two bands from shifting and creating uneven hemlines. It also helps to stop buttonholes gaping open at the point of most strain i.e. bust level. With flat buttons, it’s always important to make a thread shank as you sew them on so that there is room between button and fabric to accommodate the extra layers of fabric. Hold the button away from the fabric a little as you sew it on or you could use a matchstick place under to create a gap as you sew. Stitch through the button a few times and then finish off by wrapping the thread around those strands before finishing off.
9: Buttonholes On Knits
These can be tricky and require a bit more patience. You must always use some kind of reinforcement. Even if the whole of the buttonhole area isn’t supposed to be interfaced I suggest you either iron or baste in place some small rectangles of interfacing behind the area for each buttonhole. On especially fluffy or nubby textures you may also need a tearaway stabiliser basted on the back before you sew your buttonholes. In my experience…if your machines buttonhole settings allow it and you aren’t using a tearaway stabiliser on top of your fabric …I suggest that a slightly longer stitch length than is normally required might be useful. On a knit fabric your machine foot might not move along as easily and you could end up with your foot getting a bit stuck. A slightly longer length could help with this.
10: Thicker Fabrics
Lastly, thick fabrics and seams can create a few problems. Be sure to grade all seams. Use a hammer to flatten stubborn edges and try using a hump-jumper or a folded piece of fabric behind or in front of your buttonhole foot to ensure it can move along easily.
I can’t think of anything else to add to this list but if I do I’ll edit my post. And please feel free to mention your own tips in comments too.
I may be back at the end of this week with my latest make (you’ve already seen a little sneaky peek in the photo under tip number 5 😉 Till then!

Pin For Later


Fabulous set of tips there Diane – really helpful! It’s worth bearing in mind that tailors and small designers often take their garments round to specialist buttonholing services to get them stitched – which should make us all feel a whole lot better about managing to turn out a nicely-stitched number! You’re absolutely right about practice, practice, practice…. My ‘doh’ moment here is your Tip 3 – using a piece of tape to calculate the length of a domed (or even self-covered) button. 🤦🏻♀️ Of course…. Thank you very much indeed for that!
Author
So glad you find them all useful Alice, thank you! Yes, I’ve heard about some designers using specialist services for their buttonholes…lucky things!
The buttonhole shop in Soho is wonderful – and cheap. https://dmbuttons.co.uk
Author
Thanks for the link, Ann 🙂
Thank you Diane for SO many great tips – I’ve been extremely hesitant about buttonholes on knits but of course stabilize, stabilize and stabilize. That’s planted in my brain now 🙂 thank you!
Author
Ahh, thanks, Kathleen! I’m so pleased you’ve enjoyed my post. And you’ll be interested to know that I made 13 buttonholes in a knit fabric top for my upcoming Friday post…stay tuned!
Such a useful set of tips, Diane! Thank you for sharing. I find button holes intimidating and usually hold my breath while making them. Few essential things that I always keep in mind are these: a) correctly measure the length of the button hole – I’ve noticed that special foot of my sewing machine, where I have to squeeze in the buttton, tends to make too large a button hole, b) always use a pin to stop the seam ripper from ripping into the stitching, c) thick fabrics, oh I dread making button holes on them! Great tip you’ve shared for domed buttons, will have to remember it.
Author
Thanks, Giedre. Oh, that’s interesting that your automatic foot tends to make the buttonholes a bit long but what a good jobe you’re mindful and measure accurately. And that pin across the end of a buttonhole when cutting has also saved me from many a mishap.
Thanks for these excellent tips. I use the automatic buttonhole on my Bernina but have never done them on a knit so thank you for those tips. I have a pair of buttonhole scissors that nobody seems to mention these days. They are old but you can set the length you want and then cut. I wouldn’t suggest that anyone rushes out to find a pair as the other methods you mention work just as well when care is taken.
Author
Thanks, Chris! Well, I for one have never heard of specialised buttonhole cutting scissors. They sound very intriguing!
I’ve used a Simflex marking tool for decades to mark my buttonholes. I just wanted to add a note of caution – the tool is NOT always accurate with its spacing. It could be my particular tool since it is quite old, but I’ve noticed that the spaces at the ends of the tool as you extend it out, are wider than the spaces in the middle of the tool. If you are a stickler about perfectly even spacing for your buttons and buttonholes, this might not be the tool for you.
That said, I usually use the Simflex because it’s good enough and the tool is very easy to use. I just thought people should be aware of its limitations.
Author
Thanks, Liz, I appreciate that. I personally don’t use one but mentioned it as I know it’s quite a popular tool. That’s interesting about the discrepancies in the widths though. I guess nothing is foolproof eh? I must admit I’ve always used a tape measure and checked then double-checked.