
Hi, my lovelies. I’ve spent the last couple of weeks on this tartan jacket and I’m splitting all the juicy details between two blog posts because this tailored tartan jacket was a marathon project!
Tailored Tartan Jacket…The Backstory
So let me take you right back to the beginning of the saga…
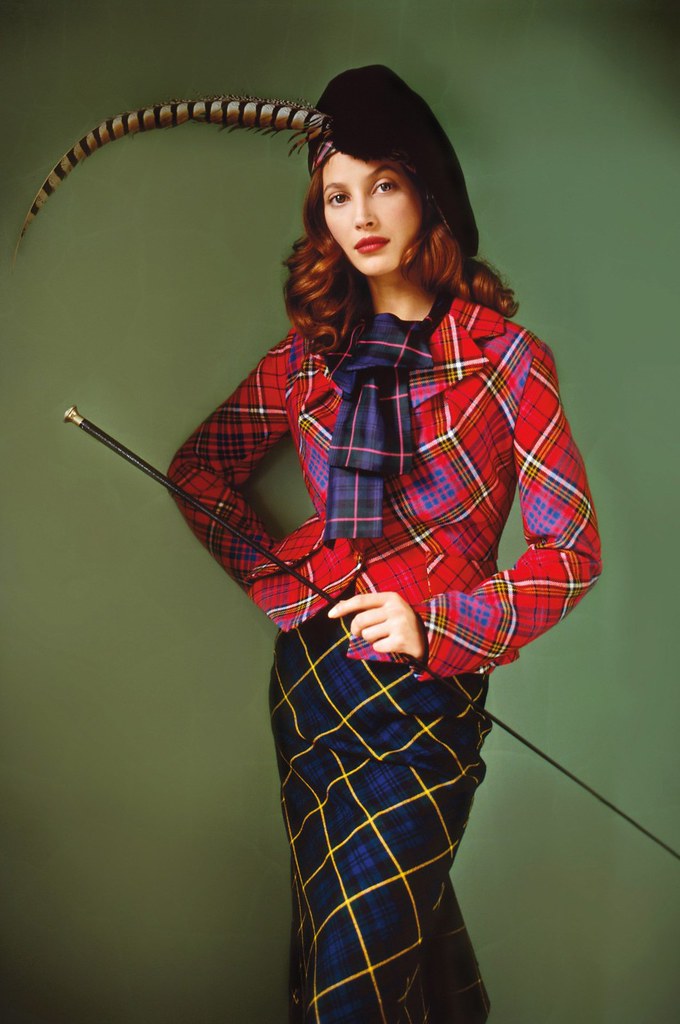
It all started over 2 years ago when an online acquaintance sent me a rough paper pattern that she had rubbed off of a Vivienne Westwood Bettine jacket that she’d found in a vintage shop.
Here’s 8os’ supermodel Christy Turlington modelling one of the original Bettine designs:
The pattern had very minimal markings, just a few grainlines and a couple of dots in the collar area. I had no instructions, just a couple of photos, no idea of the order of construction, or indeed what some of the (very odd-shaped) pieces were! The challenge was accepted though!
The Fabric:
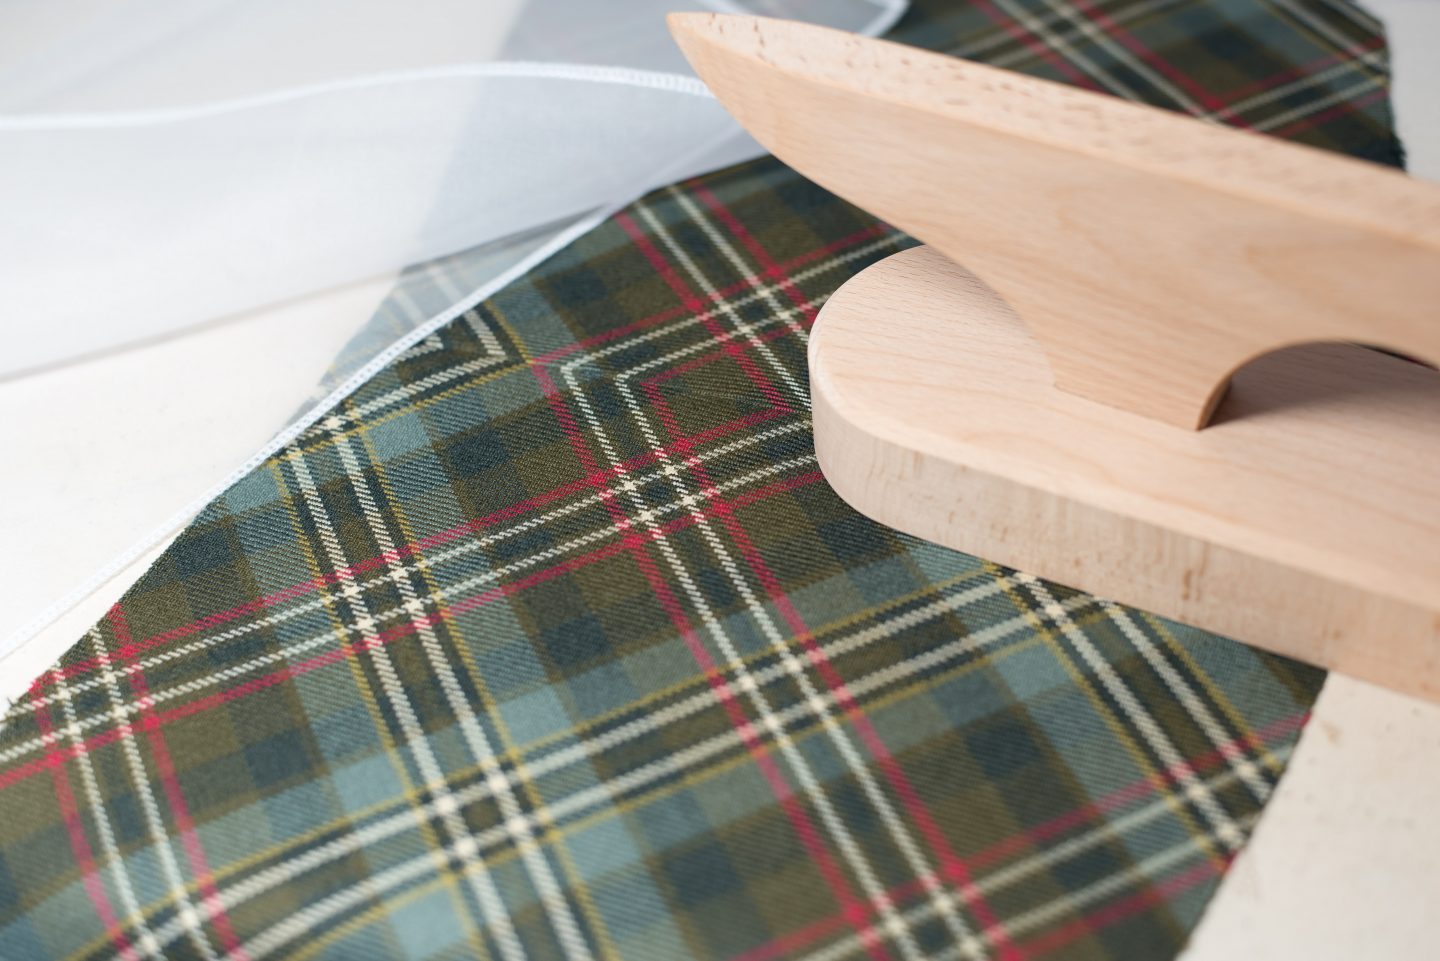
I decided of course, that my jacket must be made up in a genuine tartan wool cloth (see another tartan make of mine here) and spent many, many hours browsing tartan designs online (there are so many!). Some of the fabrics were eye-wateringly expensive…I ended up buying mine from a place called Tartan Time and my medium weight gabardine weave was £110 (average pricing for a pure wool tartan) The design is called ‘Scott Green Weathered’ and it has my favourite olive tones plus lovely coral pink and ivory lines running through it. Perfect!
I got to the stage of making a toile, checking the fit and I even cut it out (that stage took forever because I decided it all had to be bias cut)…..Annnnnd that was it….I ended up putting it away in a bag and there it sat for over 2 years.
Reunited:
I reckon it must have been the recent influences of seeing so many fabulous tartan jackets on the runways that made me decide to pull out this UFO. It was a sorry looking bag of rumpled bits by the time I released it from the cupboard of doom.
After staring at the pieces for some time trying to fathom what each bit was I set about my biggest project yet.
Getting Started:
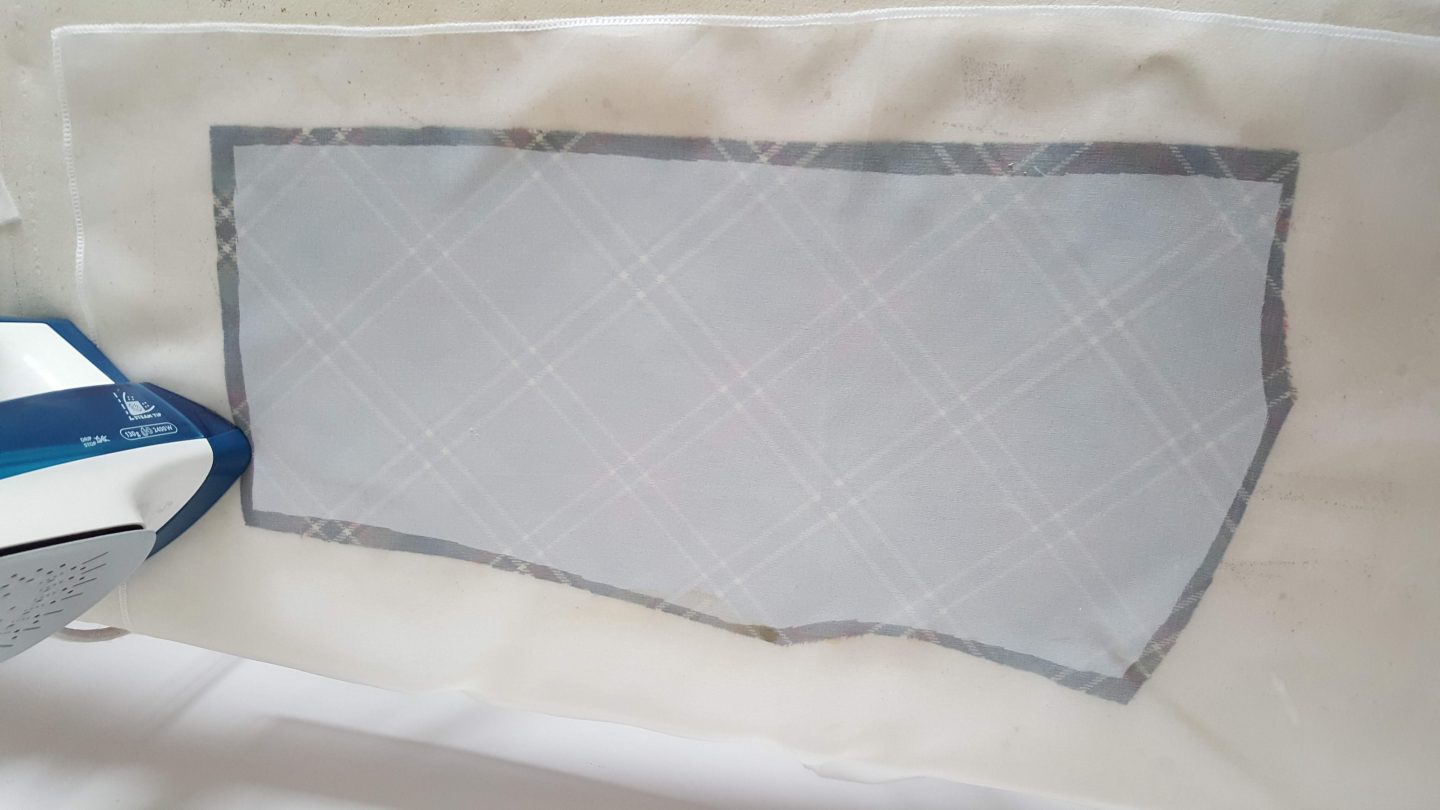
First up I pre-shrunk all of my pieces (I remembered that I’d cut generous seam allowances to accommodate a bit of shrinking) by hovering my steam iron slowly over each section. I also pre-shrunk my interfacings by soaking them in a bowl of hand-hot water for about 20 mins. Before hanging them to dry naturally.
Next, I interfaced every piece except for the main fronts with lightweight interfacing. The wool fabric is bias cut but I wanted it to behave like a straight grain fabric, so I used straight grain interfacing on every piece. The wool is fairly stable anyway but doing this added some extra stability.
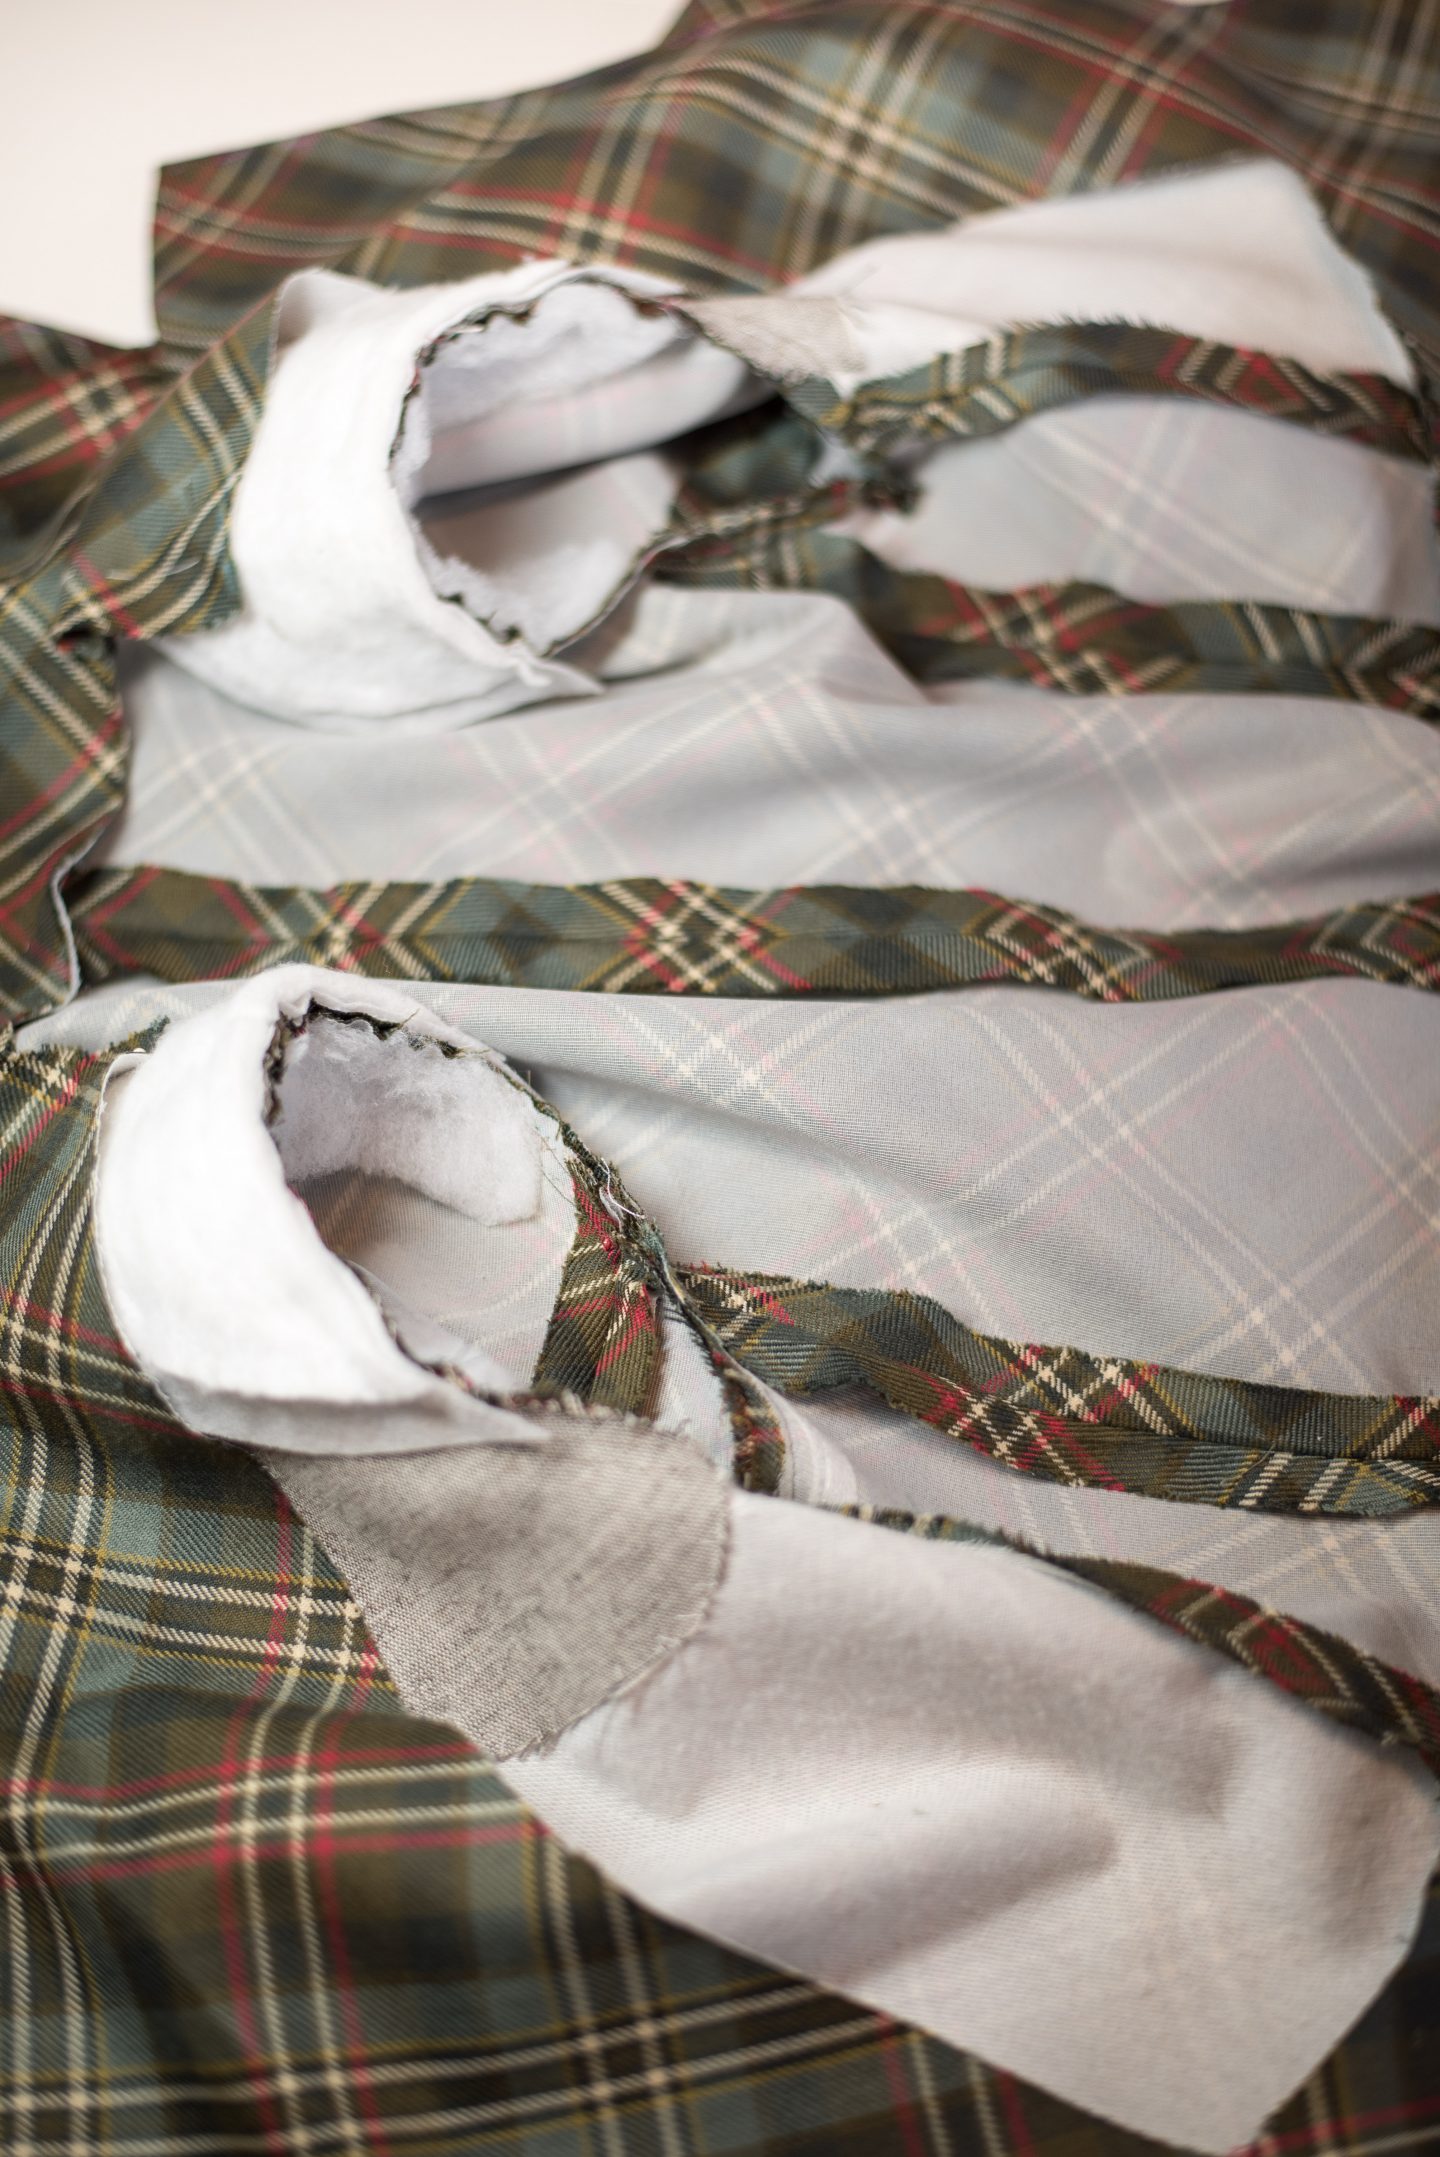
I interfaced the fronts with ‘Perfect Fuse Tailor’ by Palmer Pletsch and around the armholes, neckline and collar edges I used an iron-on stabilising tape.


I thread-traced my seams, neck pleats and pocket pleats and then fell-stitched a narrow cotton tape (also pre-shrunk) down the revere roll line just catching tiny threads as I went. And then finally, I began sewing up. Many, many pins were used to keep my pattern matching even and I pressed thoroughly as I went. I always use a silk organza press cloth and a tailors clapper.
Once the bulk of the body was constructed I had the tricky task of fathoming how the unusual pleated collar worked. This was not easy! Without instructions, I couldn’t seem to figure out where one crucial bit was stitched. I knew that a vertical slash on the upper revere edge was key so I literally started sewing the top collar to the main revere until the process revealed itself, which thankfully, it did!
See here how the top collar seems to straddle the facing and body fabric? Such a cool feature where the collar and revere exist independently of each other.

Now, pockets…these are fun designs. So the pockets on the jacket that my pal copied have unusual origami folds in the flaps. I looked at lots of Bettine jacket images and none of them had this feature. Maybe they were customised by someone? Or perhaps only a few were made like this? Either way, I wanted to make them and they definitely have the VW vibe that I love. The top piece folds under and the buttonhole is set diagonally (anyone else instantly think of Diagon Alley?…Just me then?).


To finish off the peplum hem I ironed on a bias strip of interfacing and steamed out the surplus width as I turned up the hem allowance. I added a hair canvas chest piece for shoulder support, shoulder pads and batting sleeve head strips for a lovely sleeve head shape. The sleeves were a delight to sew in because the pure wool fabric steams and moulds beautifully. I adore working with wool!

Well, I’ll leave you there for part one and in my next post, I’ll cover the lining and show you all of the extra details plus styling shots. See you soon and thanks for reading!


Such excellent and thorough work here!!
Author
Thank you Judy!
I can’t wait to see your finished jacket! Thank you for writing such a detailed post. I’m sewing a dress with wool for the first time, the instructions say to steam out the excess in the hem – do you put something in between the hem allowance and the garment when you do this?
Thanks – Alex
Author
Hi Alex! Thank you. So glad you enjoyed my post. Regarding the hem allowance question. For my jacket, it wasn’t a problem because of the thickness of my fabric and the fact that I had a strip of interfacing. However, on a finer dress weight, I would recommend either laying a press cloth folded double under your hem or maybe even using a bit of thin cardboard cut especially for the purpose. Many couture methods of sewing include using an interlining which also helps immensely and it gives you something to sew your hem to.
Thank you! I have underlined but I was having trouble visualising the process. I’ll be having a go tomorrow.
Author
Feel free to give me a shout if you need too 🙂
Oh that is beautiful, such fine work. Thank you for sharing this, I will refer back to it when I start doing a wool jacket myself..
Author
Thanks, Christine! That’s so nice of you to say. I’m glad it’s made for an interesting read.
Absolutely stunning
Author
Thanks ever so much, Linda!
Oh Diane
What a brave challenge to do this big sew.
Luckily your skills and problem solving are up to the job and the jacket looks supreme.
Author
Thank you, Jenny! It was definitely a fun but challenging sew.
Do you ever sell the patterns that you make? I would definitely buy this one.
Author
Hi. No, I don’t, I’m afraid.