
Hi! I wanted to get cracking on my next project before we run out of cold weather, lol, so I thought I would split it over two posts and today I’m sharing my long coat inspiration and pattern alterations.
The idea for this project started a month or so before Christmas when I became obsessed with the idea of a longer style coat and decided it would be a great addition to my wardrobe. I fancied the idea of the long silhouette and I’d seen some lovely images on Pinterest that inspired me even more. These for instance:


I had really long search around the internet for patterns and after browsing through Vogue, McCalls, Butterick, Burda, Simplicity, Grasser and DP Studio, I finally found the Emmanuelle coat by Vikisews. I adore the seamlines on it which give fabulous scope for perfecting a good fit, though I won’t be having it quite so nipped in at the waist and nor will I be creating an exaggerated hipline with padding 🙂

I love that it has a two-piece sleeve, a double-breasted fastening and it even has a shoulder dart. In fact, it seems really well drafted.
So, we have the inspiration and the pattern, next I needed the fabric. I wanted a neutral (to me) colour that I could pair with both the warmer or cooler shades from my Soft Autumn colour palette and olive green fit the bill, plus I loved that photo with the olive green coat so I was really sold on the idea of green.
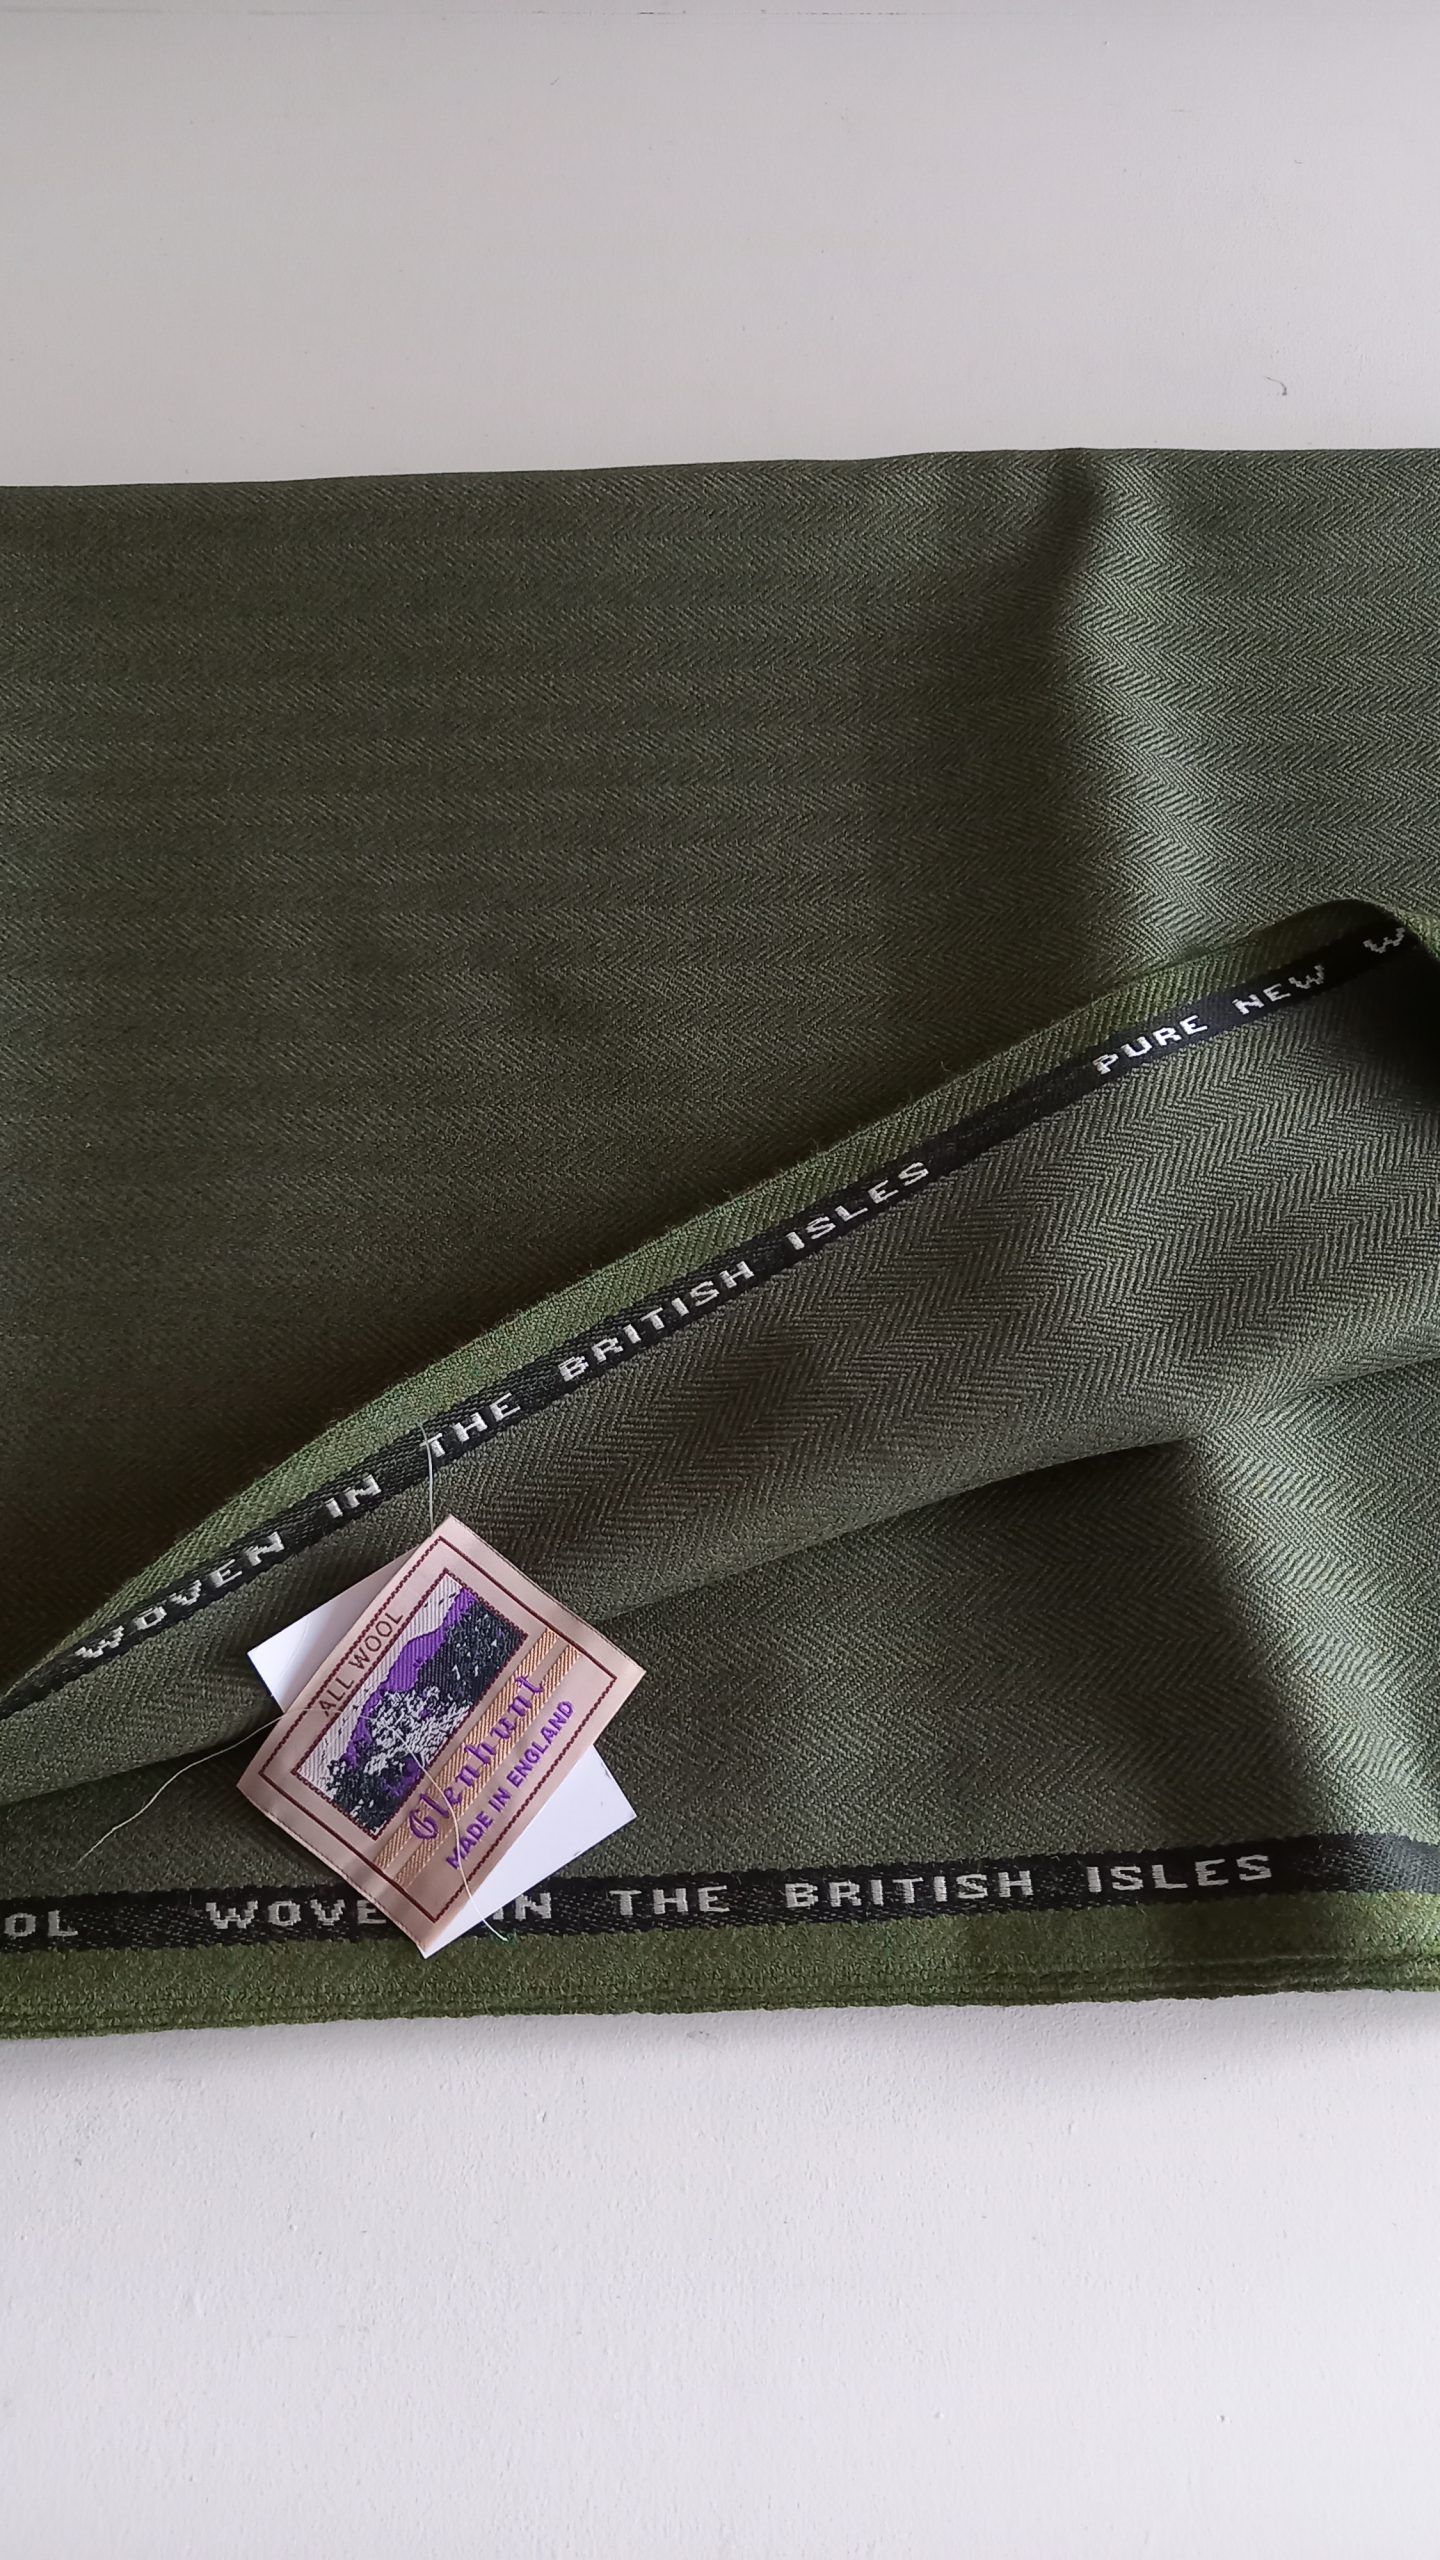
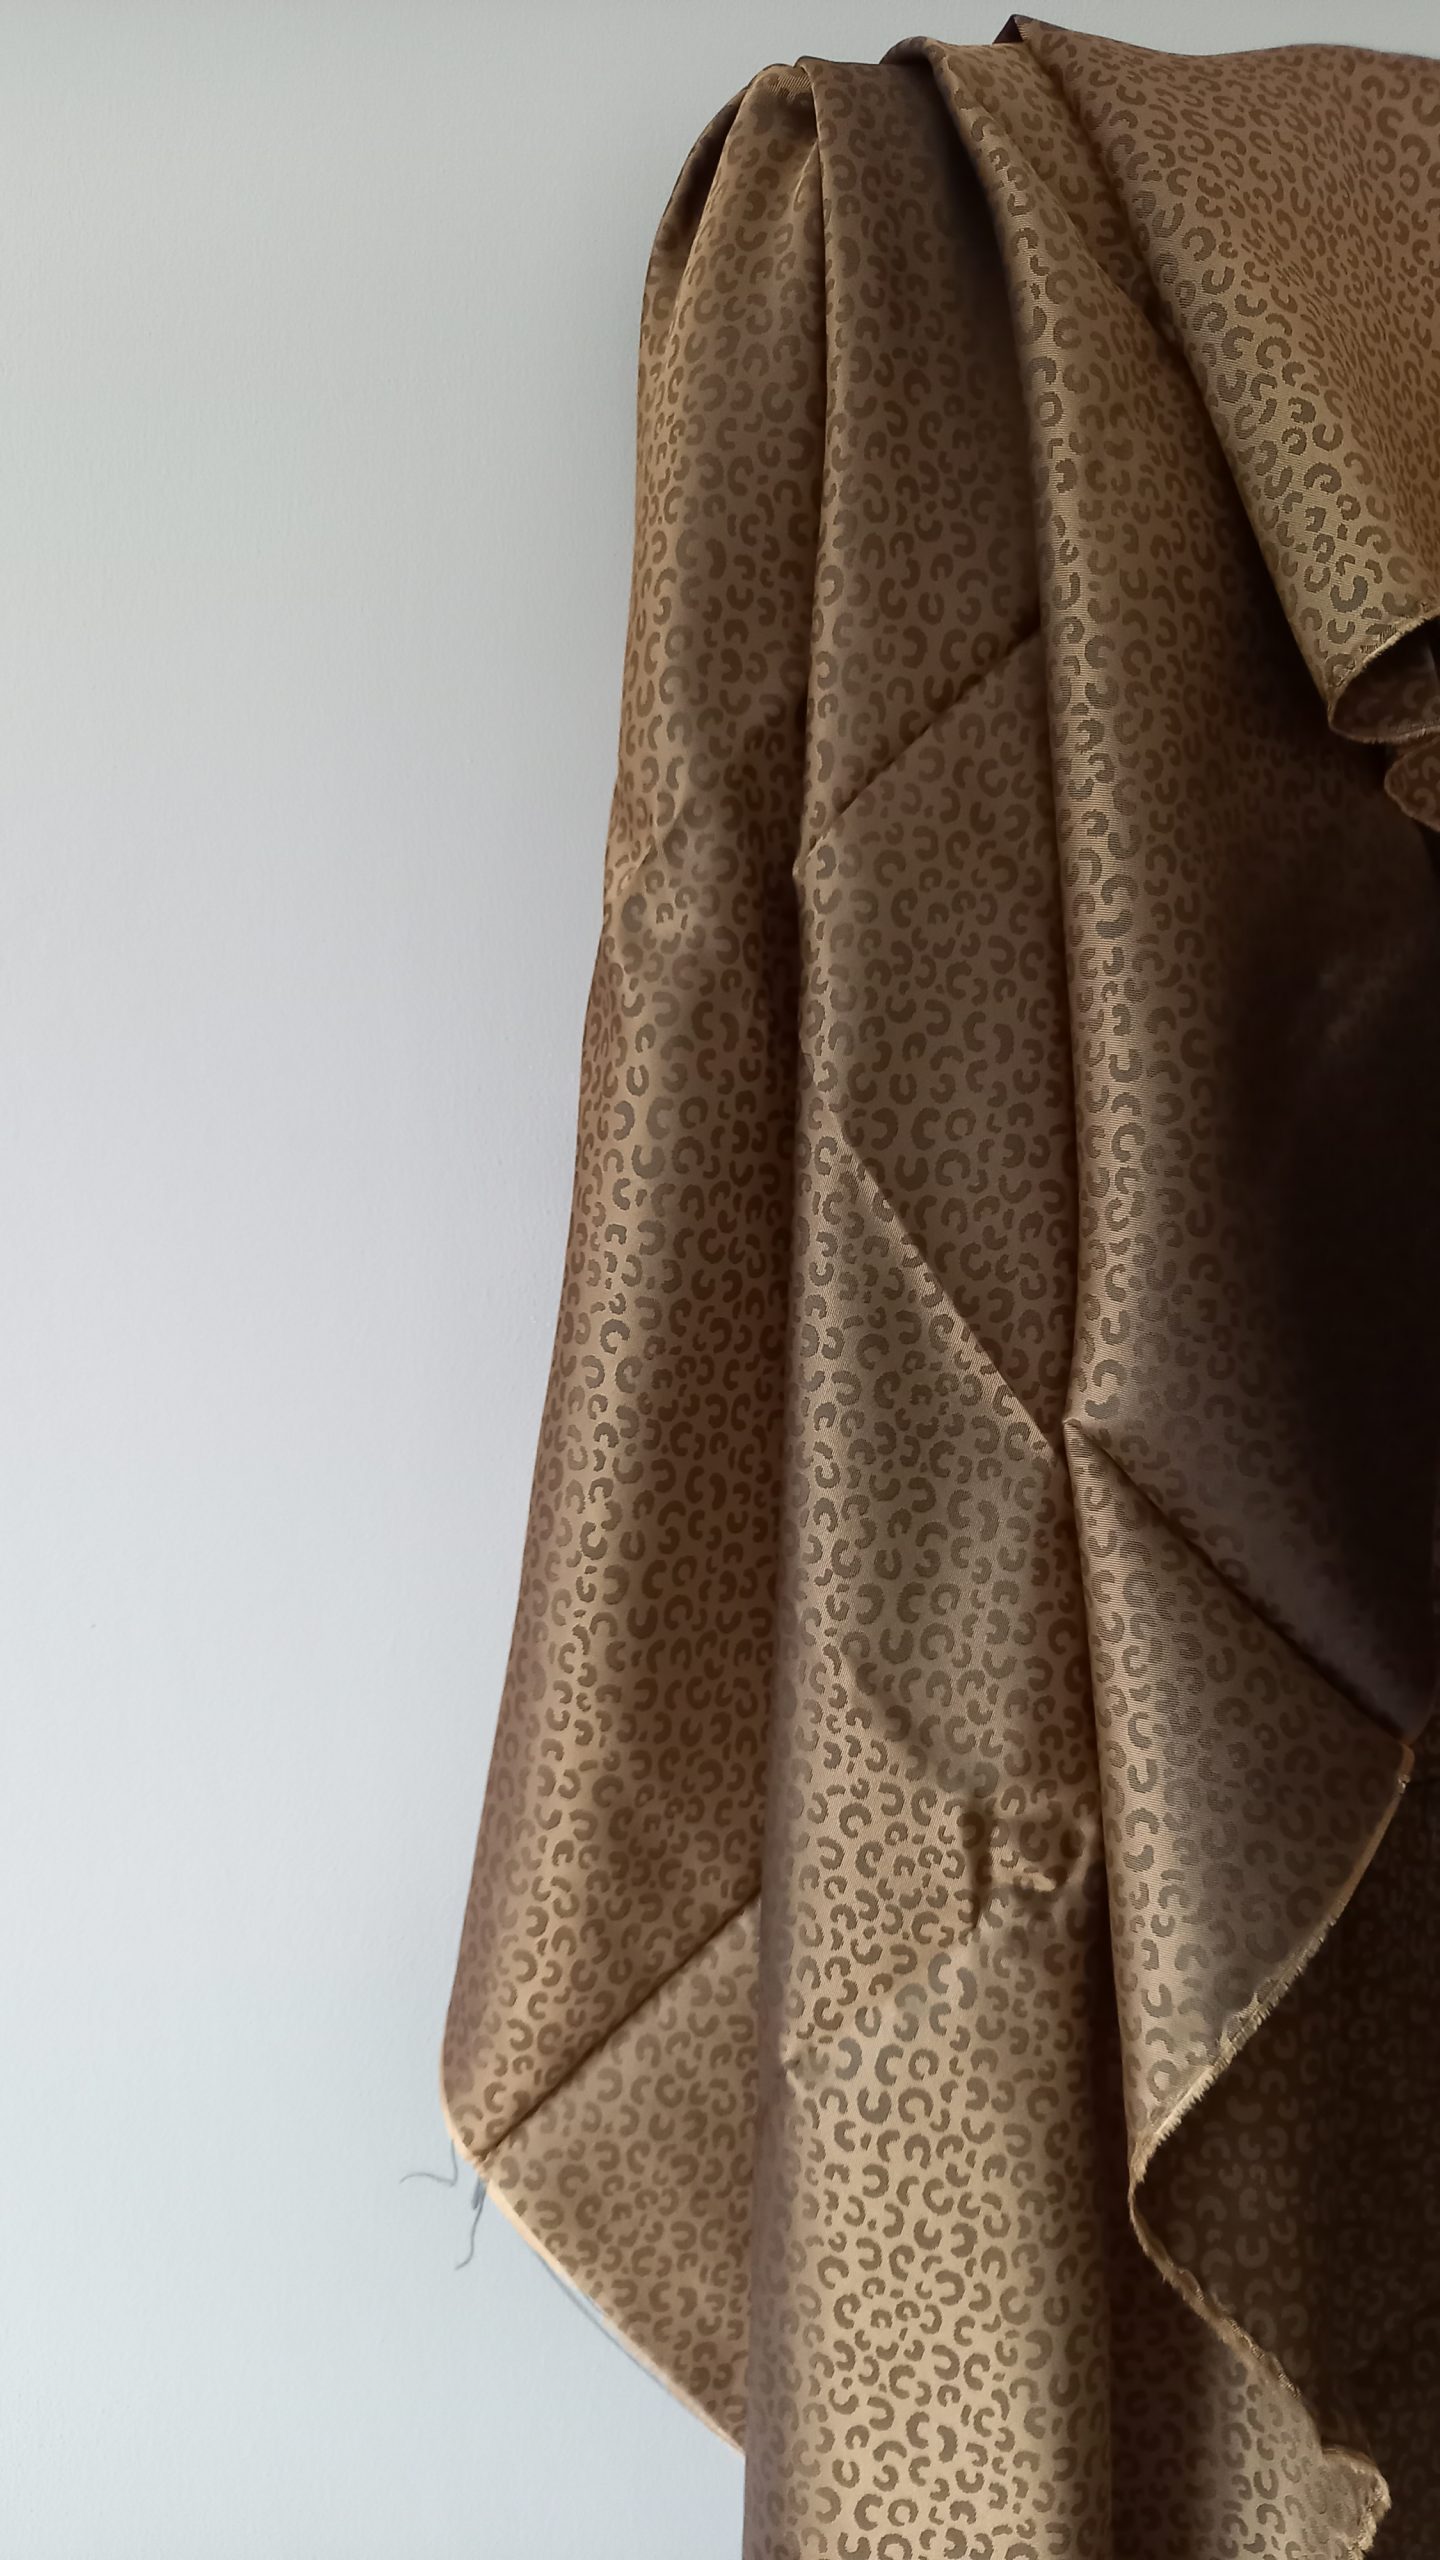
I found some traditional wool fabric which I ordered way before Christmas and I won’t go into details or mention the company (I had never heard of them prior to this), but let’s just say that it was a combination of the pandemic and very, very poor business communication from them that after being promised the fabric just before Christmas I never received it. By the middle of January after many unanswered emails and phone calls, I claimed my money back via the bank. Anyhoo, I had to go back to searching for fabric again and eventually I found the coat fabric of my dreams, beautiful pure wool from Bateman and Odgen. Very generously my mum treated me to the fabric and I have to say that service from B and O was amazing. I got it in 2 days! Yay! Oh, and guess what my lining is like 🙂 It’s a fun jacquard leopard print in a lovely shade of bronze that I got from Stone Fabrics… it’s snazzy!
So Vikisews sells patterns based on your size and height. I ordered a size 40 combined with 162-168 height. I’m at the lower end of that height range so I won’t be surprised if I end up shortening the length a little by the time I get to finishing the hems.
On the Vikisews website, I use Google Translate which is great, but all of the PDF’s are printed in Russian too, as are the instructions and here’s the weird thing…I’ve used a pattern from the Russian Grasser website before and although the instructions were in Russian too, I was able to copy and paste chunks of them to use within Google Translate, however, I don’t seem to be able to copy and paste from the Vikisews instructions as they aren’t clickable…Luckily there are lots of clear photos for each step but I did have trouble identifying what certain small pattern pieces were and had to do some sleuthing by finding words that looked similar on pattern piece and instruction segment. I got there in the end though, thank goodness!
Once I had sussed out what all the pattern pieces were, I made a partial toile of the coat just down to hip level and the size seemed pretty good. I liked the amount of ease but it was clear that I needed to do the usual forward shoulder adjustment and I also needed extra length at the front between my armpit and bust. I noticed that the hemline raised up at the front and I had some excess fabric around the side bust and armhole. The upper back/neck width was too wide for me too.
Here are the pattern adjustments that I did:
First, I took a wedge out down the centre back seam, but I still needed the same width of the back neck so I widened the neck which then took a bit off the shoulder width, which meant I had to adjust the shoulders a little and move shoulder dart over at the same time, I also did my forward shoulder adjustment as outlined in this post.
Adjusting the front bodice was much more involved. There’s a large underbust dart that goes down vertically into the pocket seam. I didn’t want to create a side bust dart so it was clear that the extra length I needed to add would have to be rotated out into that large dart.
Removing the odd excess of fabric around my armhole was a tricky one. Well, after staring at myself wearing the toile for ages and experimenting by pinching out chunks of fabric, I decided that in order to get rid of it I needed to remove a vertical segment from the shoulder downwards. This smoothed out fabric down the side of my bust nicely.
Here is the full adjustment that I did on the pattern:
- I slashed across the front level with the top of the large dart.
- I spread the pattern by the extra length needed.
- I slashed down from the shoulder line to bust point.
- I overlapped the shoulder slash to remove the fullness, this opened up a dart shape at the side seam.
- I finally closed up the dart opening at the side seam which ultimately rotated all of the adjustments into the original large dart.
Here’s a short video of the adjustment which I made for Instagram Reels:
Well, that was all of the pattern prep done so I started to get stuck into the construction. The instructions tell you to interface each and every piece, but I went my own way with interfacing :).
I completely interfaced the sleeves, and side front with some weft insertion interfacing from Tailormouse. On the back and side back pieces, I only did partial interfacing stopping above the waistline.
I’m using a full sew-in hair canvas for the fronts and the undercollar and will be padstitching the lapels and undercollar areas.
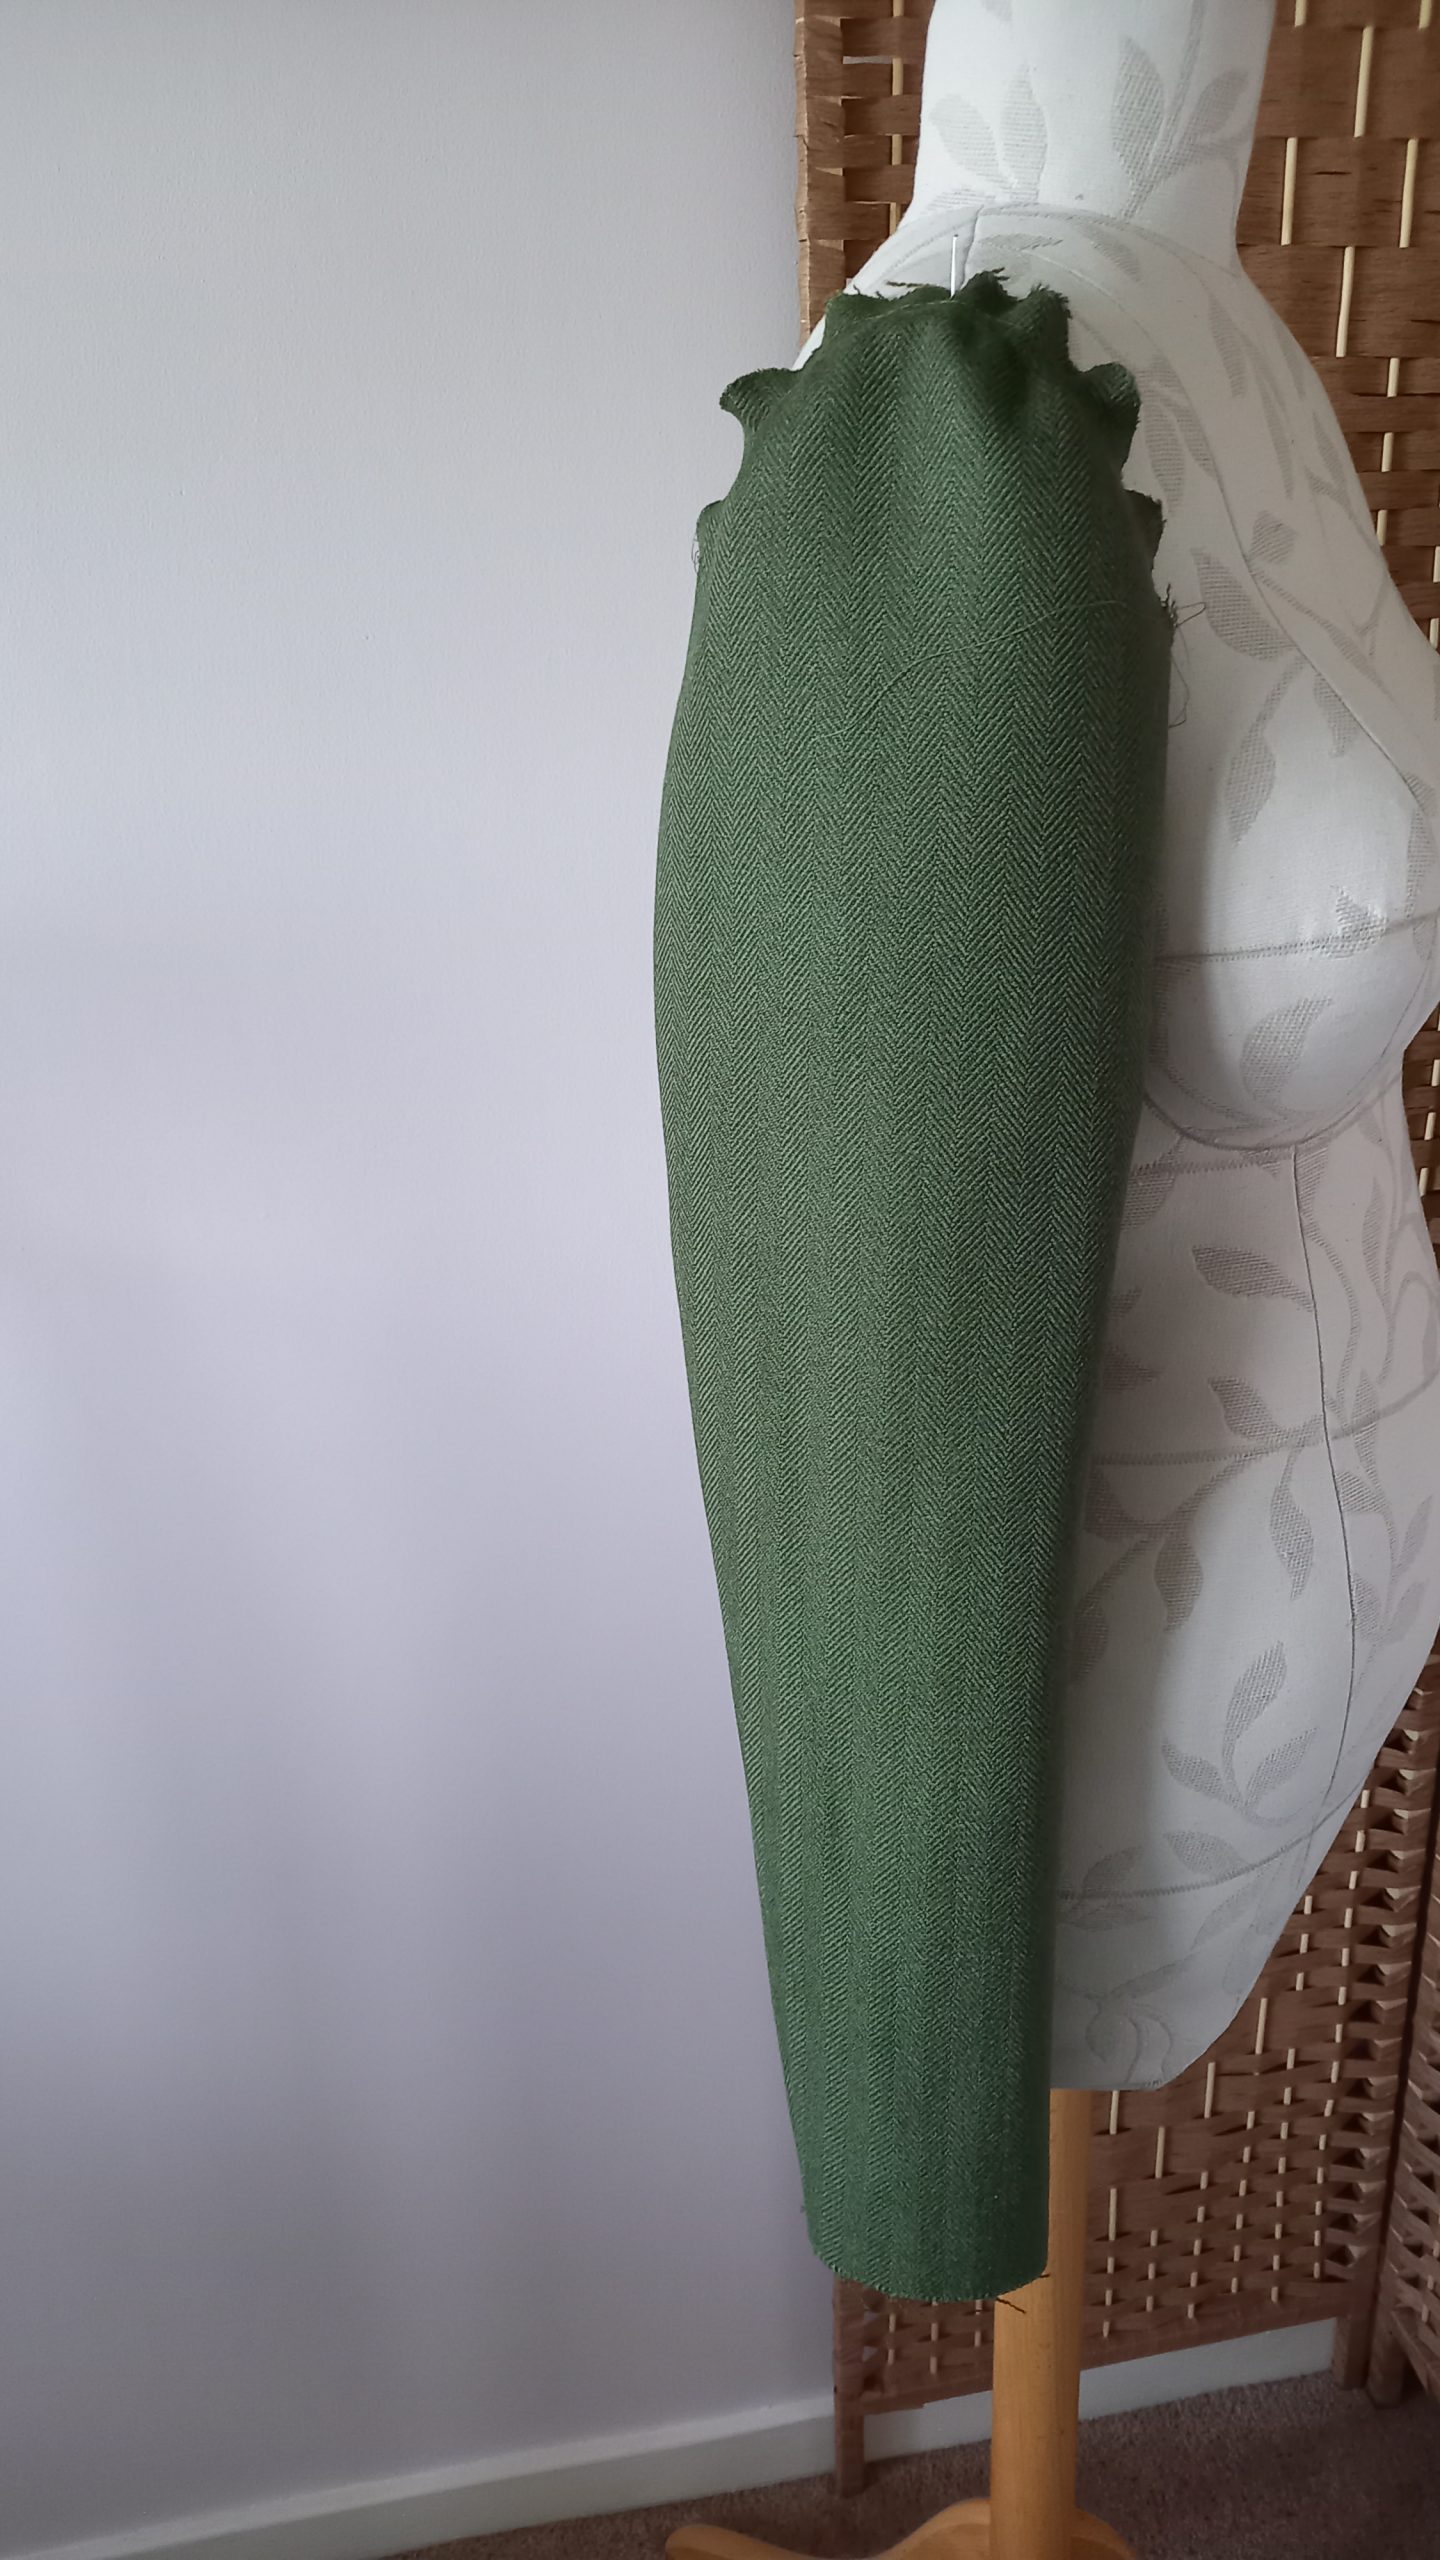
As you read this blog post I’ve so far constructed the whole back with the centre vent, I’ve also sewn the sleeves together and I’ve made up the fronts. I’m currently halfway through doing the pockets. Next, I want to pad stitch the front lapels before I join the back and fronts together.
Here are a couple of progress pics. Excuse the quality as they were just snapped on the spur of the moment with my phone and the lighting wasn’t great.

Well, that’s the end of part one. Now I have to get cracking and finish off my coat. I’ll be sharing it with the week after next because I have something else planned for next Friday’s post :). In the meantime, happy sewing and I’ll see you soon.


such an inspirational post – I wish I needed more coats, but I have more than enough! I did enjoy all your changes though, and I look forward to seeing your finished coat.
Author
Thanks, Sue. It’s going well so far 🙂
This looks like it has th e potential to be a nice blazer pattern. Very smart lines.
Author
Thank you, Susan. Glad you like it!
Looking good.
Author
Thanks ever so much, Vicki!
Love following your bust alterations process, Diane: you don’t seem to get intimidated (like me)! And your video was helpful! Your pattern choice has the lines and detailing you wanted, but perhaps its sizing is a little less orthodox than more mainstream pattern companies, requiring more alterations?
Also appreciate seeing your choices for interfacing and process.
BEAUTIFUL fabric and I know your coat will be fantastic!
Author
Thanks, Joan! I’m so glad you enjoyed this taster post on my coat. And I’m glad you liked the little video too. To be honest I don’t really feel that the sizing is a bit less orthodox than mainstream pattern companies…It’s very much a Euro-type sizing and I think it’s rather like Burda except for the fact that you get the chance to narrow the sizes down by height which can only be a good thing. The measurements are in cm and I chose the size with a bust measurement closest to mine. No matter what pattern company I buy from though, I always end up doing something with the length over my bust and I always end up doing something with the shoulders and or upper back width, so it’s par for the course :). In closing and having got on with my coat a bit further since writing this post I’m finding it really well drafted.