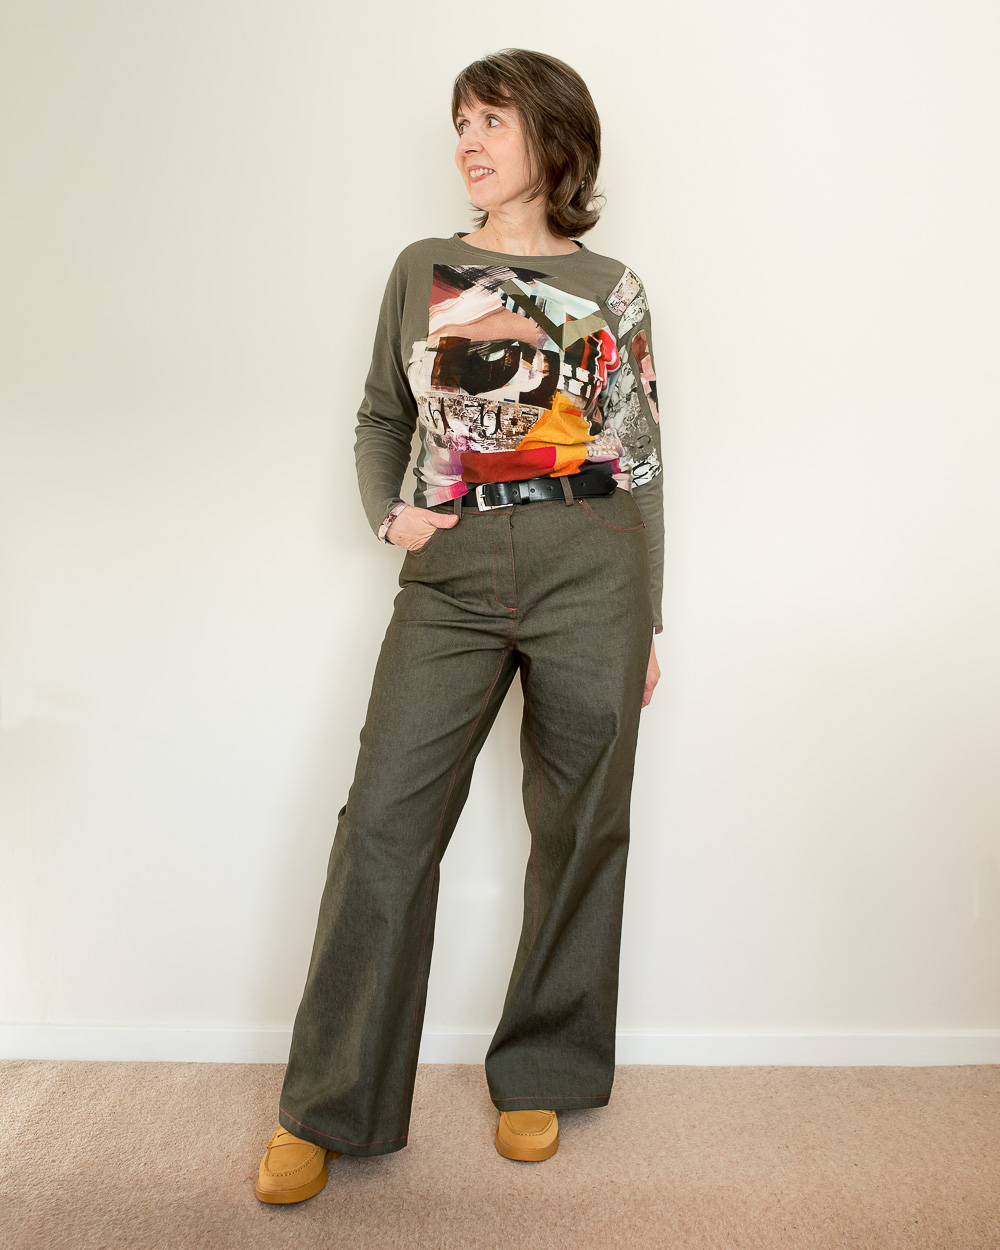
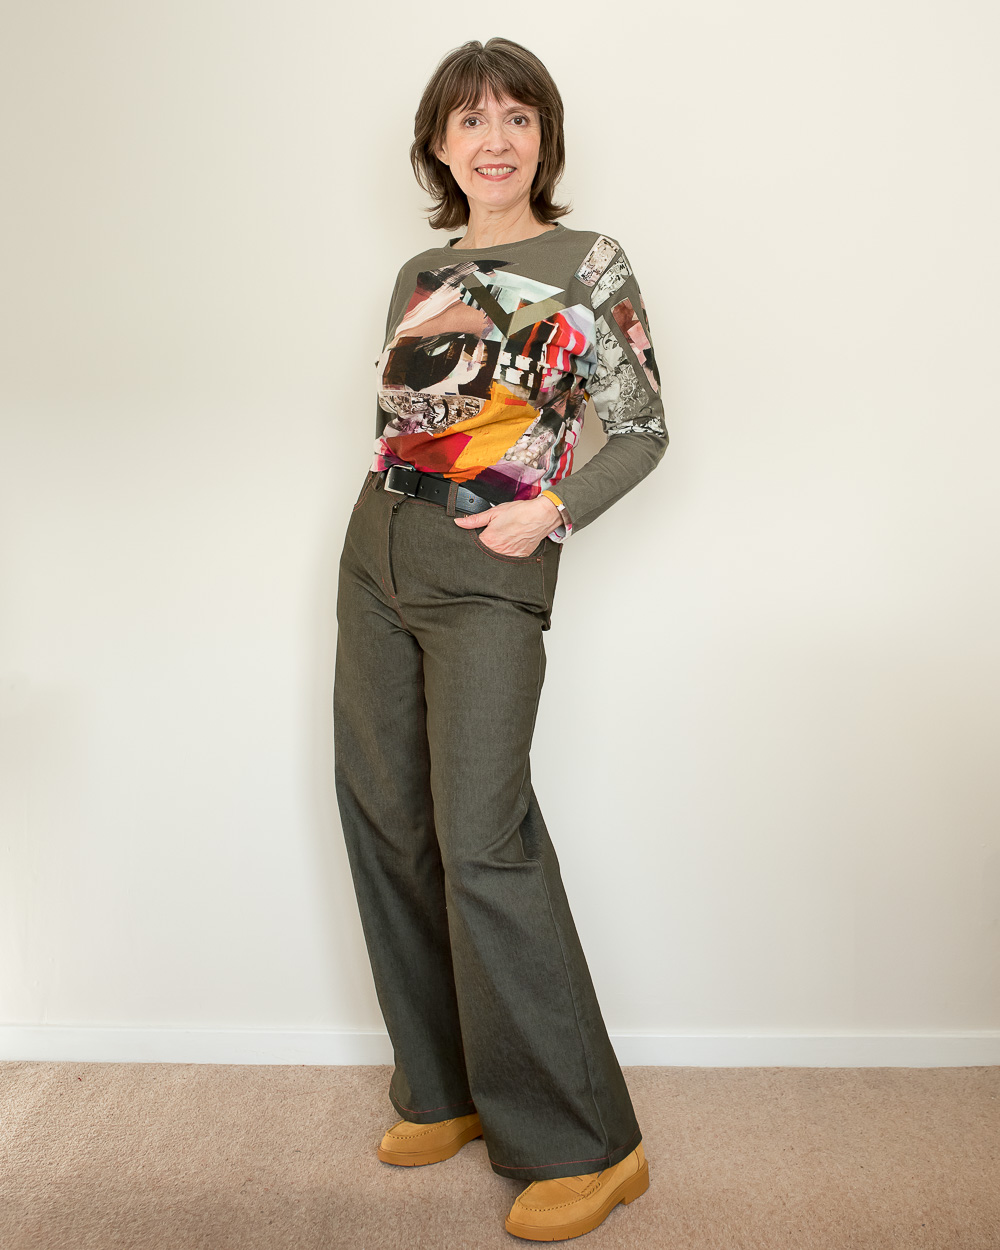
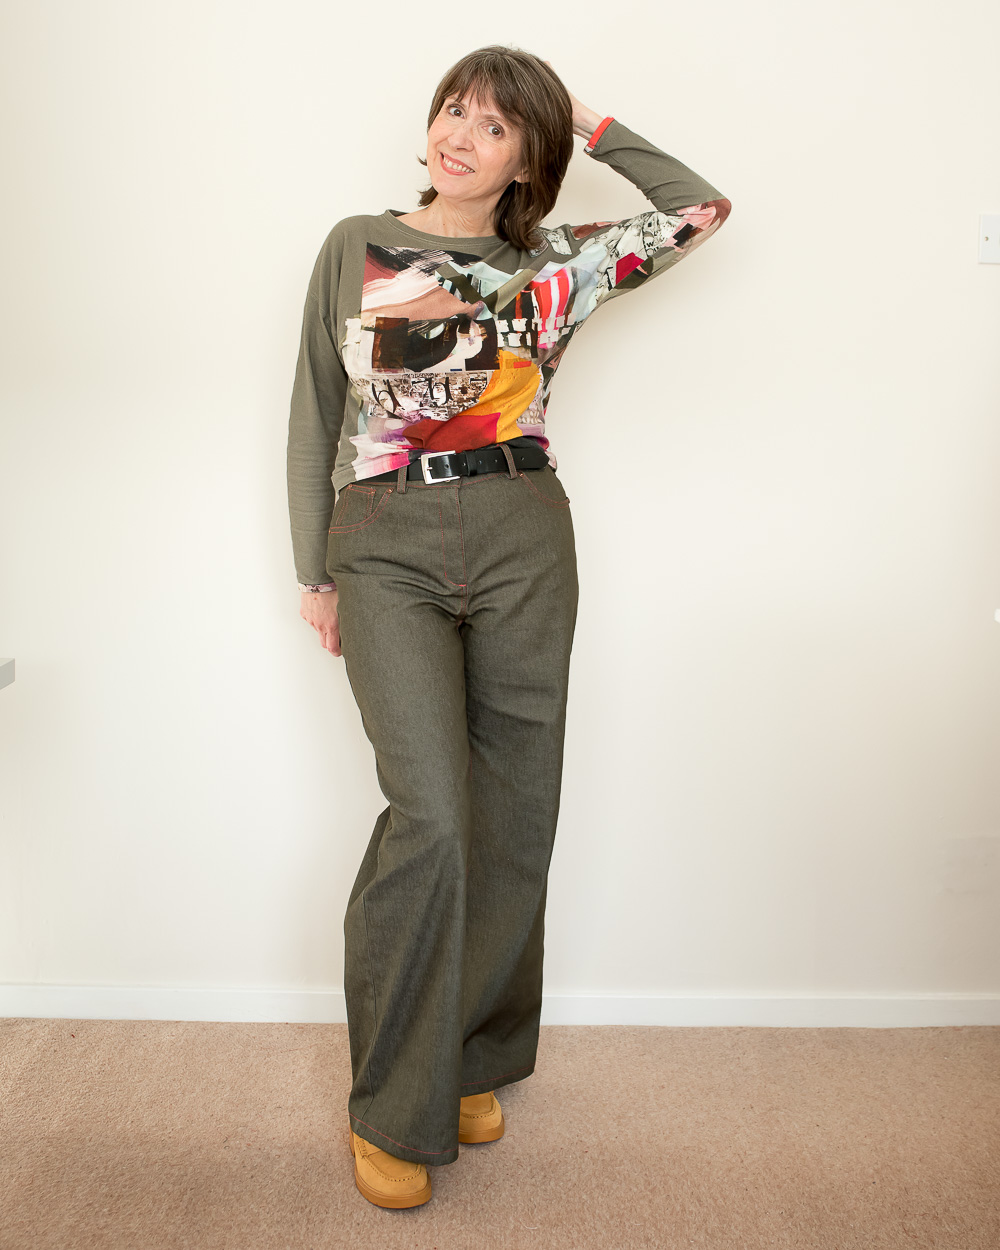
If you read my blog regularly, you’ll know that during the last year or so I’ve been enjoying jeans with wider legs. My new Olive Wide Leg Jeans Using Grasser 710 will be my fourth pair.
The pattern was in my collection for quite some time and I got the dark olive denim several months after buying it (sadly the online shop that I bought my denim from is no longer trading). I decided that the pattern and olive fabric would be a great pairing.
Well, I finally got around to sewing up the denim just in time for the perfect Autumn weather to wear them in and after gathering supplies, like thread, topstitching thread, rivets, jeans buttons etc I made a start…but not until I checked fit.
I didn’t want to take any chances (there was no way I wanted to ruin my lovely fabric), so I made a toile. Just like I did in this post I sewed a one-legged toile and checked fit using the Top Down Centre Out method. I’m glad I did because I realised that I might have been better off choosing my pattern from a shorter height range. The legs were too long and so was the crotch depth. This pattern was designed to be high-waisted but I like my waistbands to be slightly contoured with the top edge just about hitting my natural waist. If I go any higher I feel constricted and uncomfortable. I normally only have to take about an inch out of the crotch depth but for this pattern, it was almost 2” so I think the proportions would definitely have been better in the lower height range.
Anyway, after adjusting the crotch depth I just did my usual slight reshaping of the crotch curve at the front and back and I made the waist wider.
Grasser pattern instructions are generally pretty good with plenty of photos. I found the zip instructions to be nice and detailed and I enjoyed the process. There’s a lot of work in jeans and it’s quite a detailed project, but I found myself loving each step.
For some nice contrast with a bit of pizzazz, I went with a coral pink topstitch colour and to get just the right shade I used two strands of Gutermann all-purpose thread, one in bright pink and one in burnt orange. I set up one of my sewing machines just for the topstitching and I used a Schmetz Topstitch needle size 80. My other machine was used for all of the main seams. It was so nice not to have to keep on re-threading in order to topstitch.
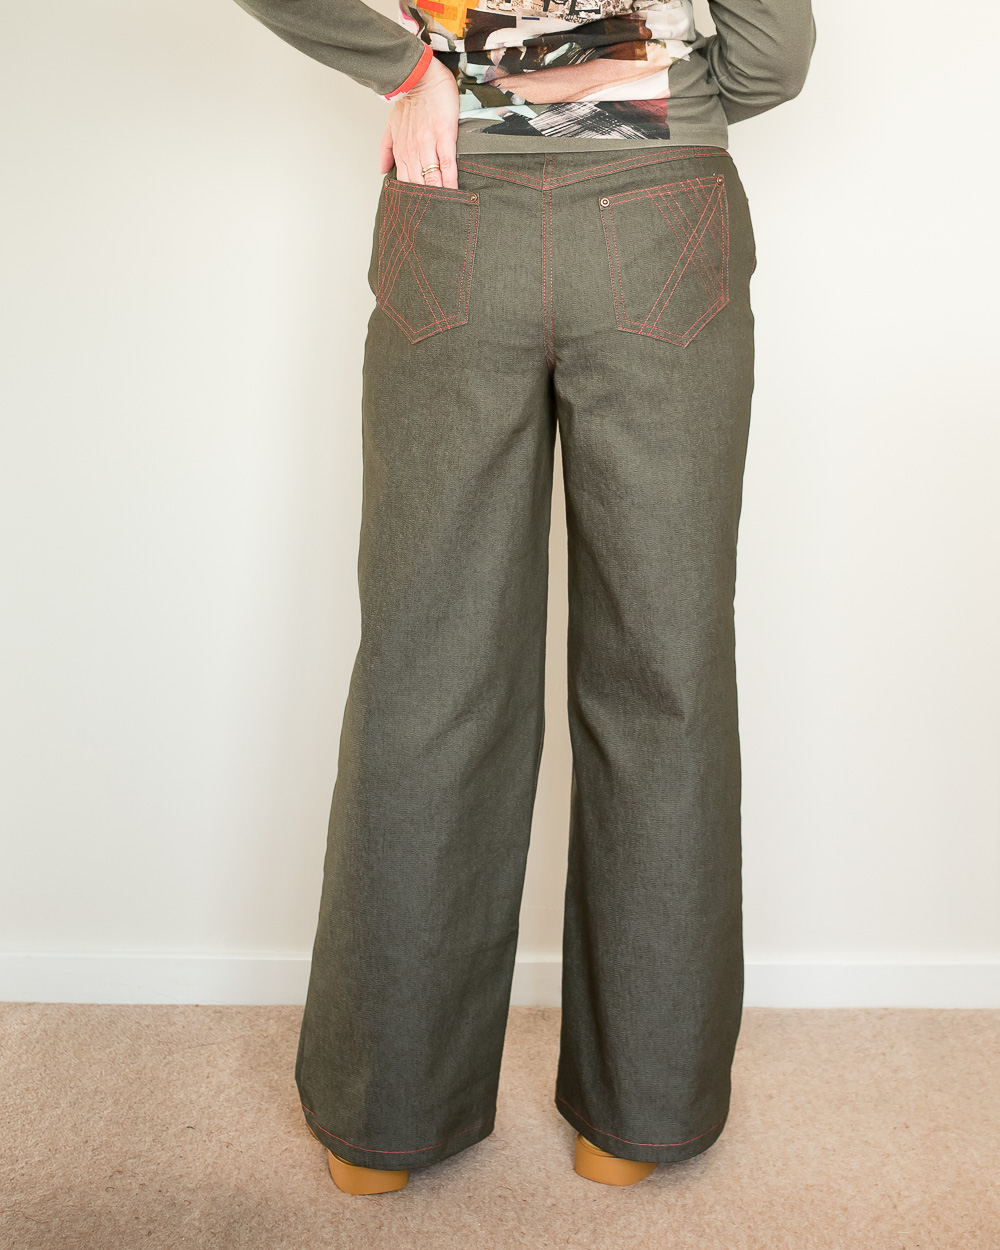
As you can see I had fun on the back pockets with a little design that I made up. The little ticket pocket on the front is a cute detail too.


I strayed a bit from the pocket instructions and I extended the pocket bags right across the front so that they were sewn into the zip area. When I do this type of extension it holds the pockets in place nicely so that they don’t gape, but also it acts as a bit of tummy control too. I used a regular lining fabric so that it didn’t add any extra thickness.
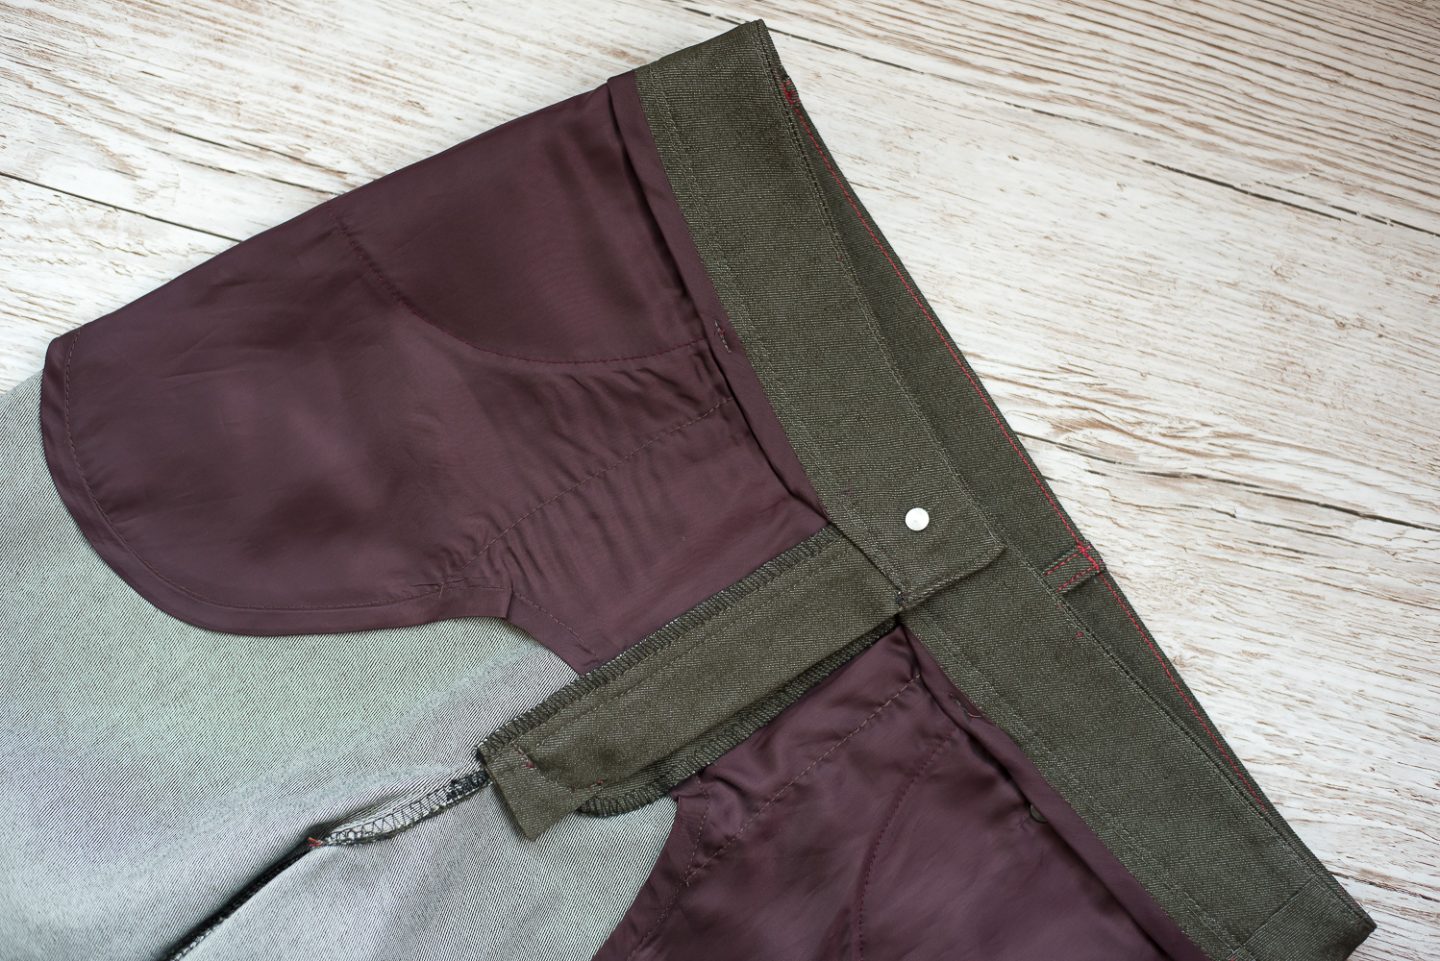
On the inside of the waistband I chose not to fold the lower edge under, but instead, I added a binding to match the pocket bags. This also reduces waistband bulk and It looks nice as well 🙂
The leg width of these jeans is wider than I’ve sewn before and ultimately I ended up taking a bit of width out from the outside leg seam from mid-thigh to hem. They’re still a bit wider than my other jeans but I feel like they stay true to the design so I’m happy with that.

I think the toile preparation and feeling confident with fit as well as my sewing set-up with both machines on the go, meant that I really enjoyed this project. Even installing the rivets and button went without a hitch. Don’t you love it when a project runs smoothly? The topstitching was so fun to do too!
I think these are going to be such a useful wardrobe addition.
Have you sewn jeans before? Or have you had a nice easy and enjoyable project lately? Let me know in the comments.
See you soon!


It’s an inspiring project, Diane! For a while now I’ve been considering making jeans. Have a pattern chosen, don’t have fabric yet, though. Should perhaps take on this project too!
Author
Thank you Giedre! I’m really happy with how they turned out. Making jeans is a big project but it can be very satisfying.
I am deep into a pant fitting course and am working exactly on the areas you adjusted. My hope is to have beautiful pants that fit my body and get to know the landscape of the ins and outs of my shape. Your whole outfit is lovely. I enjoy seeing your makes arrive in my email. Thank you.
Author
You’re so kind Donna, thank you. I hope the course is going well, that sounds great. Personally I feel like it’s only been the last year or so that I’ve really sussed out my own ‘landscape’ for fitting pants and I can almost do the alterations on a wide leg style of pant automatically and know that I’ll be pretty close with the fit. I still struggle a bit with a very close fit style though, but I’ve discovered the beauty of a centre back leg seam which helps me enormously. Good luck with your fitting journey.