[AD]. This satin camisole is my March BurdaStyle influencer make. I was provided with the PDF pattern free of charge to sew up and share with you. As usual, all opinions are my own. Please see my disclosure policy to learn more.
So, before I really get started and given that as I write this post, here in the UK it’s cold and we’re having torrential rain and gales force winds…maybe you and I should get into the right mindset. Imagine if you can, a balmy Summer’s day with gentle breezes, the sound of the sea in the background, the warmth of the sun on the back of your neck and maybe a long tall glass of something cold and refreshing to drink in your hand whilst you sit back and soak up some rays. There, much better suited for looking at a strappy camisole suited to Summery weather, don’t you think? 🙂
Read on…
DIY Satin Camisole
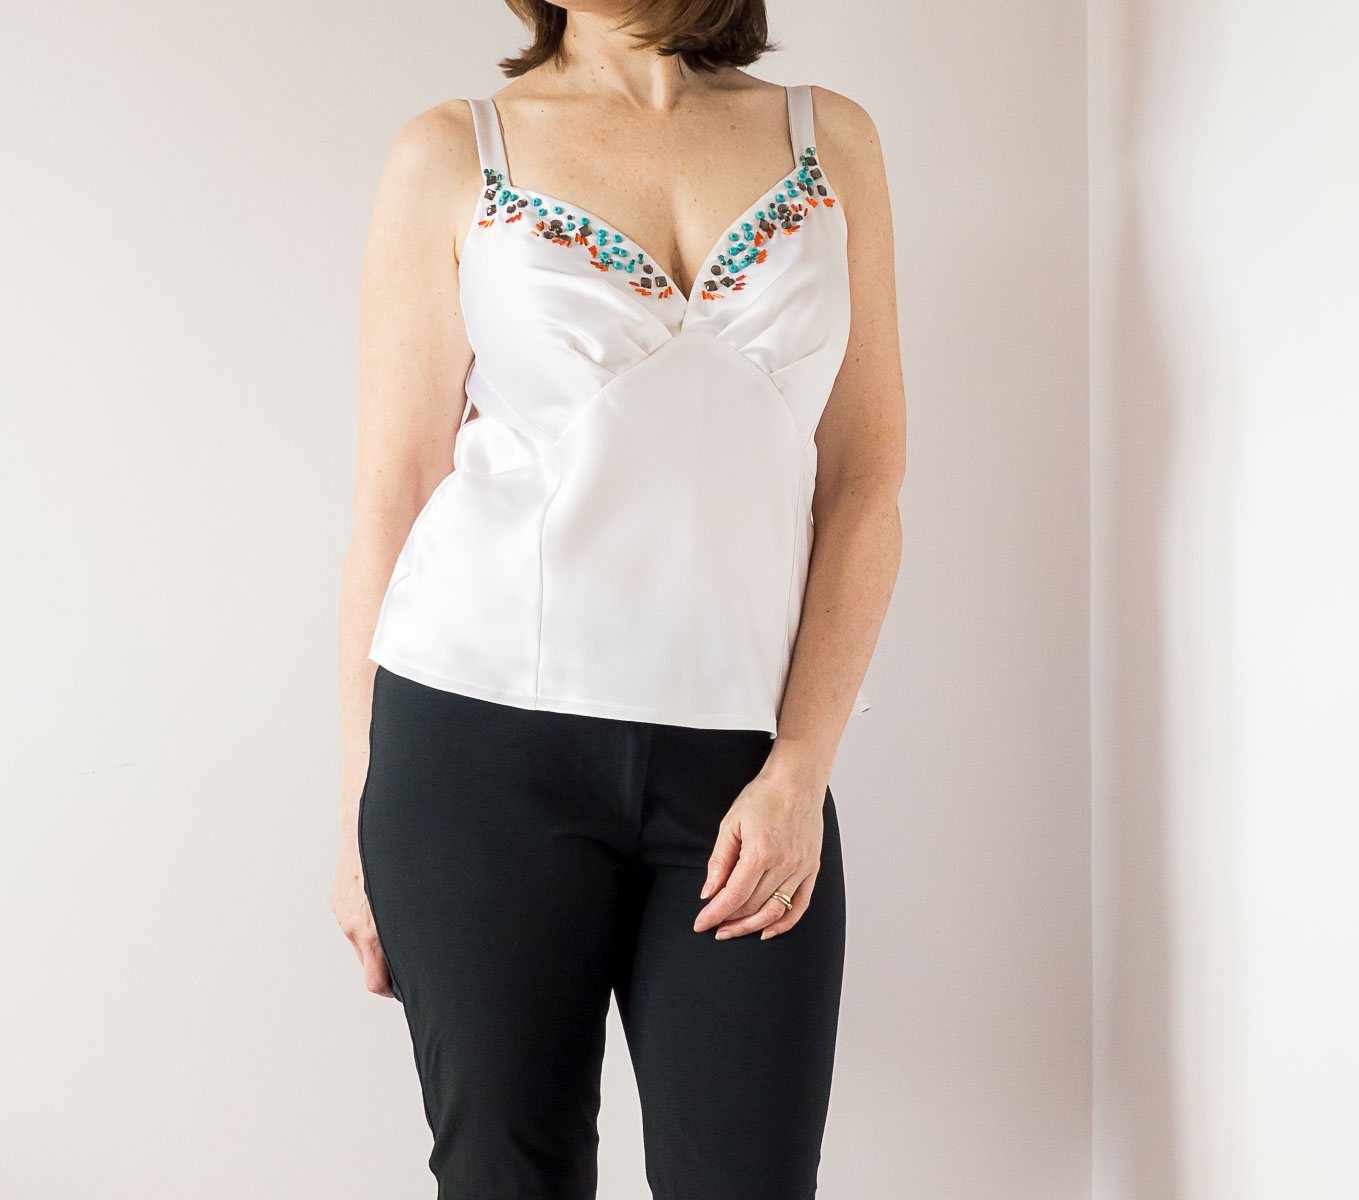
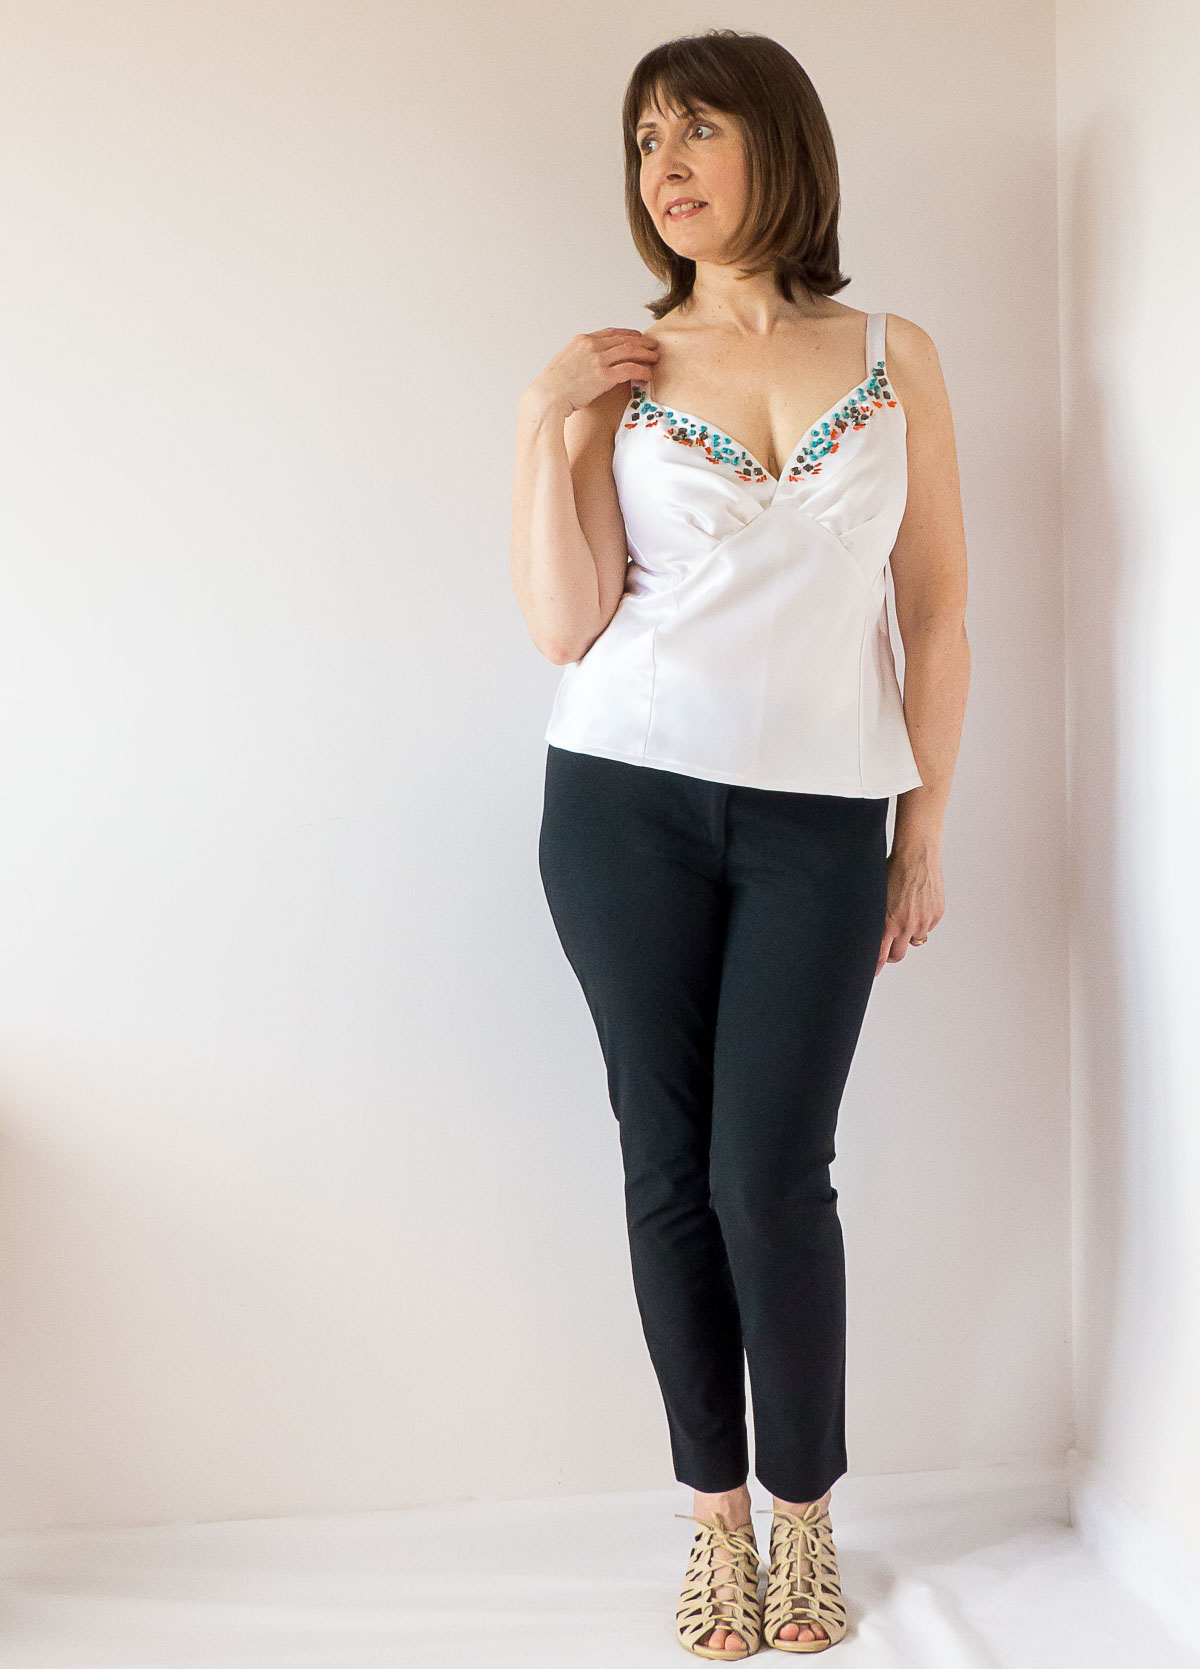
So, my camisole is number 116 01/2019 and I chose it in an “it’s meant to be” sort of way. My mum had been having a sort out and a declutter and she came across a brand new, unworn satin underslip. She said how nice it was and did I want it to cut up and make something with it? Well, I was due to choose my March project and when I saw the camisole pattern everything clicked into place, so I said yes and it would be an ideal make to wear for my holiday to Greece later this year. The fabric is a satin polyester and it started out as a stark white colour. I soaked the whole slip in hot water infused with coffee for a good half hour and it softened the colour nicely into a warm ivory tone, which was what I had hoped for. If the colour washes out I can easily repeat the process.

The PDF didn’t use up much paper and there are only 4 main pattern pieces, plus straps. All of the pieces are cut on the bias grain and as the underslip was also cut on the bias, I just had to true the fabric before laying my pattern on. I had to go with the flow a bit though and accept that there would be a few extra seams that already existed on the slip. On the midriff sections, I’ve ended up with a centre back seam instead of it being cut on the fold and two side front seams as well. Plus a couple of extra seams on the cup sections, which I’ll tell you more about later…
Now, I was a little confused by the sizing numbers which go from 17 to 21 and when I looked them up I realised they are petite sizes for a height of 5’3”. For the record, I’m almost a half-inch under 5’6”. Anyway, I tried the midriff pattern piece by me and the length seemed only about a half-inch too short so I cut out the equivalent of a size 36 which is between 18 and 19.
I hit a bit of sizing trouble when it came to the cup sections of the top. For reference I’m 34DD and I would say that this top is drafted for about a B/C cup and no more than that. I already assumed I might need to make more depth and I simply added more room by curving the lower edge down which in turn made the pleats a bit wider. A quick try on and I soon found out that it wasn’t enough.
The lining of the cup sections only has one large dart and I didn’t think that it gave quite the room needed and it seemed to restrict the shape of the upper layer.
I had to think on my feet and after unpicking the lining layer I tried the upper layer over the top of my bra and came to the conclusion that if I added an extra pleat and moved the fullness nearer to the centre that the pattern piece would fit me better. As I was really short of fabric I ended up using the lining layer to join on at the sides with an extra seam that fortuitously lined up with the one on the midriff section. Let’s call it a design feature shall we 🙂
I used a scrap of georgette as cup lining instead and just duplicated the upper layer shape including pleats. I joined the layers together and then folded the pleats over, treating it as one layer. This did the trick and the fit is good now.
Here’s how I suggest you increase the cup size if you need to (this is a method I came up with that I think will do the trick):
- Draw a line across from the side seam to about a third above the middle-lower edge.
- Draw 3 lines down from this line. Two of them run through where the two pleats are and a third is below the pleat markings where you can create a third one.
- Slash through the long line but not right through at the ends.
- Slash the three lines up from the bottom but don’t cut right through.
- Open up the long slash allowing the three lines to spread.
- Re-trace the pattern piece blending the side seam and the front cup edge.
- Create one more tuck just below the two original ones.

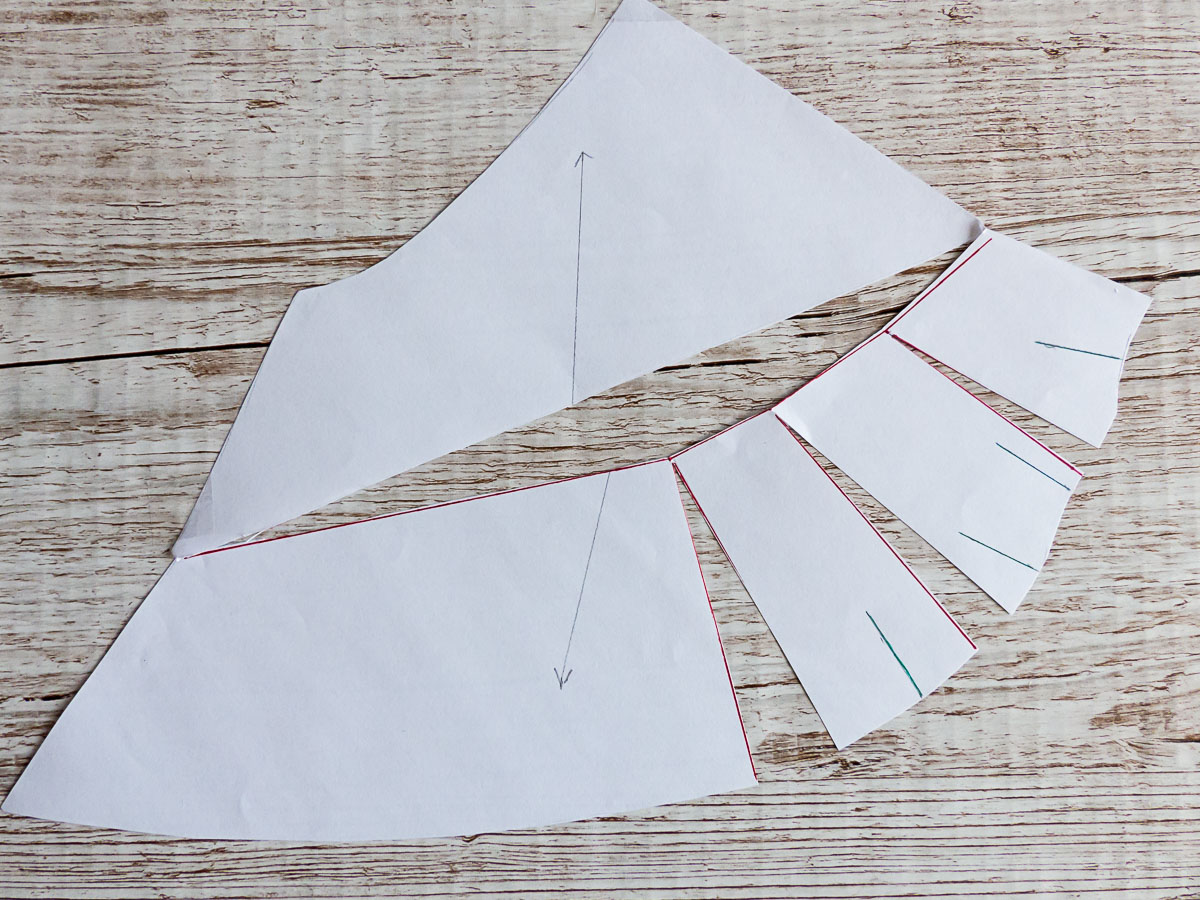
How much you spread the pattern will be more trial and error than anything. I suggest you do a muslin mock-up of a cup to see if you’ve increased its size by the right amount.
Here, you can see the georgette lining on the cup section and the third pleat, plus the fact that I pleated both fabric and lining as one.

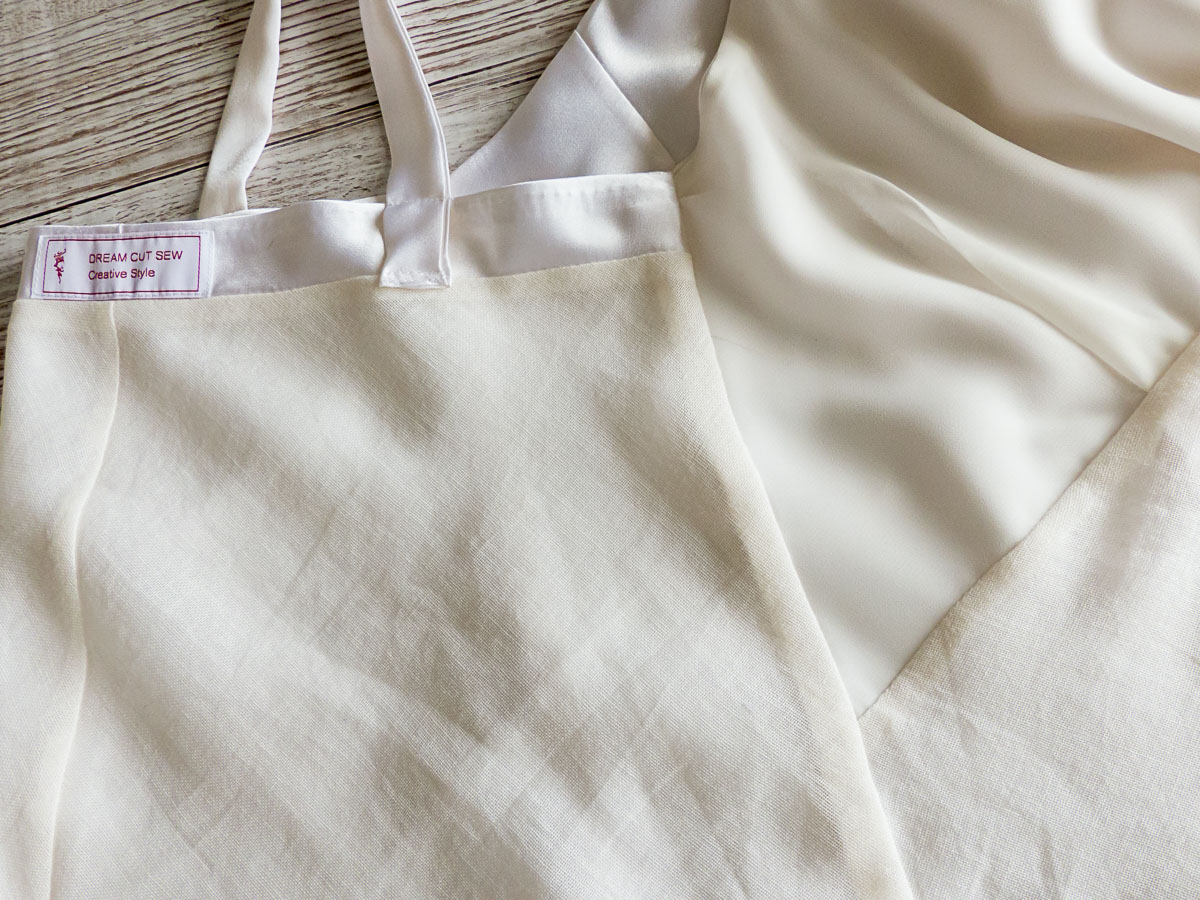
The eagle-eyed amongst you might have spotted some more lining on the photo above. Well, I realised that the fabric was a bit see-through and I decided to line the lower part of my top as well. I used a cotton muslin from my scrap bag, it adds a bit of opaqueness and also feels really nice next to my skin. I made another BurdaStyle cami last year and added a cotton muslin lining to that too.
It was quite easy to add the extra lining. Once made up, I simply sandwiched the cup sections between lining and fabric as I stitched the curved midriff seam. Then I stitched the back lining to the top edge of the back fabric and sandwiched the fronts between the back layers as I stitched the side seams together.
For extra modesty, I’ve increased the strap widths to make them bra-friendly and I’ve slightly overlapped the cup sections in the middle.
I wanted to give my top a bit of extra pizzazz and the plain-ness was crying out for some beading in colours that I often wear in the Summer. In keeping with the thrifty theme of my make (this has cost me zilch, zip, nothing, lol) I used some beads from an old bracelet, some beads leftover from my other camisole, and also some that were scavenged from a small sleeve refashion that I did for a client last year.
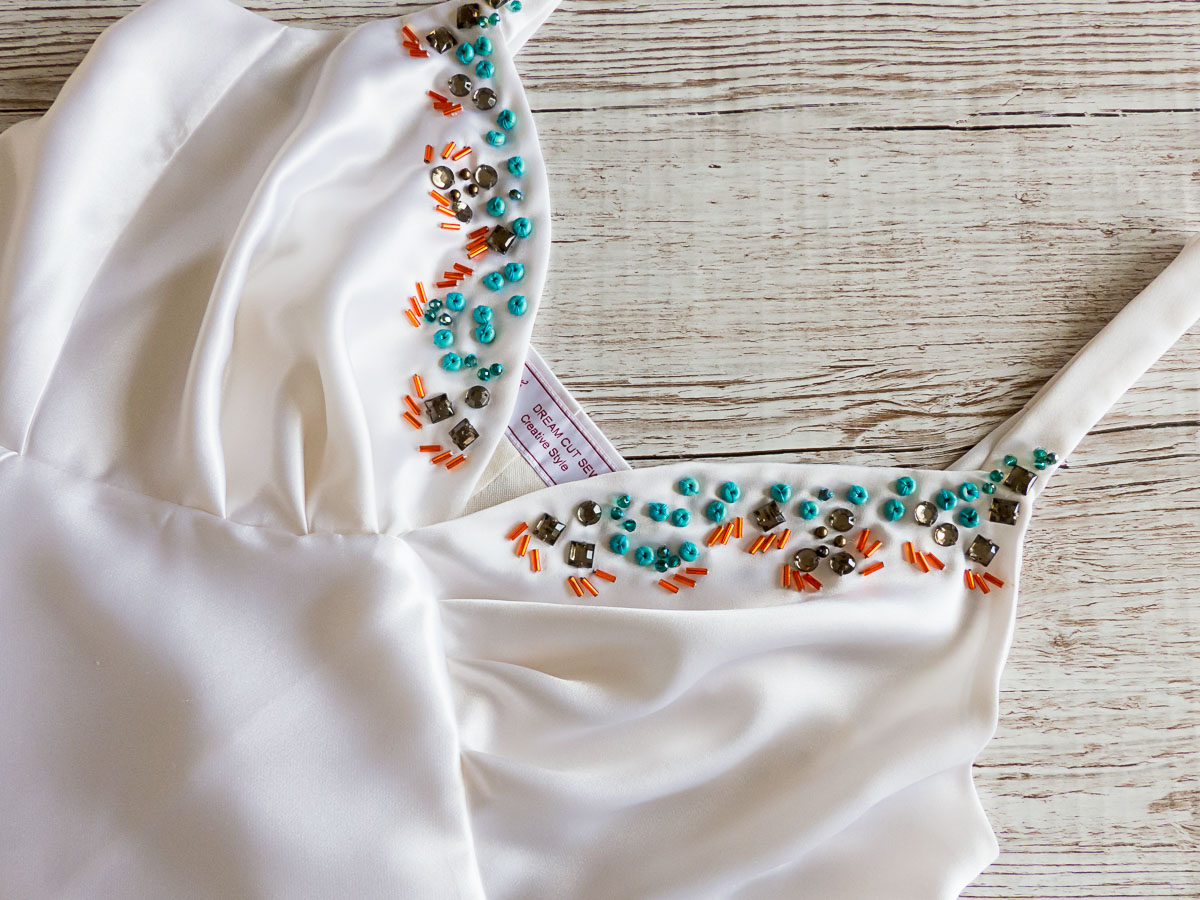
There’s no particular design in my beading. I literally stitched them onto one side, making the pattern up as I went and then replicated it as best I could on the other side. To help me I used a chalk pencil to make dots on the fabric and map out the placement. I love how the colours all look together.


For styling, I’ll wear my top with cream jeans, a turquoise wrap skirt, a coral skirt and maybe even black skinny trousers and a denim jacket for a date night look. I bet it would also look great with wide-leg pants and culottes. Bring on my Greek holiday is all I can say!
Thanks for reading. And don’t forget to sign up by email to be guaranteed regular post updates…much more reliable than Bloglovin’ which has proved to be rather sporadic lately.
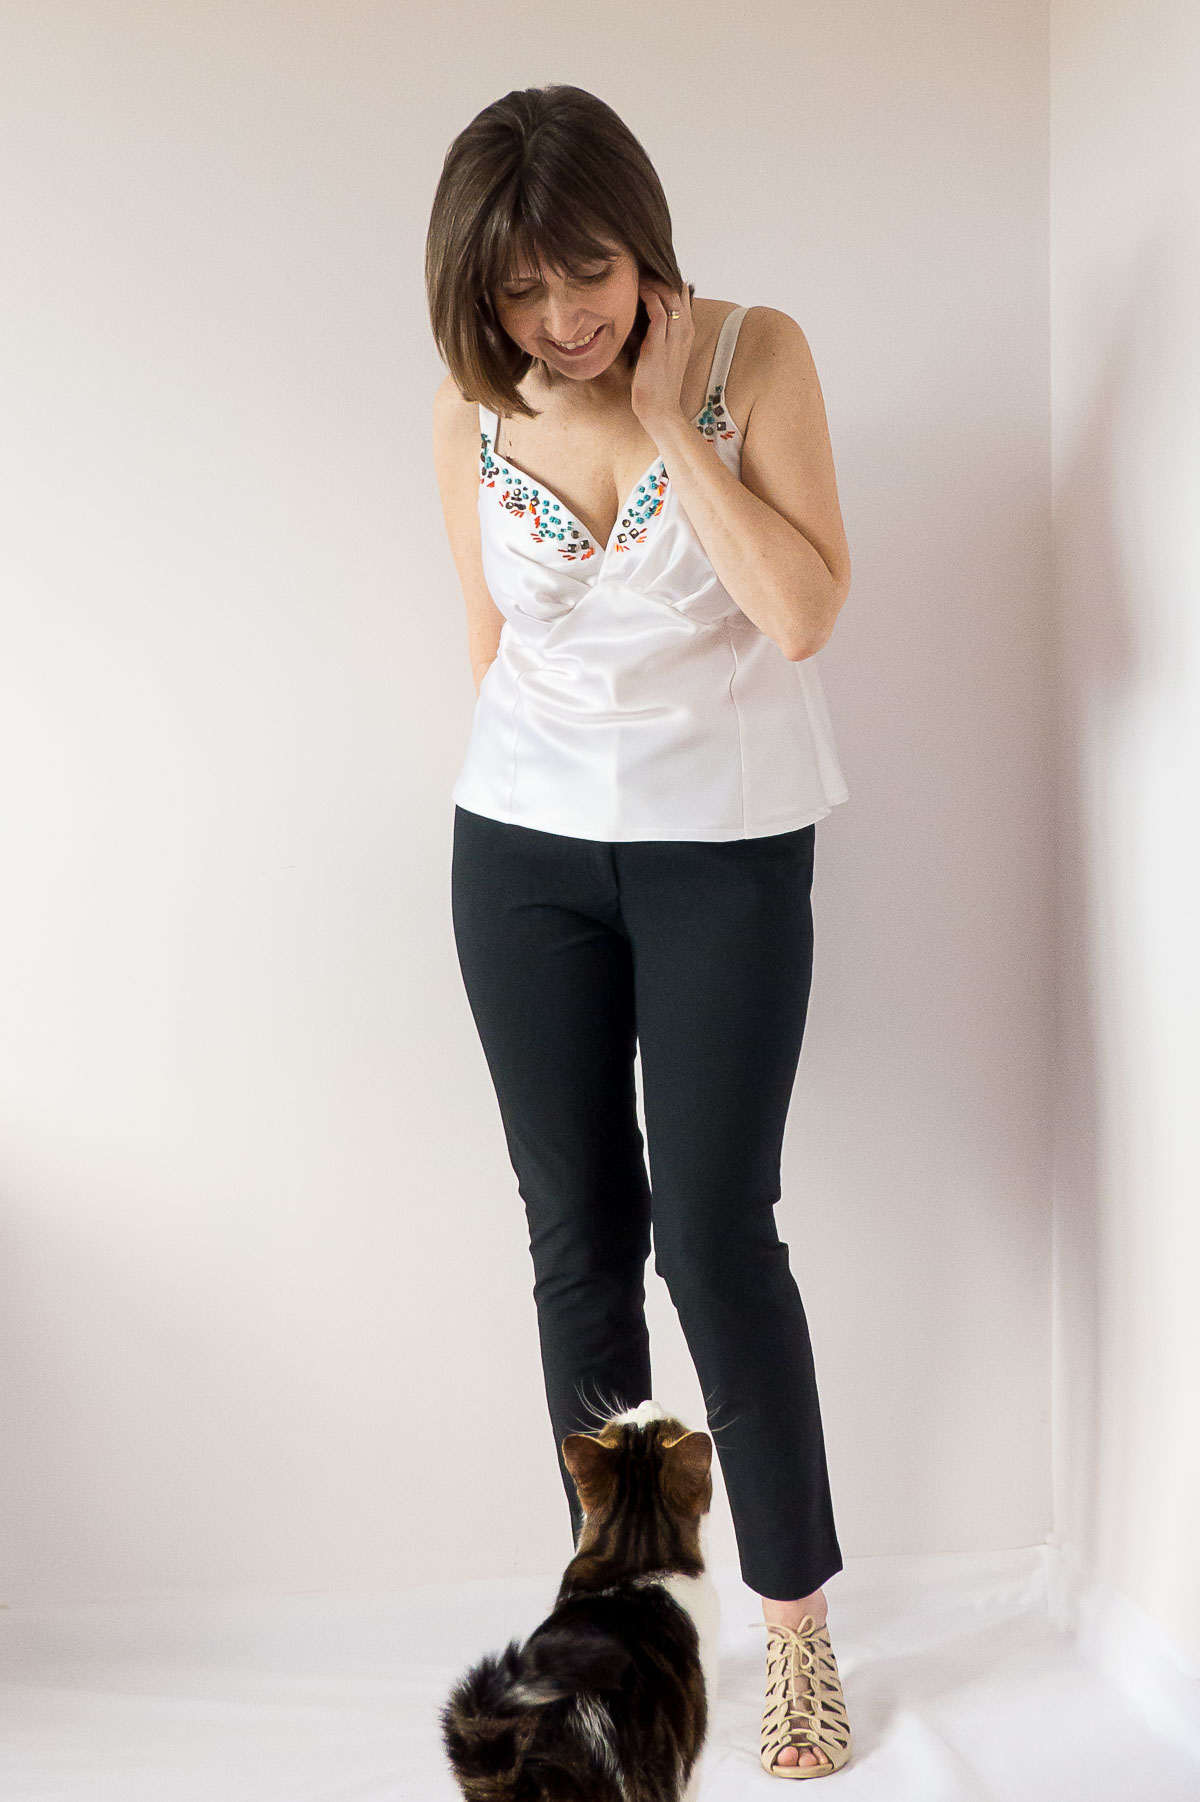
Bilbo is giving me photography advice….or perhaps he’s just asking for Dreamies!
Cheers, see you soon!

Pin For Later:


Wow – so beautifully made. Thanks for the cup adjustment how-to. I love the beading on the neckline!!
Author
Thanks! I’m really pleased that you find the cup adjusment useful.
So typical of you – beautifully made – lovely fit and so creative! Just love it on you and I have no doubt you’ll be proud and tickled to wear it on your Greek holiday!
Author
Such a lovely comment, thank you, Kathleen!
The beading really is the icing on the, er, cake! I really like the idea of this camisole as we are experiencing exactly that sort of balmy weather you describe.
Author
Mmmmm, cake! Thank you Sue!
so pretty! I did notice that pattern in the issue and now I’m tempted to make it 🙂
Author
Thanks, Beth! Ooh, if you do make it be sure to tag me. I’d like to see it 🙂
Oh, that’s a show-stopper, Diane! I love the beading and the extra lining was a brilliant addition. You will look fabulous On your Greek holiday and will be comfortable no matter what the weather. So impressed that this make was practically free!!
Author
Thank, you so much Linda! I’m glad you like it 🙂
This is gorgeous!! And I love the beads on the neckline.
Author
That’s lovely of you to say, thanks Lynne!
My dream top: a cami top for the small, full busted woman with bra- friendly straps. Wish somebody would draft one. As I thought, and you confirmed, I’d have to do a lot of hacking to pattern like this. Lovely!
Author
Thanks so much, Dee! Yeah, I know what you mean. What you describe is like the unicorn of cami tops…so not easy to find. I’m resigned to altering a pattern. I could probably draft one for myself but not as a pattern for general sale to the public as it’s not my forte.