
So, a while back, I spotted a long-sleeved brown jersey top on Pinterest which had horizontal drapey folds across the upper bodice. The design percolated in my brain for a while until I felt like making something inspired by it. At first, I wondered if I could emulate its drapey folds, but as time went on and my idea morphed, I ultimately ended up designing a jersey top with tucks that looks quite different from the original inspiration. Isn’t that often the way, though? What we make has to suit us and not the model in the image.
I had the perfect fabric in my stash already. It’s a pure wool merino jersey knit (my favourite type of jersey) in a lovely soft mid-brown shade. Mine came from The Fabric Store online shop based in New Zealand. It doesn’t contain any Lycra, so any stretch is purely mechanical. It’s lovely to wear and washes beautifully.
I’ve made a couple of long-sleeved tops that I designed myself, and just like those makes, I used my basic knit top sloper pattern (developed from my personal moulage) for my starting point.
To be honest, I don’t think this is an overly complicated design, and it would be easy to use any basic long-sleeved knit top pattern and make the changes to it. Something you’ll notice, though, is that lately I make all of my knit tops with a bust dart. This decision came about ever since I made a couple of Grasser Patterns that had bust darts. They include the dart, but they also have you stretch the side seams of the back bodice for about 5 inches in the middle part of the seam. The combination of the dart and stretching of the back seam helps to smooth out any horizontal folds that can sometimes appear on the back of jersey tops across the midriff area.
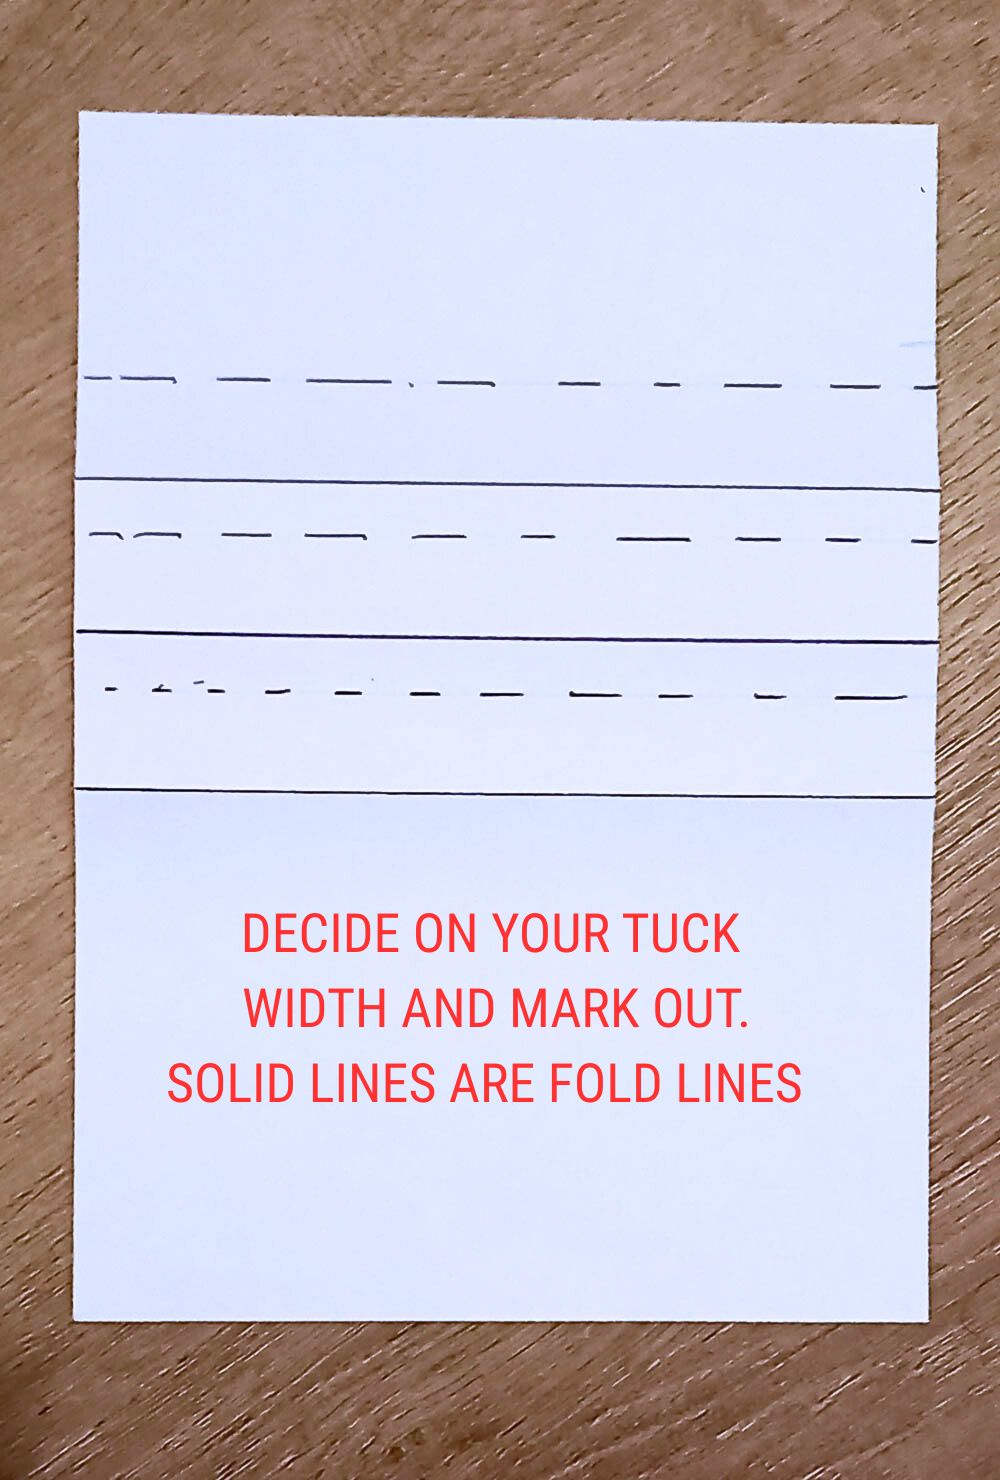
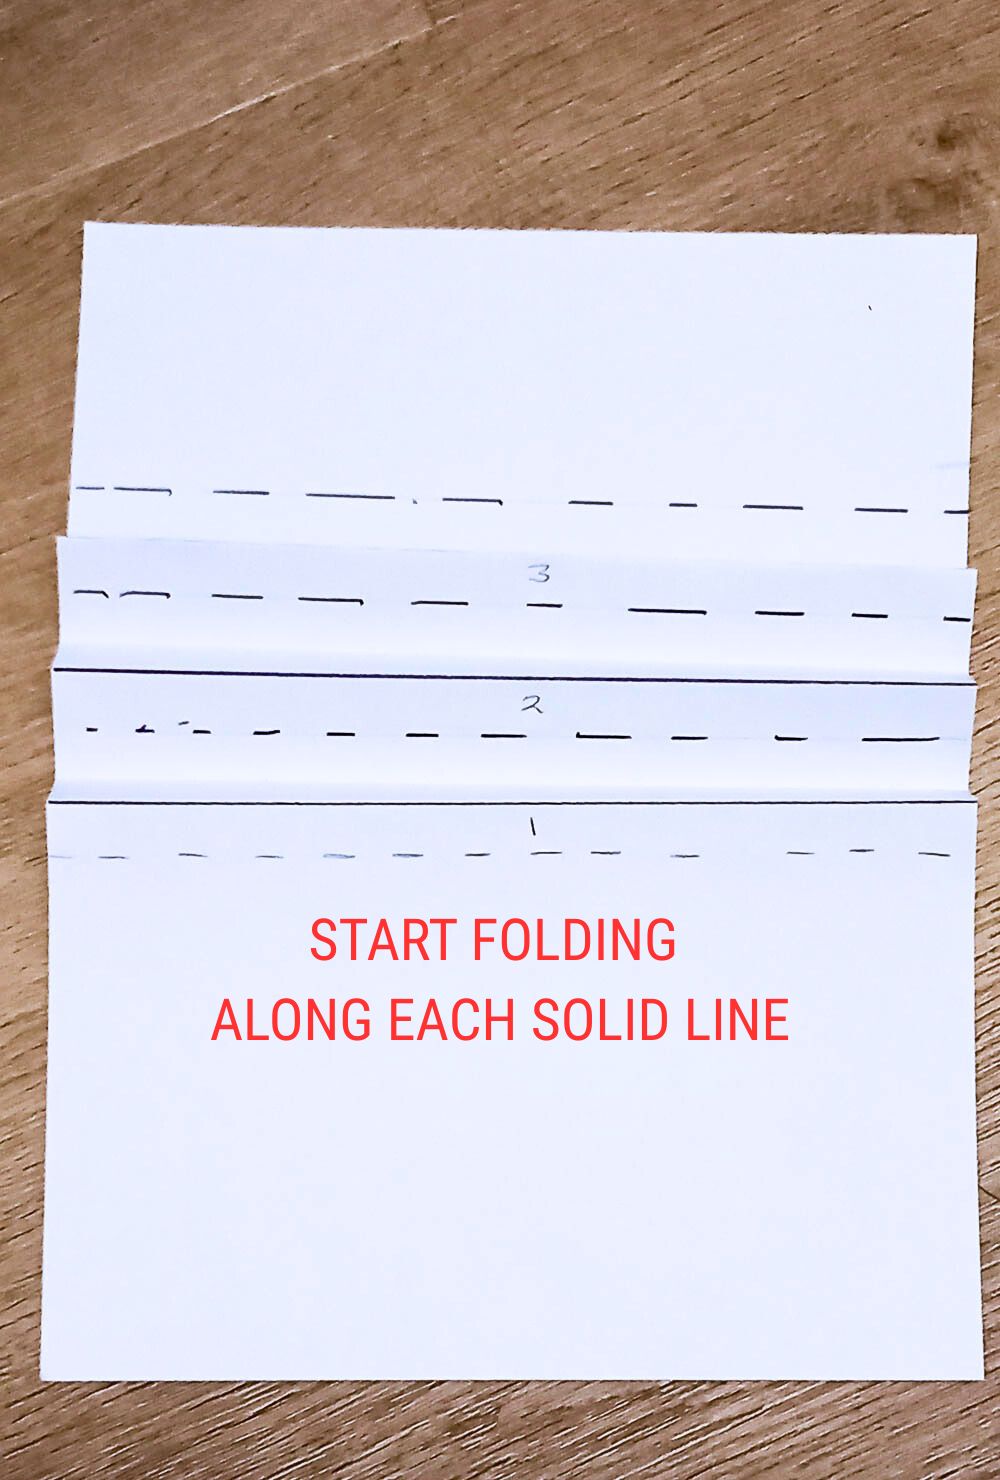
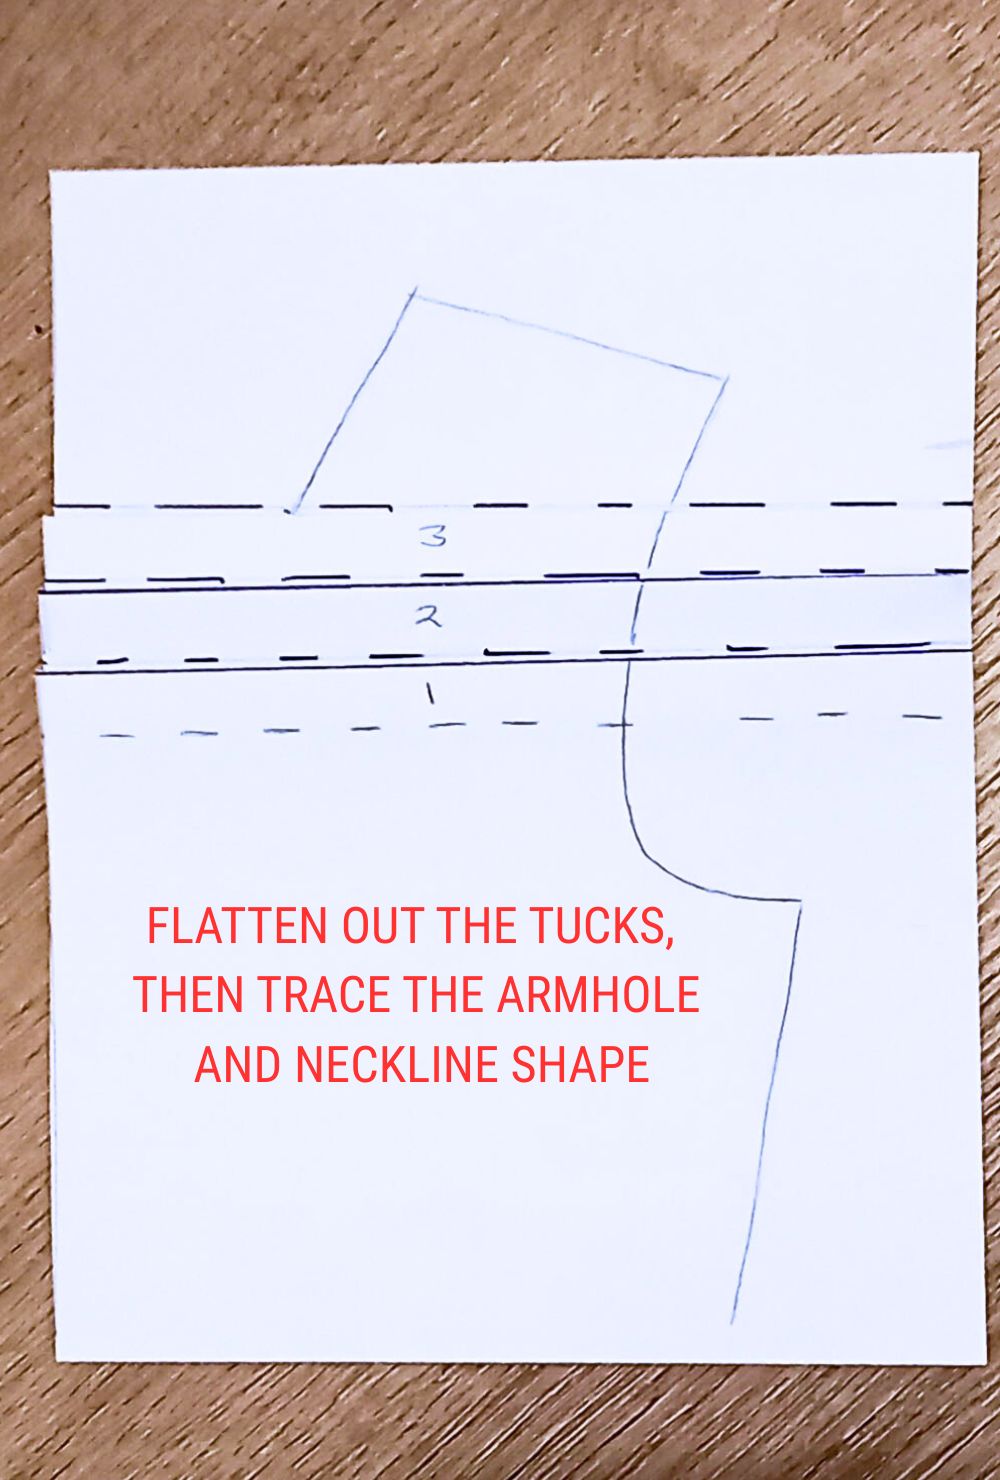
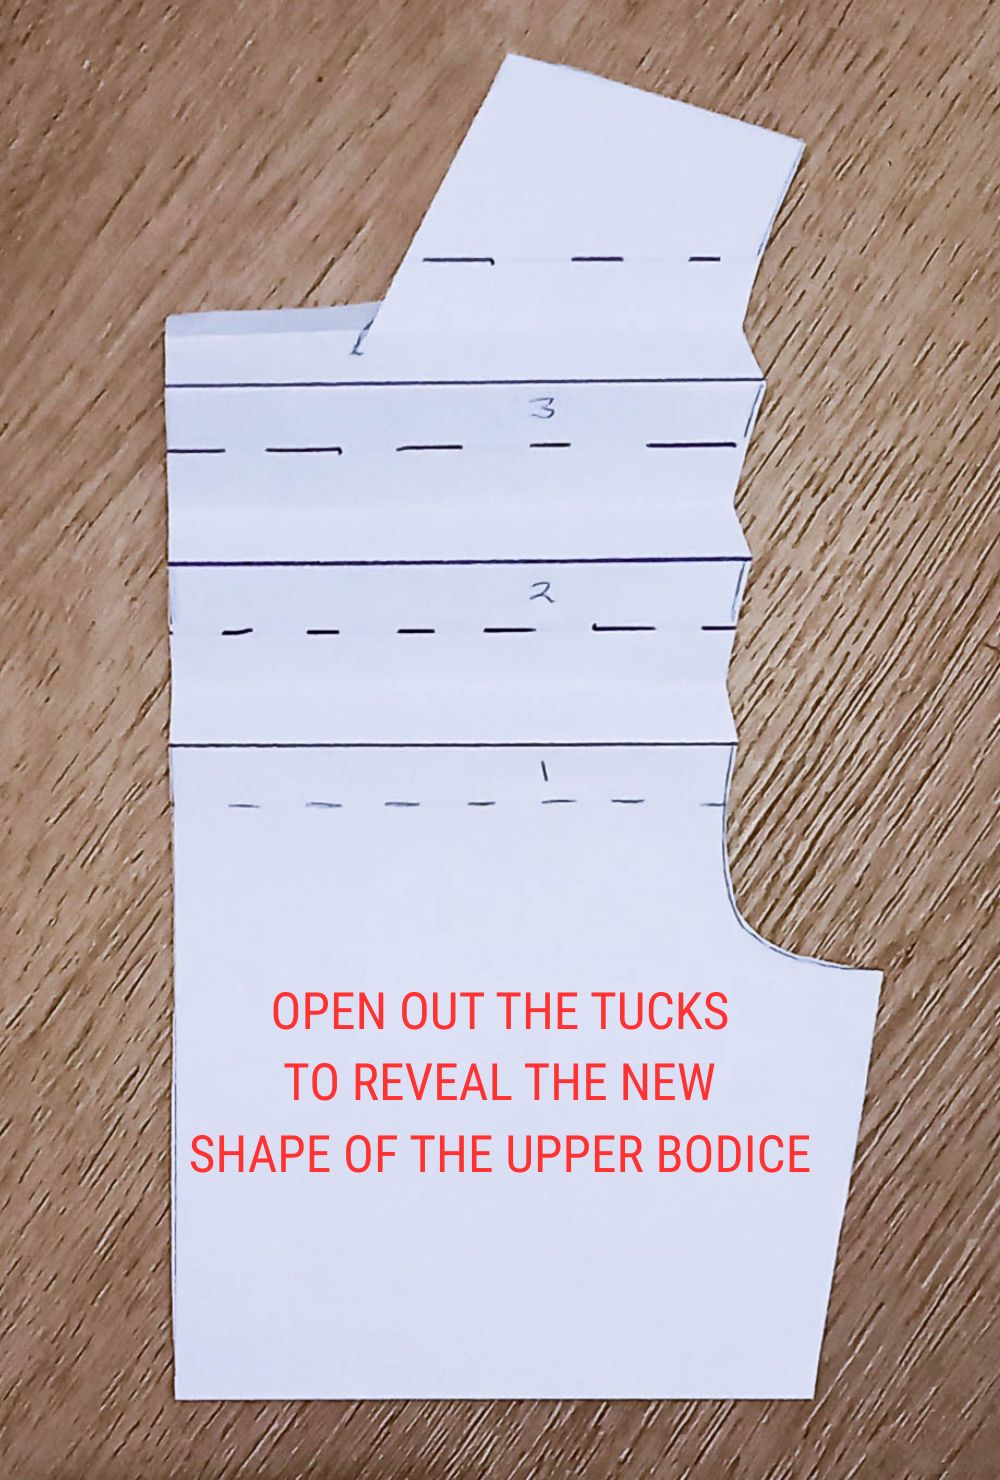
To create the deep tucks, I traced my sloper pattern, leaving excess paper at the top, and then worked out how many and how deep I wanted the tucks. Once that was decided, I folded the paper into the tucks, then laid my sloper over it and drew in the armholes and neck shape. Now, rather foolishly, after making my top, I left my pattern lying around under some other paper scraps, and it was only when I decided to write this post that I realised it had ended up in the recycling and was long gone. Oops!
So, just for you, I’ve recreated my process in miniature. The following photos show how I did it. Enjoy!
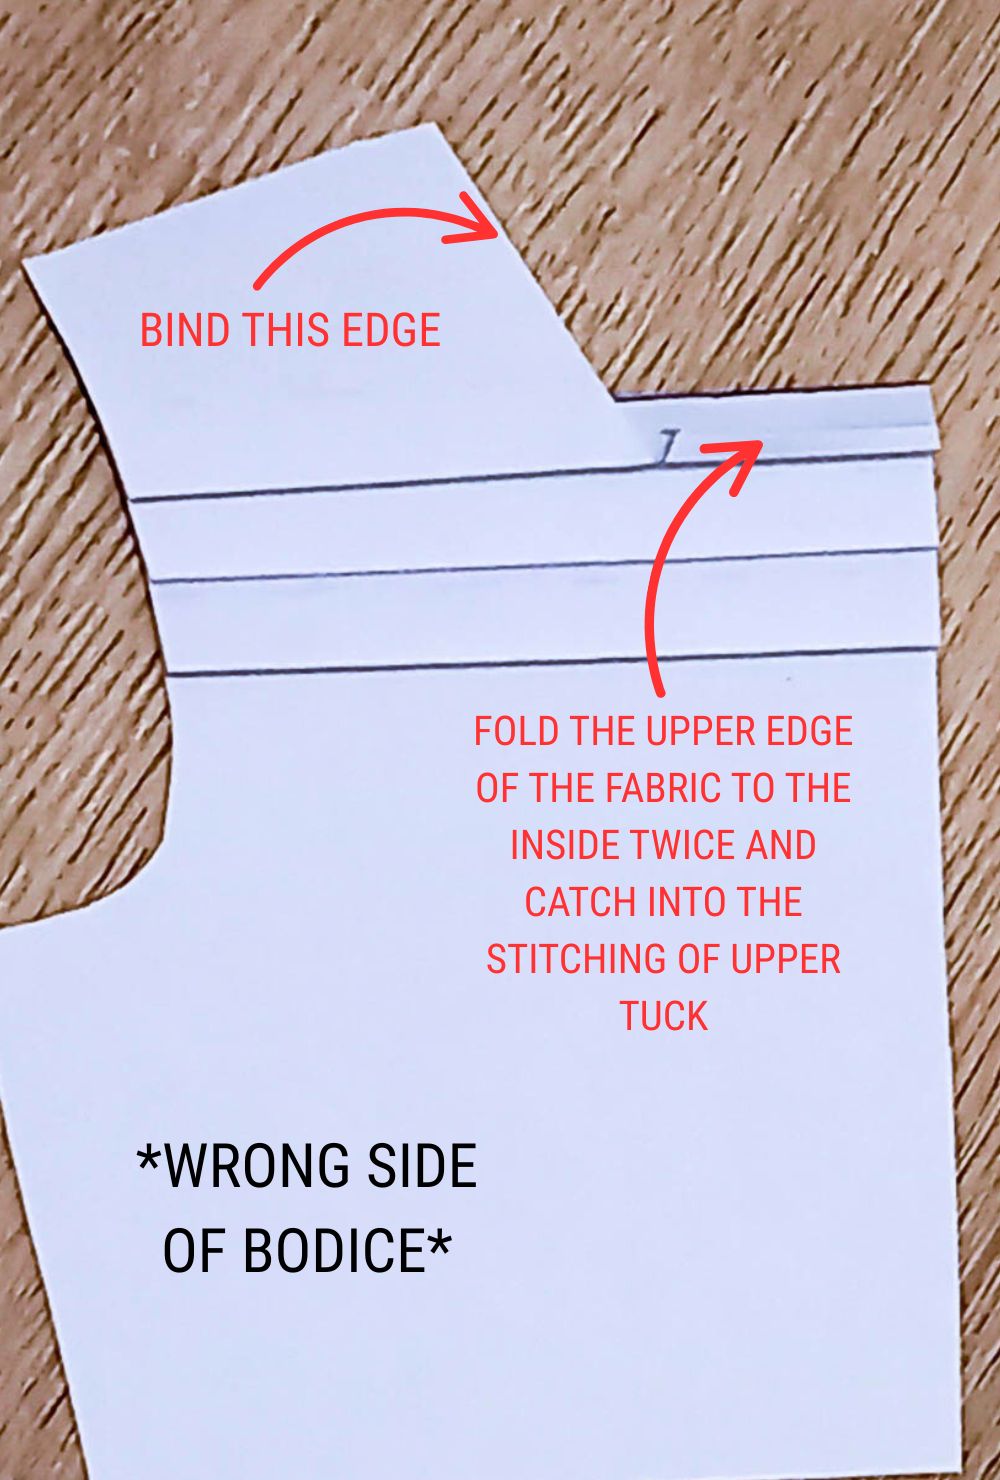
Creating the sleeve tucks was a similar process of folding the paper and then laying the pattern onto it to achieve the sleeve seam with the correct truing of the tuck edges.


My finished make is another of those ‘basics with a twist’ that I like having in my wardrobe. Just enough interest to make it not quite as plain as your average long-sleeved tee. And in a luxe fabric too 😉 …Oh, and in an on-trend colour, hehe. I love wearing brown and cream together.. It reminds me of a hot chocolate drink with cream on top. I think brown can also look nice with mustard, orange, aqua, or coral 🙂
Thanks for reading. See you soon!


Very inspiring, really like a simple-looking design for uplilfting a basic. Always enjoy your blogs.
Author
That’s kind of you to say thanks Karen 😊