
After last week’s more time-consuming sewing project, I was in the market for a quick make and this week I’ve created a cosy, cropped puffed-sleeve cardigan using the same BurdaStyle pattern as I used for this sweater It’s #108 09/2019
Because it has a plain front it was a really simple pattern hack to do, so read on for how I went about it.
Altering The Pattern
First of all, I folded back three-quarters of an inch down the front edges. Later on, this gap gets filled up by the button bands.
Next, I marked a point along the shoulder where I wanted the new neckline to begin and I drew a line from that point to just above bust level creating a v-shape.

For the back pattern, all I needed to do was to mark the neck edge on the shoulder line at the same point as the front pattern and draw across the back neckline shape using my pattern curve.
Finally, I created a pattern piece for the band. I simply measured the two front edges and back neckline for the length and made it 3” wide. And that’s it…onto the cutting out…
Making Use Of Fabric Leftovers
So long time readers of my blog with good memories might I remember the olive and off-white fabric. I first used it for my funnel-necked Burda sweater. It’s a polyester blend sweater knit and I won it for one of my photo entries when I took part in #SewApril about 18 months or so ago. It’s from LA Finch Fabrics.
I only had a randomly shaped chunk of it left after that first make, so straight away I had to be very, very inventive with cutting out. Let’s just say that many grainline rules were broken and a couple of compromises, plus rather a lot of muttering under my breath! It was a real Tim Gunn “make it work” kind of moment but I did it…yay me!
An Easy Sew?
The actual sewing up part is nice and straight forward for this design. Shoulders and side seams are sewn up first. Then it’s gathering the upper sleeves onto the lovely long, narrow cuffs. The cuffs were supposed to be completely double fabric up to the top but my fabric shortage meant that I just had a regular hem at the bottom and single layer where the top piece attaches.
Before sewing the sleeves into the armholes I reinforced the corner junction of the armhole with a strip of iron-on interfacing. I love this armhole design with the dropped shoulder seam combined with a regular underarm shape.

I did a quick try on of the cardi before I stitched on the band and at that point, I realised I could have done with a bit less width across the back.
Things then proceeded to go a bit wrong…
I created a centre back seam to take a bit in and I *thought* that I had it smack bang in the middle…but alas it was wonky, going off to one side…ugh! So what did I do? Well, I created a faux second seam next to the first one that angled towards the other side and now I have a ‘design feature’! 🙂 Lol!

Then guess what I did? I accidentally nicked the fabric with my shears on the front just as I was snipping threads. Aaargh! Thank god for patterned fabric that hides a multitude of sins. A quick darn and a dab of Fray Check and all was well.
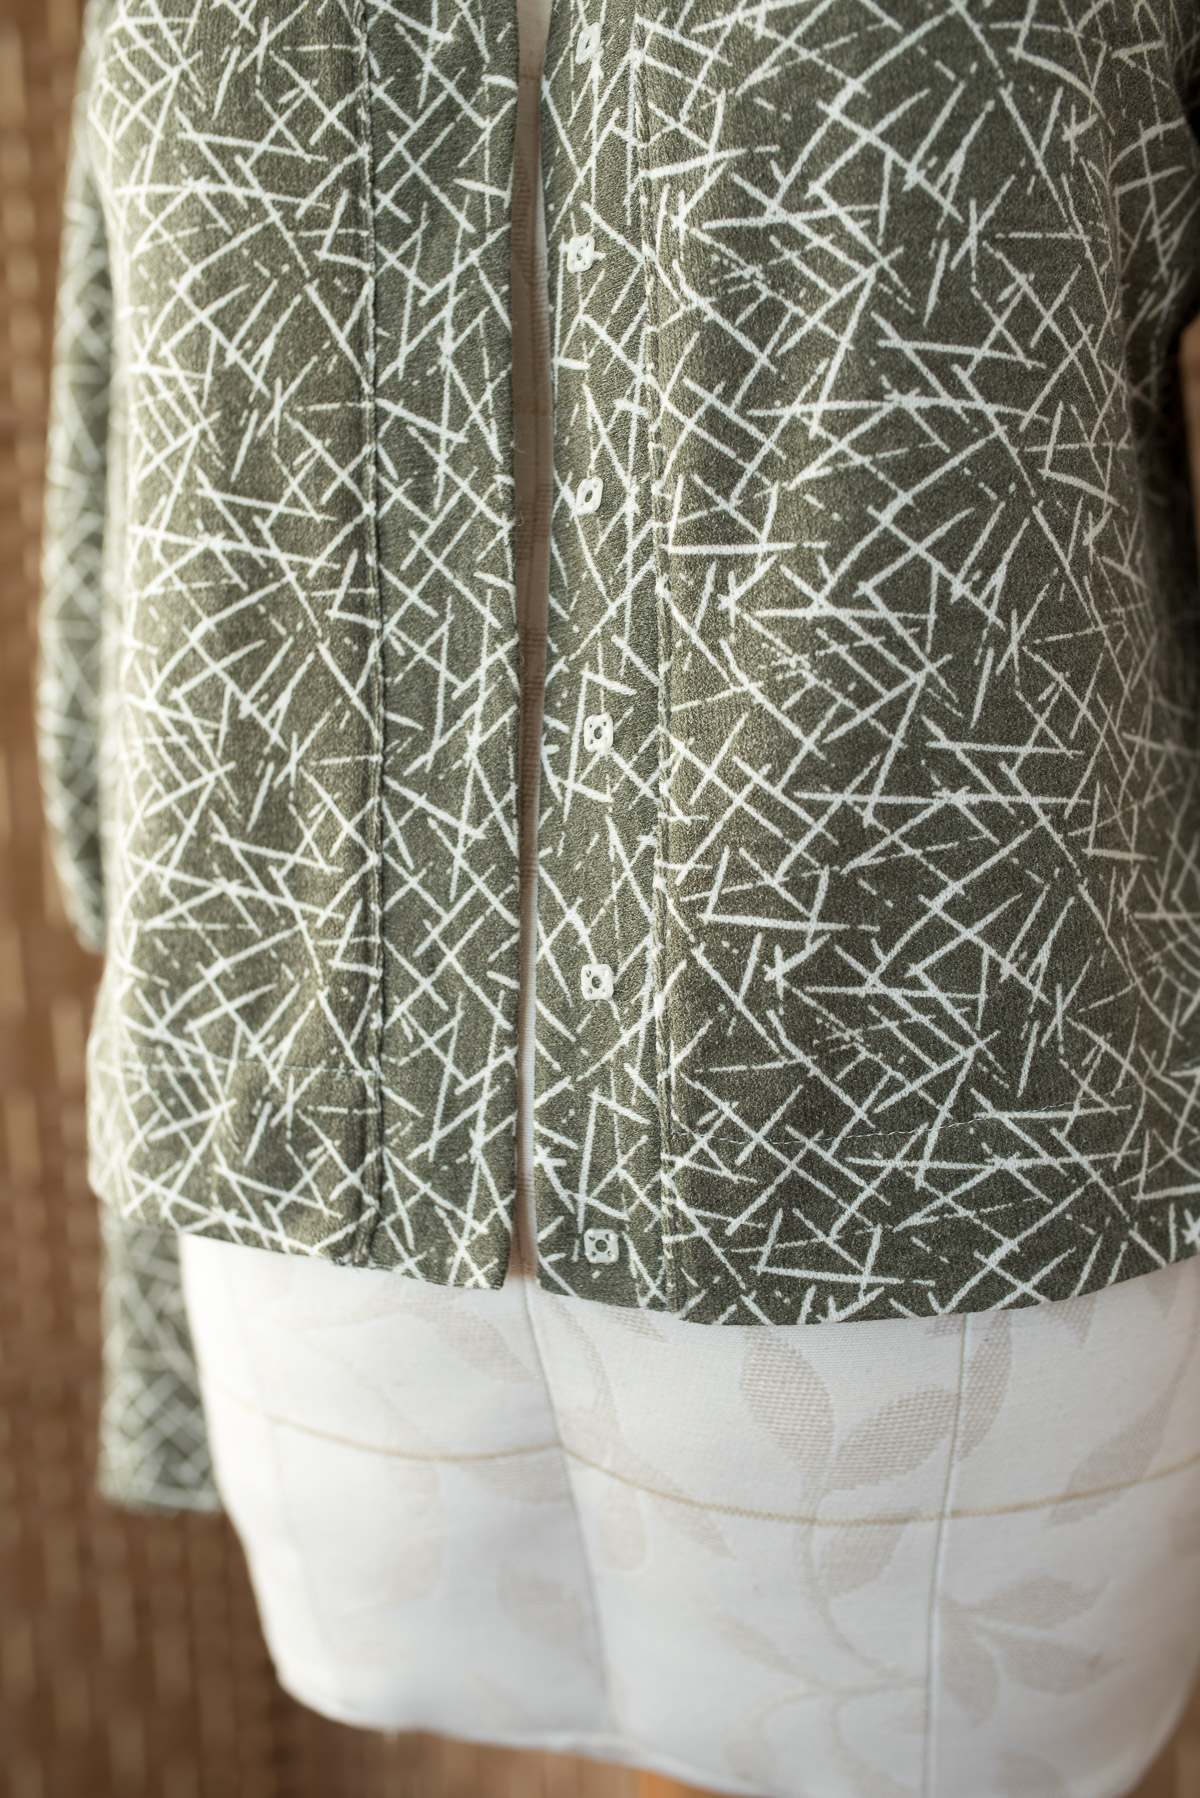
After sewing up the hems and attaching the long neckband it was finally time for some means of fastening. I didn’t have enough of the right colour buttons and after my series of mishaps, perhaps buttonholes weren’t advisable anyway…haha! In the end, I just stitched on some plastic poppers and I actually like how you can barely see them amongst the off-white bits of the pattern and they make for a nice clean look on the outside. I can always create buttonholes at a later date if I change my mind.
Although I seemed to feel a bit thwarted at every step of this make, everything turned out fine in the end and I’m actually really chuffed with the finished cardigan. It feels extremely comfy and fits like a dream (if I do say so myself 🙂 ).


I do love a happy ending, don’t you? However, I hope the sewing gods look down on me favourably for my next sewing project and that it’s without drama…hehe.
Have you had any similar things happen to you? Please share in comments so I don’t feel so daft and we can commiserate.
Thanks for reading…see you soon.

Pin For Later


I just did the shoulder seams in a jacket for about the tenth time. I can’t do it too many more times as the fabric is going to fray! Finally one shoulder seam is okay. The second one I have all pinned and it looks okay. I am really tempted to take tiny firm hand stitches to secure it, as the problems with this project seem to begin when I take it to the machine, everything wants to shift! Also I found a moth hole in the front of the jacket, I admit it has been in the UFO pile for a while because I was so frustrated with it. The good news is that the moth hole is in a place where a button and button hold wouldn’t look stupid. So instead of the one button fastening, this jacket is going to have three so that I can work around it. There! Feel better? Just think: if we never did anything, we would never make mistakes and do daft sewing maneuvers! Onwards and upwards and I do enjoy your blog. All the best and keep safe.
Author
Ohhh, Susan…I feel for you. Absolutely right, we just need to keep going mistakes or not and we learn along the way. And actually, hand sewing is great for ensuring good control of fabrics, so perhaps go for it with the other shoulder? Good luck with the rest of it and thanks for the kind words x
I really like this and especially the designer detail at the back 😀
Author
Hehe, great isn’t it? Thanks, Vicki!
Great job, Diane! Your sweater is a triumph of will, and none of the boo-boos show themselves! Your funky back seam is a really funny error, yet superbly corrected: it really is an interesting back detail in the finished garment.
I have only nicked a garment once when trimming: fortunately, it was an interior casing of a drawstring waistline, so I repaired it just as you mentioned. I really couldn’t believe it at the time! One spends a lot of effort in the making, yet damage was so quick!
Author
Thanks, Joan! A triumph of will…you bet! I was not going to be beaten…lol! And just like you, I couldn’t believe how in a split second the scissors had caught the fabric.
Hi, looking good, Diane! Very attractive, I like that fabric and your hacked style. Are there closures on the long cuffs? They don’t look large enough for hands to fit through otherwise?? Thanks.
Author
Thanks, Heather! You’re too kind. Right, the cuffs…well, I have teeny tiny hands and very small wrists. However, the fabric also has a really good stretch to it. I took them in from the original cuff pattern which was too wide for me.
You triumphed in the face of all that adversity! I love the sleeves and the fabric you chose is rather lovely too. Bravo!
Author
Tanks ever so much, Sue. Yes, I beat the odds and got there in the end 🙂
I really appreciate your clear instructions on how you altered this pattern I also love your honesty on the little accidents that happen when we sew. It looks really nice on you and was worth all that perseverance and effort.
Author
Thank you, Helen! I’m glad my post was helpful…and enlightening 🙂