
An online sewing pal saw a photo of me wearing this lace skirt recently and asked that I might blog about how I made it…so your wish is my command! I actually made the skirt about a year ago, and being a dressier sort of item, it’s only been worn a handful of times for nights out. The method I chose to make my skirt is by no means couture, but it works for me and makes for quite a simple project and I thought I’d share my process for you.

So the lace in my skirt is polyester and whilst very nice quality is not like a weighty Guipure lace made of natural fibres which would need to be treated differently as that sort of fabric could sag down using my method..
I started with a basic pencil skirt pattern and my lace fabric which had scalloped borders all the way down each side plus a really nice quality thick lining fabric.


Firstly, I cut out the pieces rather roughly and bigger all the way round than each pattern piece in both lace and lining. On the lace fabric, I laid my pattern pieces sideways on in order to use the scalloped edge at the hem. In this case, I had to trim around the scallop shapes to reveal them….I carried on as follows:
Stage 1: On the lower edge of the lining I stitched a very simple hem on my machine.
Stage 2: I placed my scalloped lace edge over the lining hem so that the curves showed below the edge….Then I basted the pieces together and on the lace side, I carefully machine stitched the two layers together across the hem. You’ll find that the stitches disappear into the lace.
Stage 3: With the two layers now joined at each hem decide on your finished skirt length plus seam allowance at the waist.
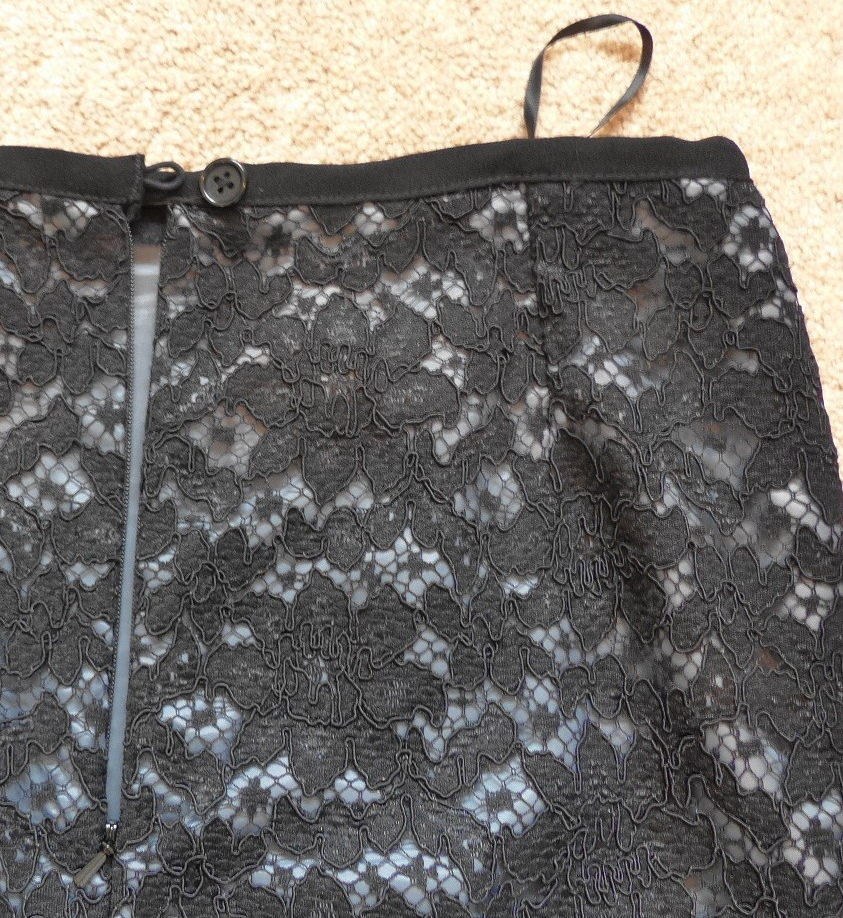
Stage 4: Pin the layers together along the waist and sides, cut out the pattern pieces properly as if one layer. Then baste layers together all around the top and side edges.
Stage 5: You can now make up the skirt as though it’s just one piece of fabric. Mark and stitch darts, put in a back zip and stitch the sides down.
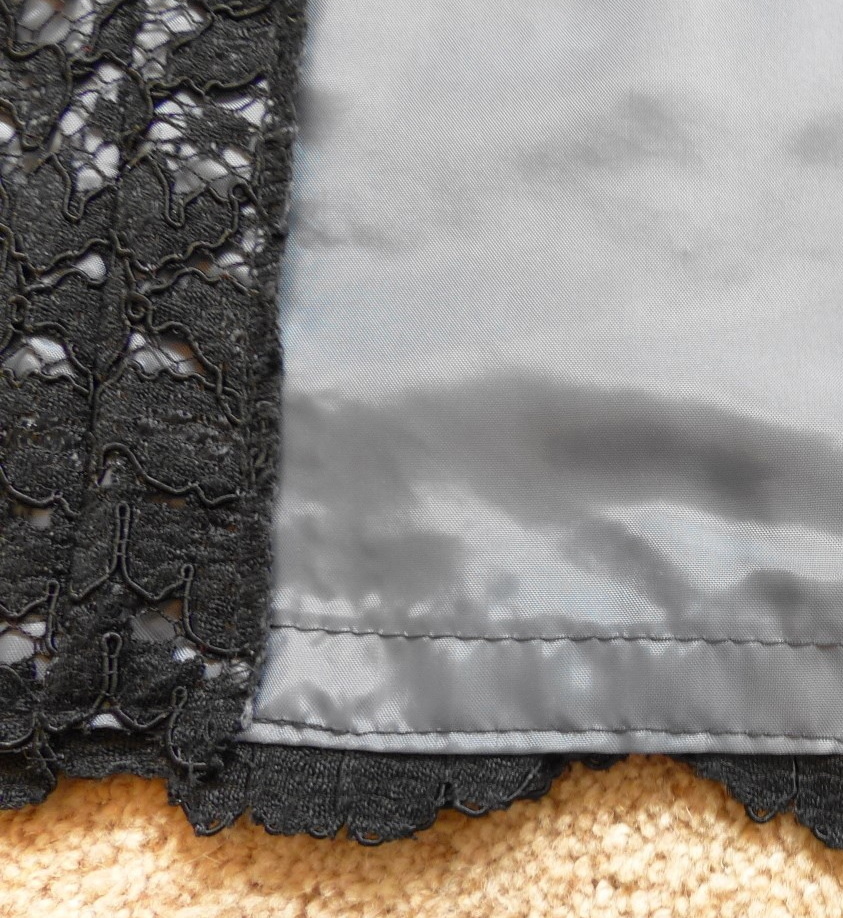
Stage 6: Seam neatening. I just overlocked my seams but it would also be lovely to use a lovely seam binding for a pretty inside finish. Also at hem level, I just folded under the side seams at an angle and anchored them down with a stitch to look neat.
Stage 7: I just did a simple binding along my waistline and used a button and loop closure.
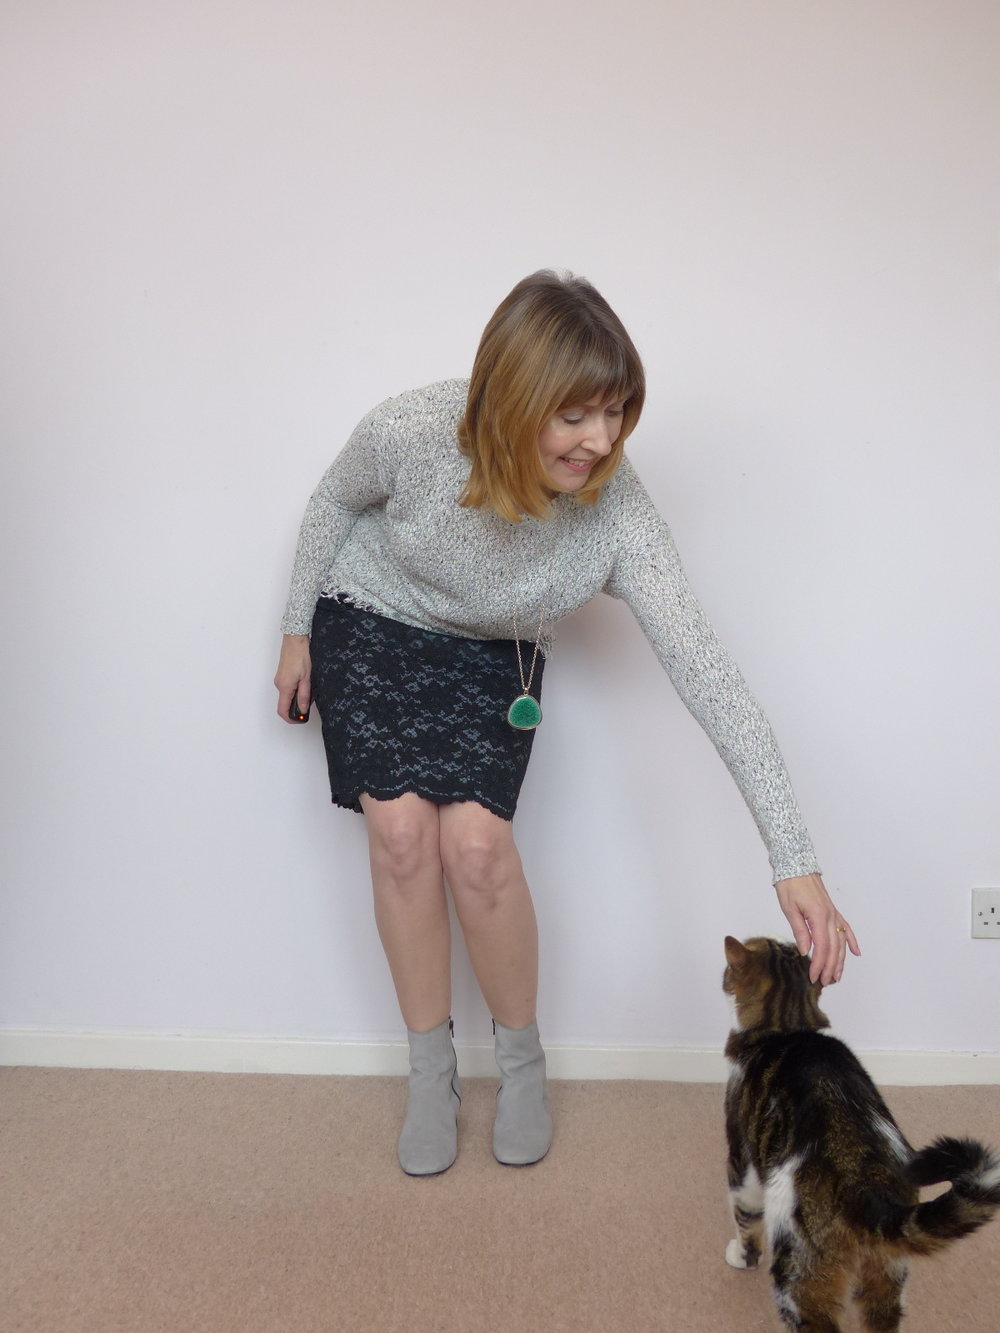
And there you are, all done! Quite a simple finish and with lining built in. I hope you like my easy lace skirt.
‘Til next time, bye…
Pin for later!


Thank you, for this post! Lovely skirt!
Thanks for stopping by Camelia. I’m pleased that you like my skirt!
Thank you for posting this! I would have never thought to make the skirt like this, but now I’ll have to put it on my list of techniques to try!
Cheers Karie! It works best on a non stretchy/saggy lace and if you want extra body you can add a separate addtional lining too, though it’s not essential.
Thank you for this post Diane. it´s a lovely skirt and you´ve shown how it can be quite a simple project. I love to read about how things are made.xx
Thanks Suzy, I had hoped to show that you don’t have to use really complicated methods to achieve a nice finish, so I’m really pleased to hear that you approve 🙂