
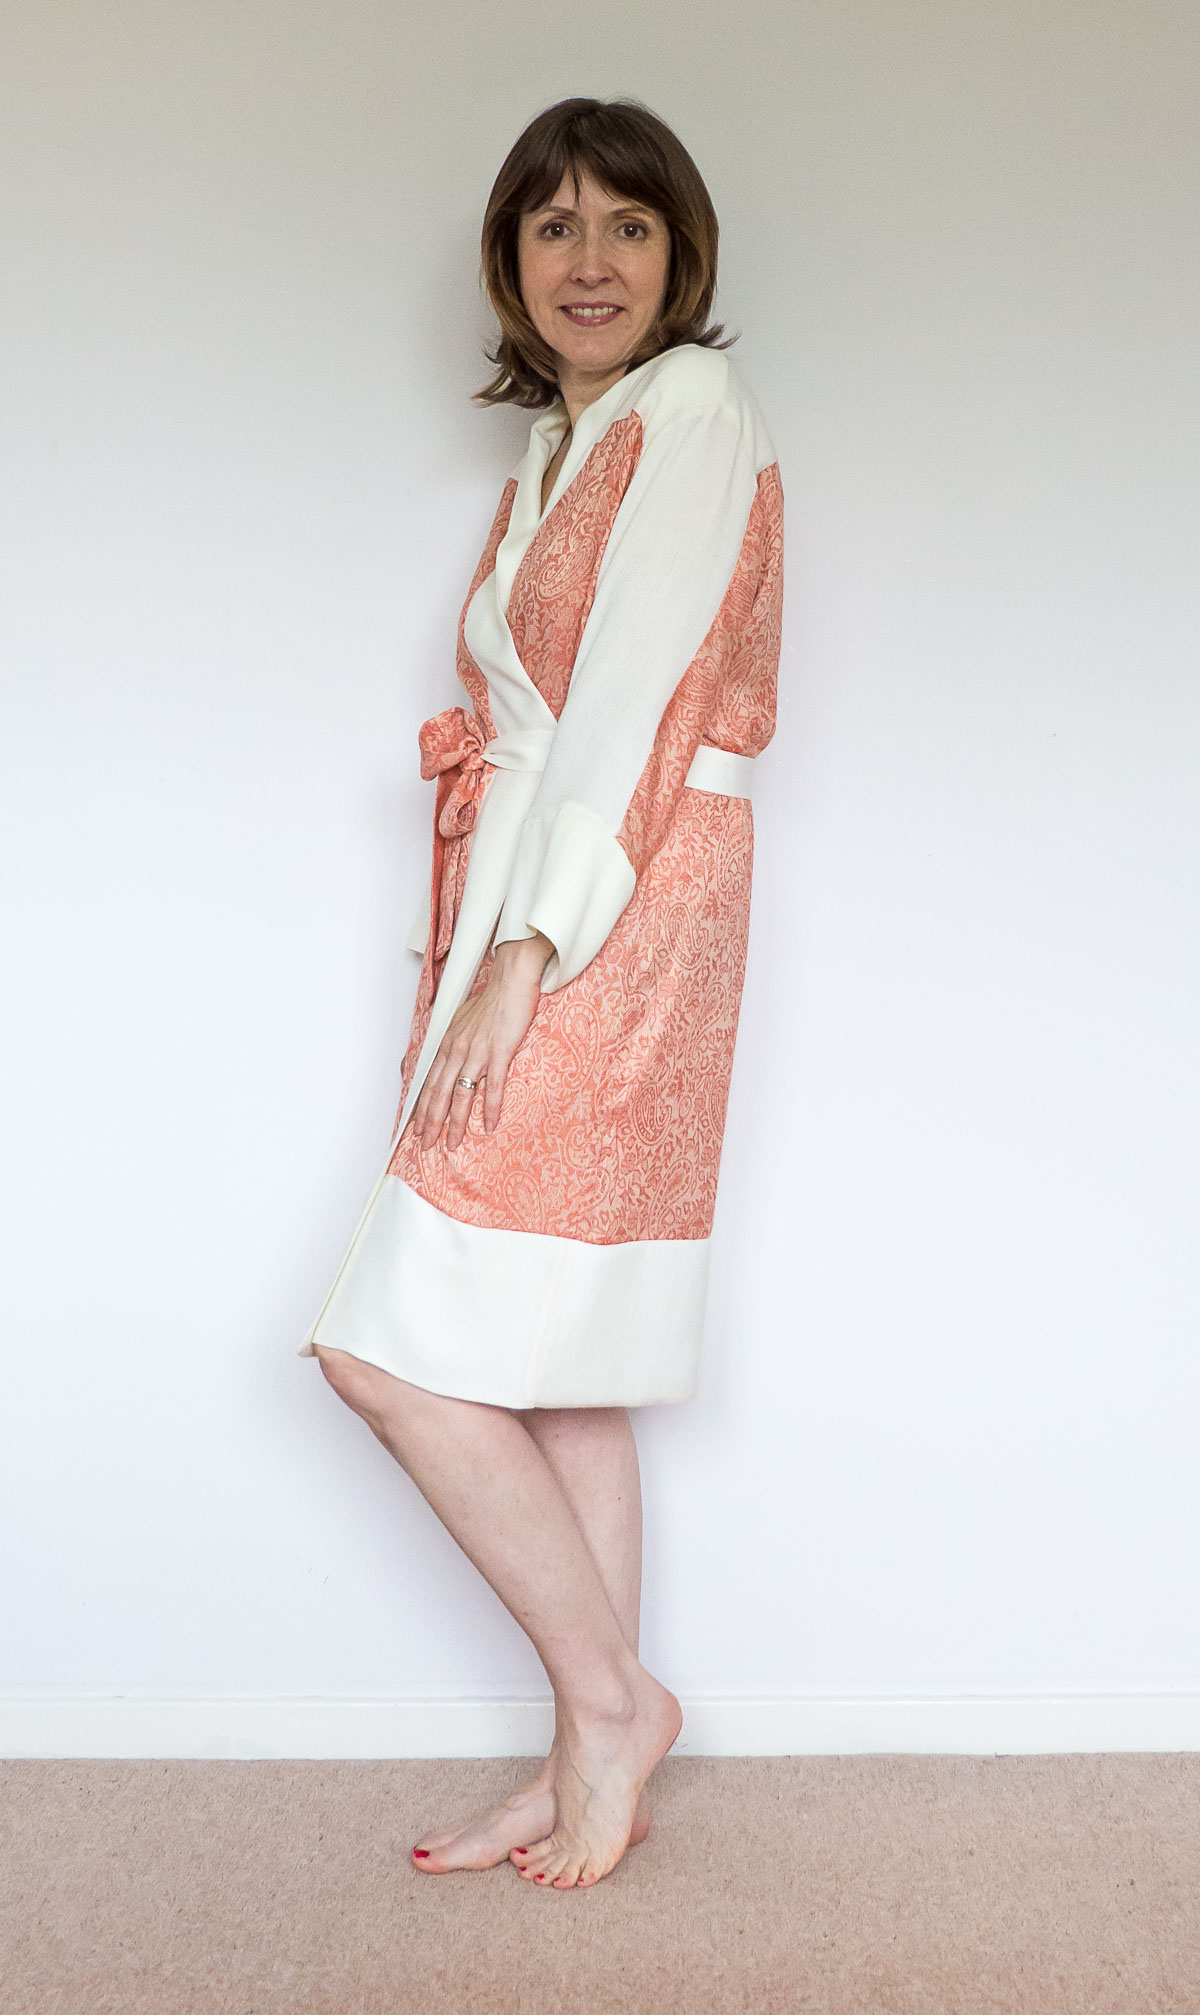
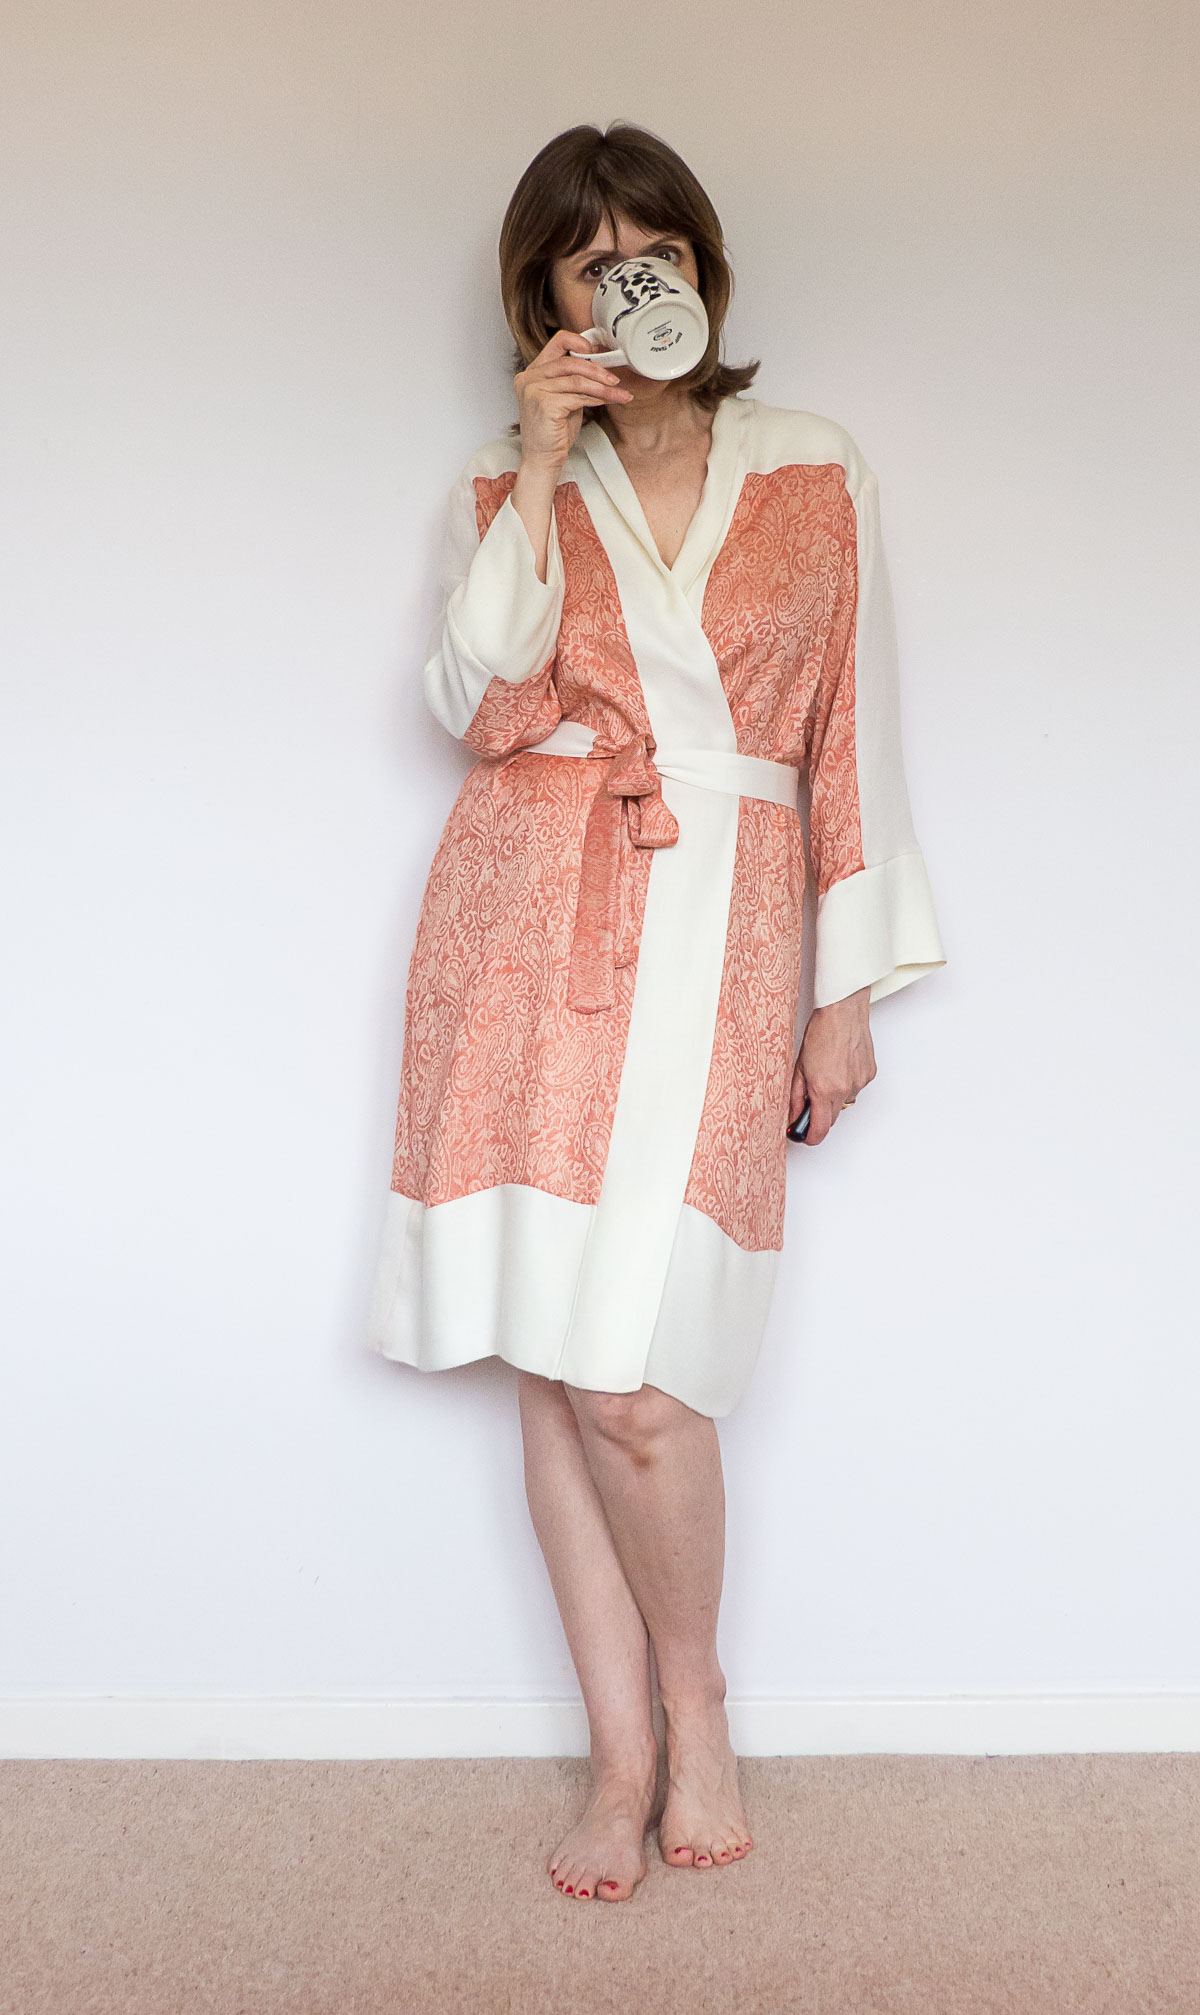
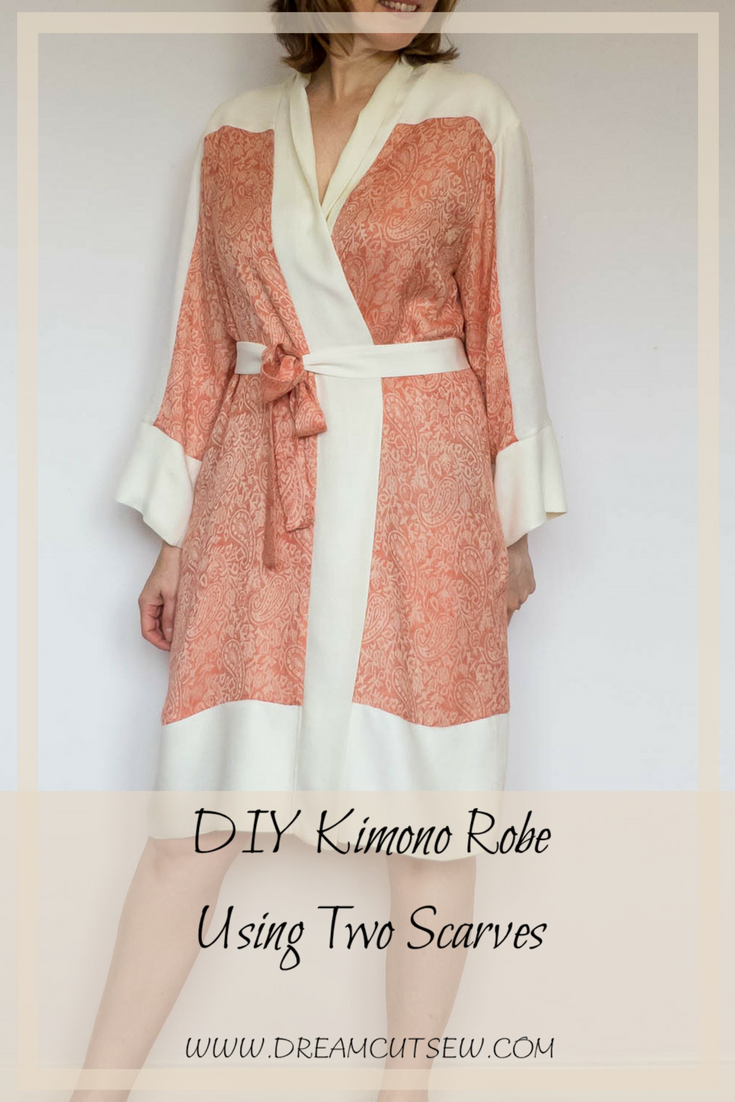
In my last post, I mentioned a few sewing plans for the coming weeks and I told you that a Summer weight robe was next on my list. Well, I like to keep my word, so as promised, today I’m sharing with you my DIY kimono robe using two scarves.
A Wardrobe Gap
I already have a couple of cosy dressing gowns that I made up in warm fleece fabric last year, but obviously they are way too warm for the Summer months. We’ve been having gorgeous weather in the UK…though as I write it’s due to get cooler… so it became clear that I needed something lightweight to pop on over sleepwear for when I lounge around in the evening after my shower and when I’m eating brekkie and prepping packed lunches every morning.
The Search
Initially, I started surfing the internet, browsing fabric sites but nothing really appealed and I didn’t really want to pay too much for fabric to make a robe with. After giving up the search for a while, I started putting away clean laundry and as I popped a few things into a draw, there they were staring right back at me….two large scarves in lovely colours and the softest viscose….perfect! Both scarves had been given to me by a good friend about a year ago, but lately, I’ve been wearing scarves less and less, so what better way to still enjoy the lovely fabric than to re-purpose and to make something with them. I must admit that I held my breath as I checked how big they were and breathed a small sigh of relief when they turned out to be maybe over a yard long (1m) and about 30” or so wide. I figured that some piecing and blocking was the way to go.

The Pattern
The pattern that I used was Butterick 6258 and is the one I used for both of my fleece dressing gowns. It was a freebie that I picked up off the swap table at Sew Brum last year. It has a loose cardigan, skirt, plain pull on trousers and a simple sheath dress or top. The cardigan has wide bands all around the neckline and front edges and I cut it out on a size bigger than my usual so that it created enough width to wrap over at the front.
Pattern Tetris!
As you can imagine a considerable amount of Tetris, combined with head-scratching ensued to fathom out how to get the whole robe cut out. I created front and back yokes, deep hem borders, central sleeve panels and deep sleeve cuffs. The back yoke had to be lined in another fabric and so did the back lower hem border. I also had to make most of the belt in a different fabric (it’s a lighter cream shade but just about works) and the belt ends were literally cut from slithers of the peach fabric….talk about scrap busting!
This diagram shows roughly the layout that I used. I didn’t really pay much attention at the time so I’ve racked my brain to try and remember the key parts.
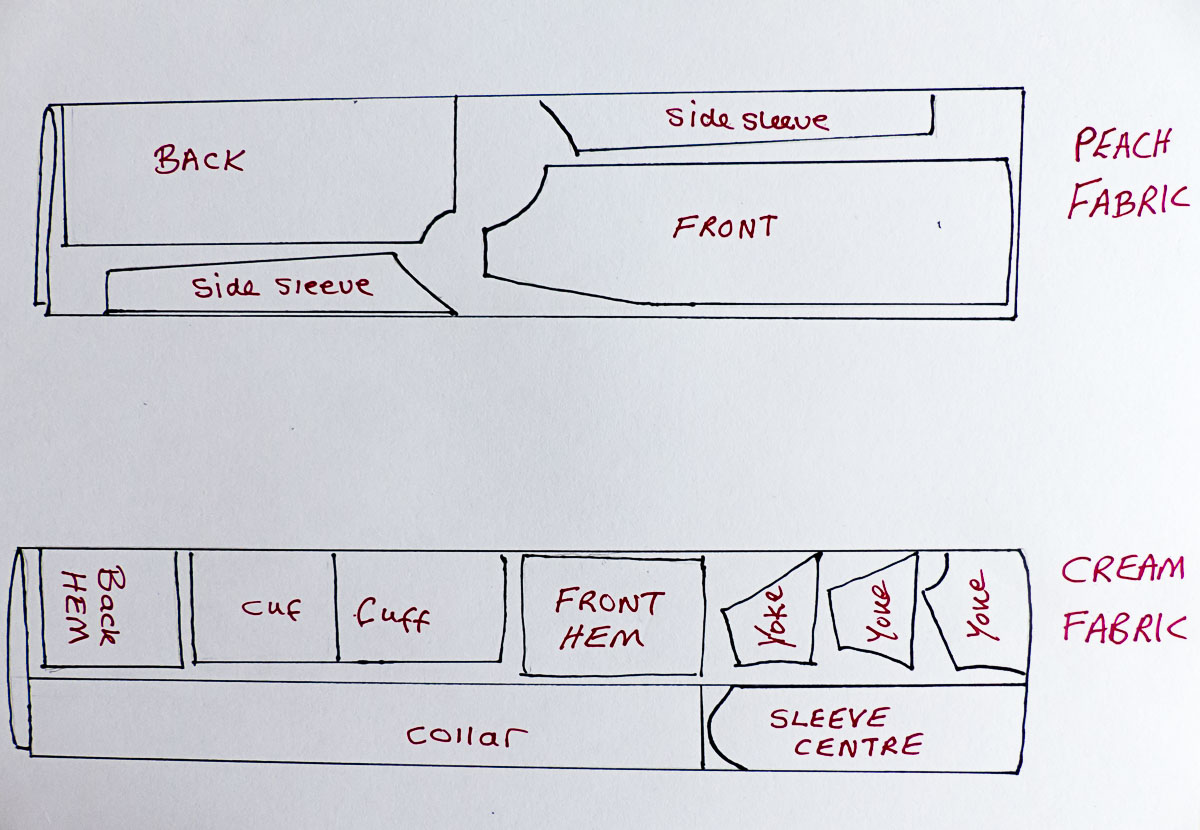
Yokes and Sleeve Panels
Now, in order to make the pattern pieces so that yokes and sleeve panels line up nicely, I used the dot marks that indicate the sleeve head easing markers as my matching points.
On the front and back body pattern pieces, draw a horizontal line level with the sleeve dots. Trace off the top section adding a seam allowance along the line you drew. These pieces are now the yoke patterns.

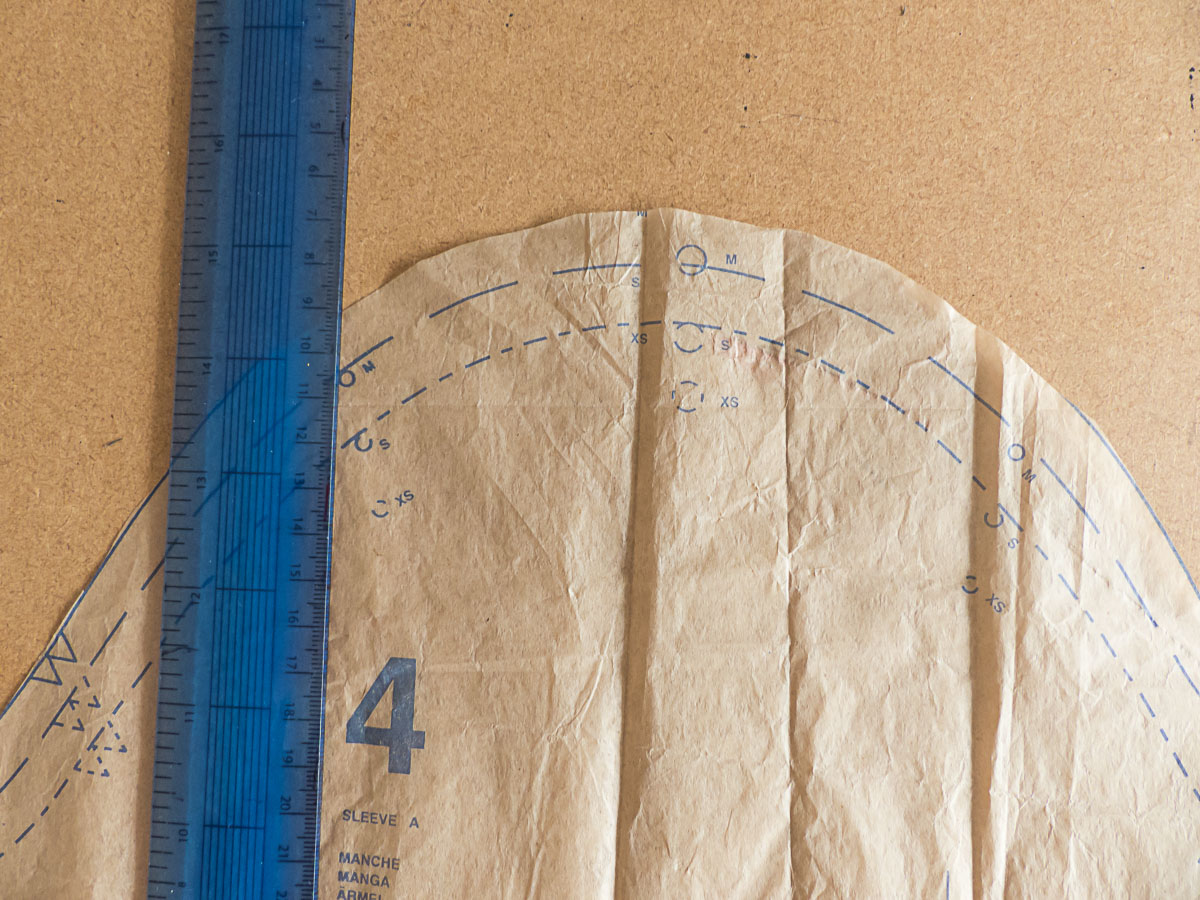
On the sleeve pattern, I drew lines down vertically from the sleeve head dots and then traced off the centre section adding seam allowances.
To get each side piece just fold the pattern back allowing for seams and cut two of each side piece. The same goes for the lower body section of back and front…just fold back next to the pencil line and allow for a seam.

Cuffs and Hem Borders
The finished length of my robe and sleeves was determined by the restricted amount of fabric. I just cut borders as deep as the amount would allow. The sleeve cuffs are simply double thickness, folded at the hem and so is the lower hem border (as I mentioned above, I had to use a different fabric for the inside of back hem). The collar band is also double fabric.
Easy Sewing
I stitched all of the seams using my overlocker set up with 4 threads. The front and back body sections were sandwiched between yoke pieces and then the shoulder seams stitched afterwards. Sleeves were put in next and then side seams and sleeve seam all in one go. Hem borders and cuffs were next and finally, the long collar was sewn on. The belt was made with the leftover scraps. I think it’s safe to say that I didn’t waste a thing with this project. All that went in the bin was the teeniest slithers.

Now that I have my new Summer robe I feel like I should be sitting decadently on a chaise longue wearing fluffy mules and sipping on an iced tea… sadly the reality is I’m wearing rubber gloves with my sleeves rolled up wiping the kitchen surfaces down….oh well…I can dream!
Next time I hope to share my first Burda make as one of the Influencer team. Stay tuned for awesome culottes….
See you soon!
PIN FOR LATER!

Simply inspiring. I gave some beautiful large scarves purchased from overseas many years ago. Like you li don’t wear much now. Fantastic way of recycling into lovely wearable items. Can I ask when you overlock how do you finish off your threads as I want mine to look neat but invariably they don’t. I finish up cutting the threads and then threading back into the down line. Any help would be appreciated x
Author
Thanks for the lovely comment, Sarah. You should definitely hang onto your scarves. I’m looking at mine with fresh eyes now since doing this. with regards to neatening overlock thread ends…I’m afraid I don’t really have a magic formula. Sometimes I tweak out the end threads to separate them and I simply thread them through a needle and stitch them through between the fabric layers as neat as I can manage. In the case of my kimono where I’ve stitched the collar right through hem …what I’ve done is press the seam to one side and I’ve hidden the tails of overlocking behind it, then I stitched a row of topstitching down to hold the seam back. This keeps it all hidden away.
I put the serged tail through a large darning needle then weave that back through the stitching at the end and drop a couple of spots of fabric glue on it. They’ll never come out 🙂
Author
Great tip…thanks Kathleen!
What a fortuitous find in the drawer! I have made quite a few things from scarves and have some winter ones malingering in the stash. I hadn’t thought of using them for a dressing gown, what a genius idea! It’s gorgeous too. Love the colours.
Author
Thanks, I’m glad you like it, Sue. Great minds think alike eh…scarf fabrics can be lovely to work with.
It’s always a good feeling to use up nice garments that are unworn and repurpose them into something useful. And what a great useful gown you have made, even if you do still have to do the everyday chores in it! That’s life, sigh…
Author
It is a good feeling Sarah Liz. I don’t like to waste things so it’s really satisfying to make something useful
What a beautiful robe Diane (I’m having some serious robe envy here 🤩). I love how you made it work with the two scarves. These kinds of projects always give us a satisfying feeling, don’t they? xxx
Author
Aww, thanks Wis. I’m so pleased you like it.
Beautiful Kimono robe! Viscose and rayon are so cool in the summer months! I’m just making up the new Kimono by Deer & Doe in a denim tencel to wear around when I want some coverage from the sun and wind. I have another couple of kimono patterns that I’m eyeing to make up in silk as well for a dressy occasion. I’ve discovered the wonder of kimono so when I saw your post I was keen to see what you did and love it!
Author
Thanks so much Kathleen. I’m feeling the same about kimonos now too! One in silk will be divine!
Such a beautiful robe! This color looks ever so lovely on you. 🙂
Author
Ohhh, thanks so much Lisa xx
Lovely! Such a clever way to make a couple of scarves really useful!
Author
Thanks Linda! I love the feeling of not being wasteful and the fabric was to nice to ignore.
I love it! Great way to use beautiful items you don’t use that much anymore, and the colors are just delicious 🙂
Author
Thanks so much, Maria!
Oh my goodness, it’s so gorgeous! I love the fabric combo. I don’t have a kimono robe, but I would love to make like yours:)
Author
So glad you like it Eli! xx
Your kimono is gorgeous, and what a great idea to use the scarves!
Author
You’re so kind, thank you Lynne!