
Whilst browsing runway shows of the designers and trawling through Pinterest for inspirational images suitable for sleeve designs and Sleevefest I came across a couple of images that looked gorgeous and maybe even achievable. Two of them were from Valentino and the third from Cavalli. I adore looking at the beautiful workmanship of the top designer it’s like a piece of art…stunning.
The first image from a Valentino design is a barely-there raglan sleeve…more of a shoulder covering…in fact I found a picture of the dress back and it’s pretty much backless. Beautiful isn’t it?

I like to think that I can use the inspiration for a possible alternative to a raglan sleeve adaptation, so I set about trying to create something like it yet wearable for every day. I’ll go through the process of how I did it. Firstly, you need a useable pattern base and that means finding a fitted dress or top with a raglan sleeve. One such pattern is Vogue 8902 (no longer available) but I bet you could find others that are suitable


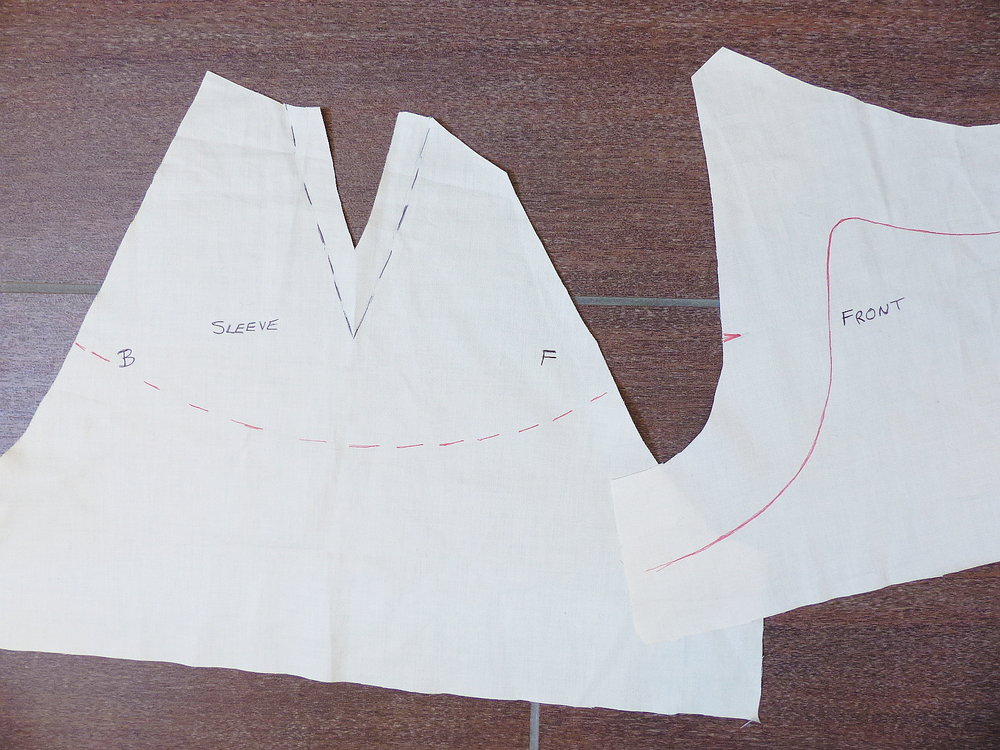
If you study the inspiration photo. You can see that the banded effect starts halfway up from the underarm. This means you’ll need a facing that goes around the armholes and underneath. I suggest you make a toile of the top of your dress/top and get a good fit around your arm and shoulders. Once you’ve done that you can start pattern hacking. In the next 2 photos, you can see raglan-style pattern sections of the front, back and sleeve. In photo 2 the armhole notch and red dotted line on the sleeve show the new shorter length sleeve and matching marker. I’ve also drawn a red line that indicates the armhole and neckline facing shape.

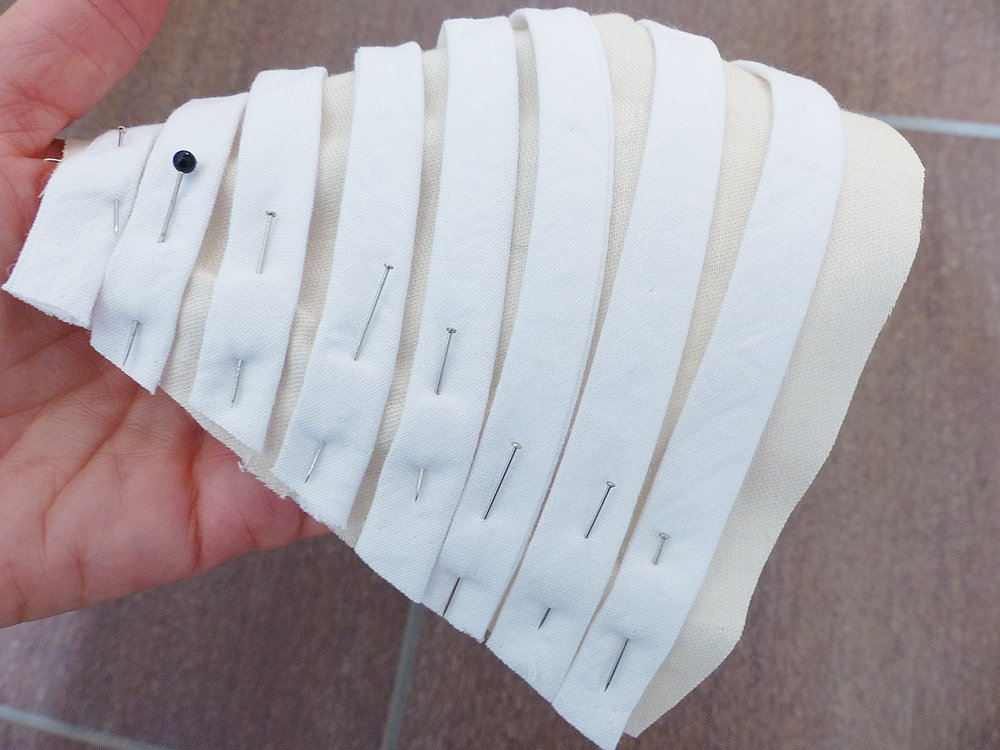
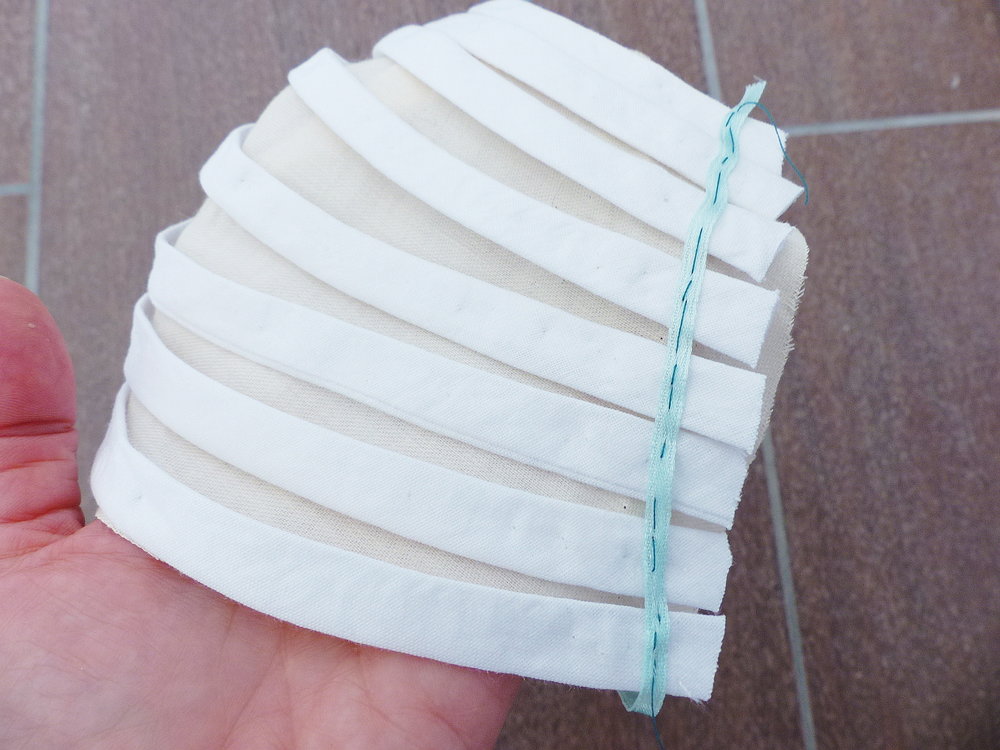
I made a length of bias tubing of about 1cm wide and cut it into sections. Using the little capped sleeve muslin piece as a base, I laid the tubes over and followed the contours of the sleeve. I pinned them in place and then used a piece of ribbon (seam tape would be better) and basted it across the tubes to secure them.

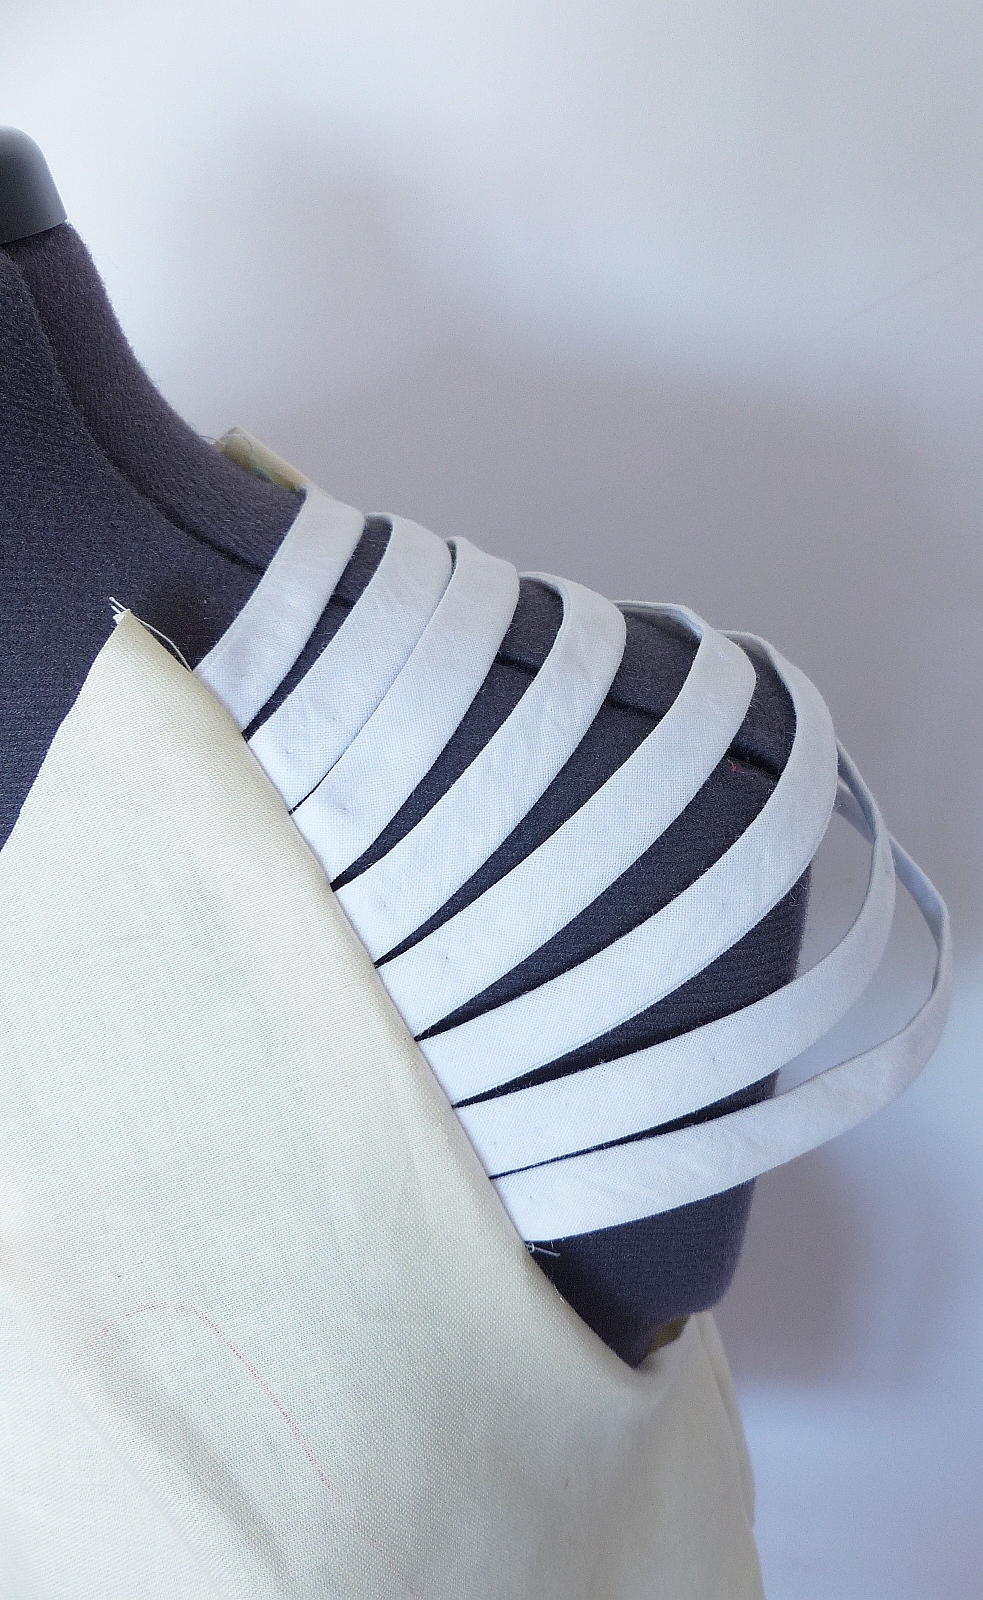
Finally, I unpinned the muslin piece and attached the banded section to the front and back bodices. My example is all in muslin fabric, but I’m pleased with how it turned out and I think it worked well. By wearing a bra with clear straps this look can be totally bra-friendly. Another idea would be to use a sheer sleeve base like chiffon underneath the bands. You could stitch the bands in place onto the chiffon for a more structured effect that holds the bands in place. Wouldn’t that be pretty too?

The next designer details I want to talk about are fluted cuffs. Very on-trend and give a nice feminine touch to a sleeve. I love the delicate sheer version in the photo at the top of this post…again by Valentino, and I can see this working on a short sleeve top. Any fairly lightweight to the sheer fabric would work well with a fluted cuff. A basic straight sleeve pattern will be perfect as a start point. Try it short, elbow-length or even soup dipping full length…ha! Or how about a double layer like on this sleeve by Acne Studios.

A soft gauzy cotton would work well in that version. Another idea is to add the effect onto a shirt or blouse cuff like this gorgeous Cavalli one. Try Butterick 5526 as a start point.


On the photos, it looks as though there may be a bit of gathering of the flounce effects involved too I’m going to go through the process of making a circular flounce now, as shown on the sheer sleeve by Valentino, but if you want gathers as well, just make your circle shapes with a bigger circumference…
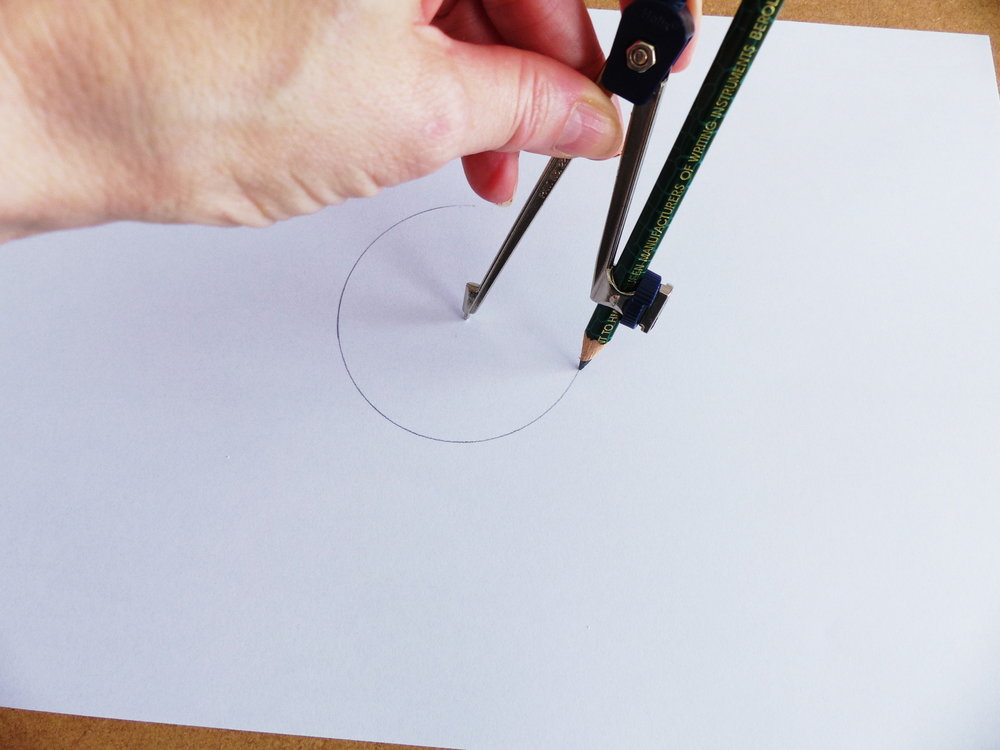
So, firstly, you need the measurement of the bottom of your sleeve or cuff including seam allowance. Once you have this you can work out the diameter and radius of your circle shape needed for the flounce. Here’s a great web page that allows you to find out the radius of a circle so you can make your own pattern….For instance… a lower sleeve edge of 22cm(including seams) generates a radius of 3.5cm and you can use a pencil and compass to draw a circle with it set at 3.5cm. Then decide on your cuff length and draw the second circle. Viola! You have your flounce pattern.
Alternatively, you can use a straight cuff pattern piece or lower sleeve section as a start point. Divide it up and spread it into a circle shape like this:… Draw a circle around it by connecting the sections and you have your cuff pattern shape.


To hem your circular cuffs why not try roll hemming with a roll hem foot on your sewing machine…or overlock around once and just turn up the depth of the overlocking stitches…or try my method for roll hemming using an overlocker as I wrote about here.
I really love getting inspiration from the top designers and I hope you feel inspired yourself to try one of these techniques too. Why not start off by practising in muslin fabric?
See you next time sewists!
Pin for later!


Thank you for this inspiring post. The first inspiration is absolutely stunning and as someone who never shows my back it is a no-go. But I can be inspired to make my own version. Thanks for that!
Author
Thank you so much Ghislaine. Your lovely comment means I achieved my goal to inspire sewists to try new things yet making them everyday wearable.
Love these, especially the first one! A really nice variation on off-the-shoulder style 👌
Author
It’s a bit different isn’t it Helen? I’m glad you like them 🙂
Hi Diane , I just discovered your page on Instagram and I love what you are doing here.
Author
Thanks so much for the kind comment Tobilola
I don’t know how you do it but ypu make it look so easy!
Author
Aww. You’re too kind thanks Monika x
Look at that dress with the strap-py sleeves and back! Sometimes these designers get it perfect!
Author
It’s a stunner isn’t it Linda?