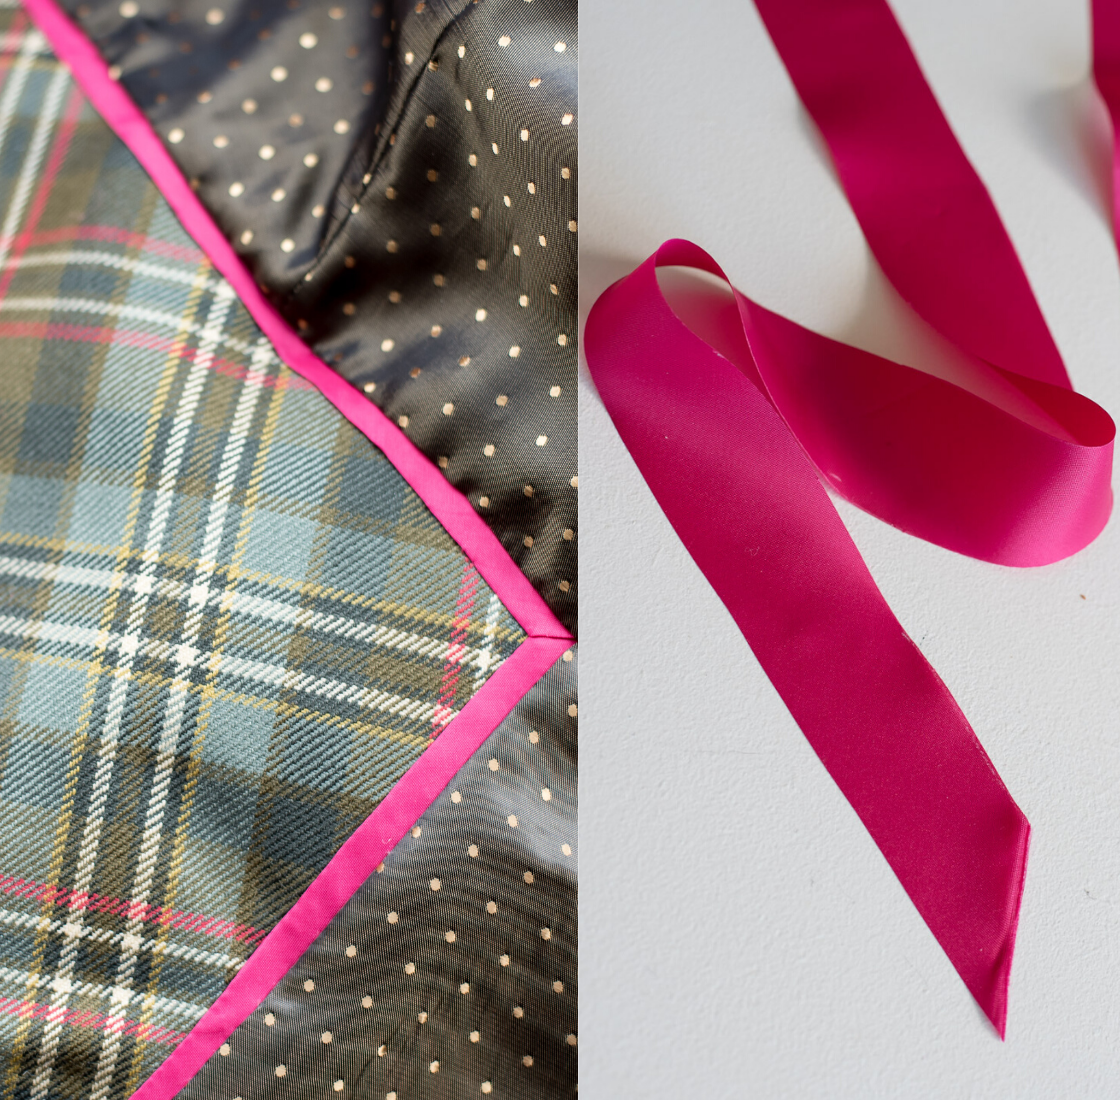
As I promised last week here is my tutorial for adding a bias insert detail to a jacket lining between the lining and facing. I love how it adds a beautiful finishing touch and really elevates the inside of a jacket. Why shouldn’t the inside be as pretty as the outside?:)
The late Paco Peralta (a fabulous designer that created many fab Vogue patterns) used this technique on his creations and apart from my most recent tartan jacket I’ve also used it on my drapey blush pink BurdaStyle trench coat which you can see here.
The method is very straightforward and I’m going to keep this post short and sweet so I’ve condensed my post into eight easy steps for you to follow, Read on for all of the details and lots of close-up pictures.
Tutorial To Add A Bias Insert Detail To Jacket Lining:
Step 1:
Cut several strips of bias fabric that are about 1 ⅝” (3.5cm) wide. I used a piece of ordinary lining fabric for my jacket insertion, but in all honesty, I think something a little heavier would probably be better. You could use scraps of silk, satin, cotton lawn or you could even recycle a man’s tie.

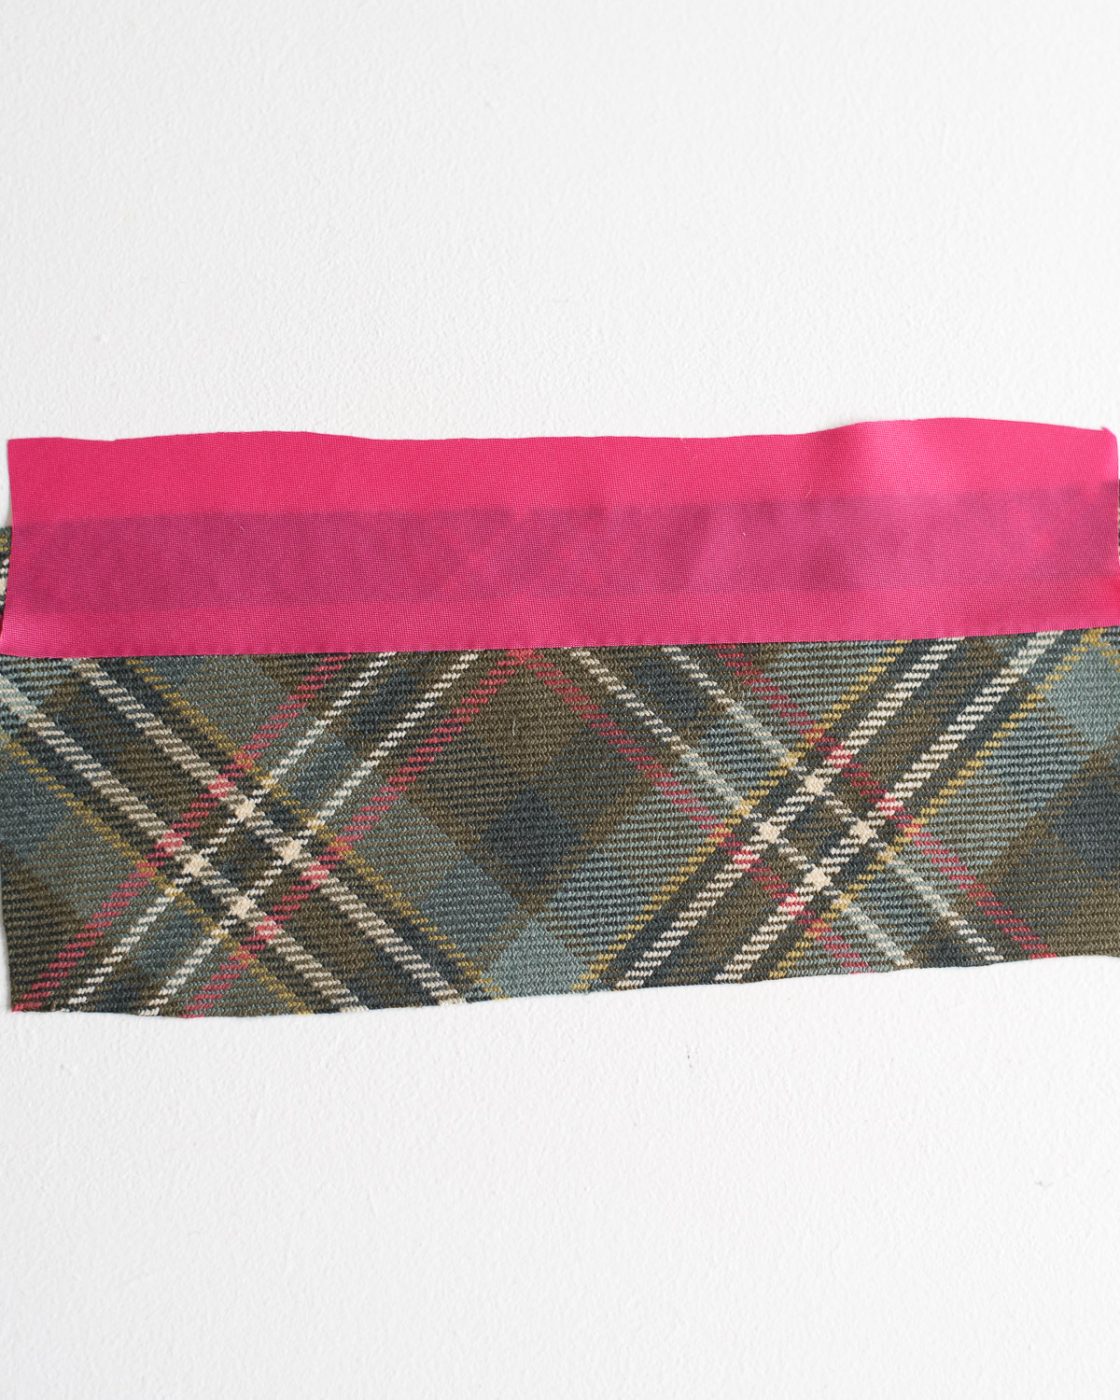
Step 2:
Pin the bias strips to the jacket facing with the edge of the strip a seam allowance distance from the edge of the facing.

Step 3:
Stitch the bias to the facing using the edge of your machine foot as a guide this should make your insert approximately a quarter of an inch wide or (half a centimetre).

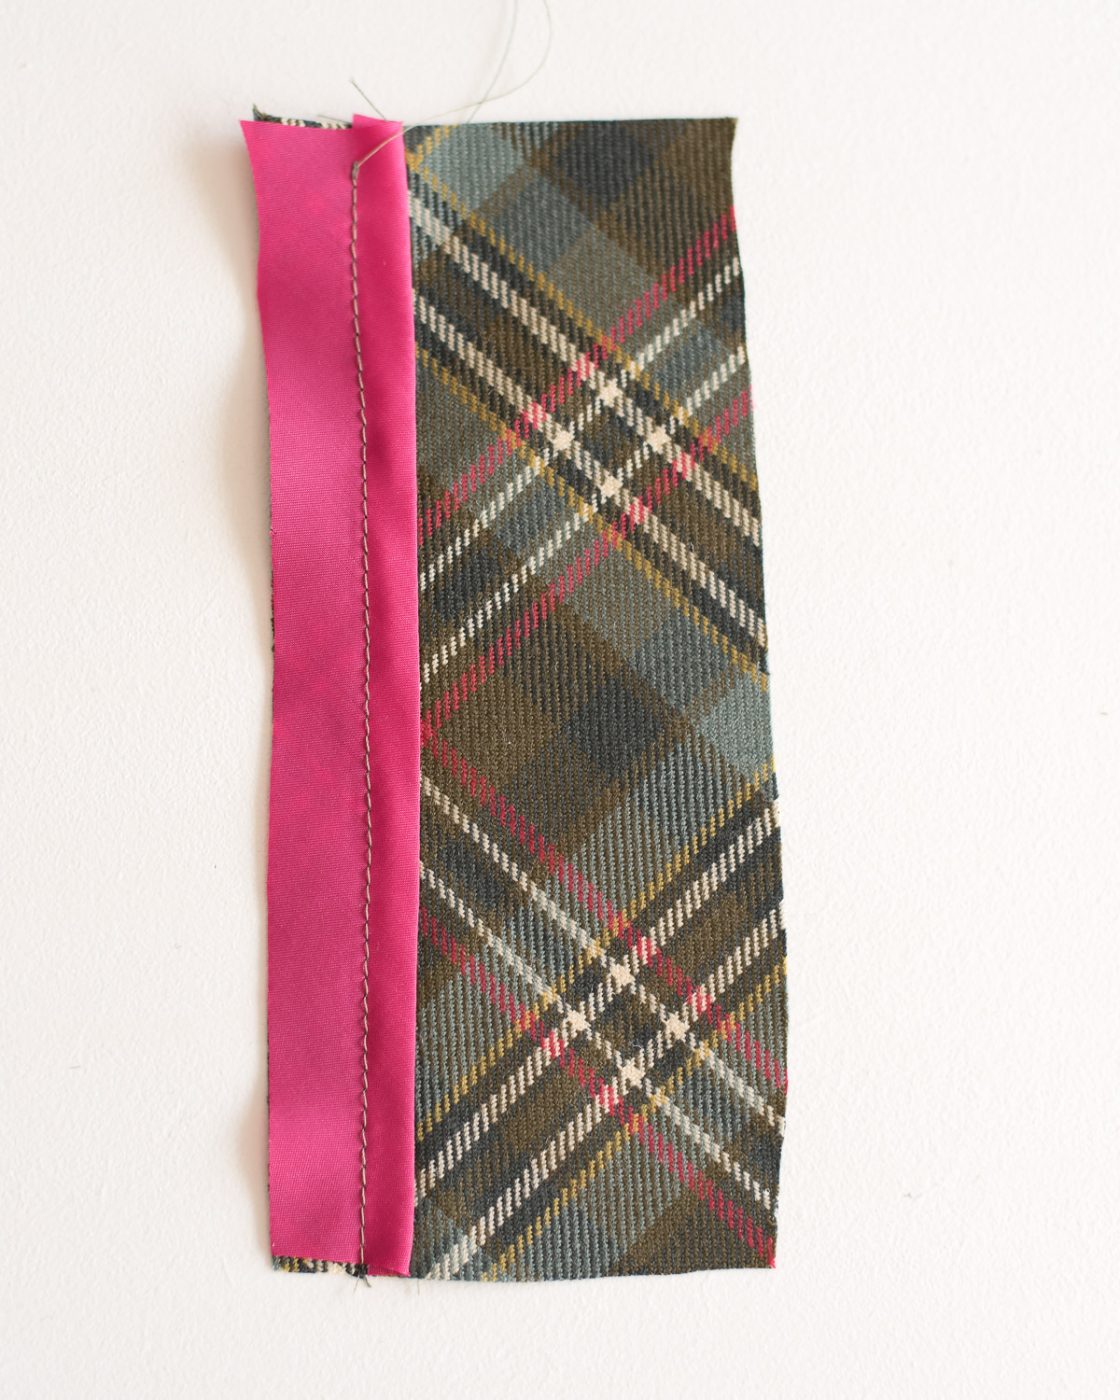
Step 4:
Press the contrast bias strip towards the edge of your facing.
Step 5:
Trim off any excess contrast fabric.

Step 6:
Sew the second row of stitching using the first one as a guide lined up with the edge of your machine foot…this will be approximately a quarter of an inch (or half a centimetre) from your first row of stitching. Press again before the lining is attached.

Step 7:
Pin the facing with the attached contrast piece to the jacket lining along the stitching line nearest to the edge.

Step 8:
Sew all the layers together following the outer stitch line but 1 mm over to the left of it.


Finally, give it all a good press and you’re done. Voila! Now sit back and admire your handiwork 🙂
I hope you found this useful and feel armed to go and make all of your jacket insides snazzy.
I’ll be back next week with a fresh make. See you then!

Pin For Later

Thanks so much for this tutorial. I have done a similar trim before on a jacket but not as neat and professional as this method. Love your jacket, it is such a masterpiece.
Author
And thank you, Vicki! Glad you find it useful. It really is a lovely accurate way of doing this kind of detail.
Brilliant! I must have a go at this.
Author
Thanks, Sue! It’s my favourite method for adding a contrast trim.
Thanks for doing such a great tutorial. I must remember it for when I need it.
Author
Fabulous, thanks, Chris!I’m glad it’s going to be useful.
Ooh! So straightforward yet clever! Now I need an excuse to try it.
Author
Ahhh, thanks Lia. If you try it out let me know how it goes!
I’ve just tried this on a jacket I’m making and -wow- it makes such a difference and gives a really professional finish. Thank you for sharing x
Author
Oh, that makes me so happy to hear that! I couldn’t be more pleased that you’ve tried it and love it. Thanks for the feedback x
Wow, that’s a great tutorial.
Author
Thanks ever so much, Sue!