
So I’ve been dying to tell you for aaaaages about my grey boyfriend blazer and a special collaboration with Clothspot. If you’re a regular reader of this blog then you’ll know just how many times I’ve used fabric from their website (here, here, here etc, etc…) In fact, it goes way back to the early days of my blog and even before then. I love their beautifully thought out good quality fabric selections at very reasonable price points. They’re a great team at Clothspot headed up by the lovely Alice who is an absolute pleasure to know. We could chat ‘til the cows come home 🙂
***This post is an advertorial with Clothspot. Please read my disclosure policy for what that means***
I was thrilled when Alice suggested that we put a special kit together for our collaboration and if you’ve bought from them before then you’ll know that kits feature regularly on their website.
This Kwik Sew blazer kit launches today. And this specific combination of fabrics that I chose for my own blazer is the “Clothspot by Dream Cut Sew” version. So if you want to copy me completely you can! Just choose this option from their website.
Well, enough of the introduction let’s get on with all of the details….
Fabric and Pattern:
My mid-grey Italian wool suiting called ‘Granito’ is actually ex Paul Smith. It’s fairly lightweight and drapey with a little lycra in it for comfort. The luscious pinky-red acetate lining is called ‘Electric Crimson’… and I love how it flashes when I walk 🙂
The pattern is Kwik Sew 3715. It’s a classic boyfriend style with various pocket options and is a really on-trend. In fact, blazer shapes like this were all over the runways for spring and summer. The pattern is included in the kit along with everything else needed to complete your project.
Kit Extras:
Alice and I decided that a few additional tweaks to the supplies suggested by the pattern were needed to make your soft tailoring project go without a hitch. Extras included the kit are:
- Fine knit interfacing to fully interface the fronts and hem allowances.
- Iron-on seam tape to reinforce armhole and neck curves
- Sleeve headers to sew in next to the shoulder pads for a lovely smooth roll line.
We really have pulled out all the stops for you 🙂
Pattern Preparations
I cut out a size small (the jacket is deliberately a little over-sized) and I did my usual forward rotating shoulders (I do see a little twist on my sleeve so my need to tweak my sleeve head rotation even more for my shoulders…) and high upper back alteration.
I felt that I needed a small FBA so I did one but I’d advise you to only do a modest amount (no more than a 5/8″ gap between the vertical slash lines), because the seam that you’re dealing with is a side-front one, so any darts will be short ones and if the dart intake is too big it will be too pointy and not gradual enough. You could curve your sewing line a fraction when you stitch your dart and literally let your stitches fall off the edge as you get to the point. It needs to be gradual.
Make the diagonal slash in the armhole just underneath the breast pocket flap placement.
Don’t forget to reposition any pocket markings once you’ve made the horizontal slash to line up the hems.

The Process
I really enjoyed getting my teeth into the various soft tailoring techniques for my make and was really impressed by the thorough pattern instructions. And I never thought I’d say this but I loved doing the double welted pockets with the flaps. At first, I thought they would be really tricky but well done Kwik Sew for easy to follow methods.
I lined my flaps with the pink lining which is fun (tip: trim your lining a smidge smaller for perfect edges) and I used a cardboard template to draw around with a washable marker. I could follow the marker line as I stitched and get lovely smooth curves. I feel proud of my pockets!


Pattern Hack Extra
When we discussed the kit and blazer making process we thought that it would be lovely to include a pattern hack.
I decided that the sleeves were just perfect to add a button vent feature so I’ve put together a tutorial for you. Read on…
Buttoned Sleeve Vent Tutorial:
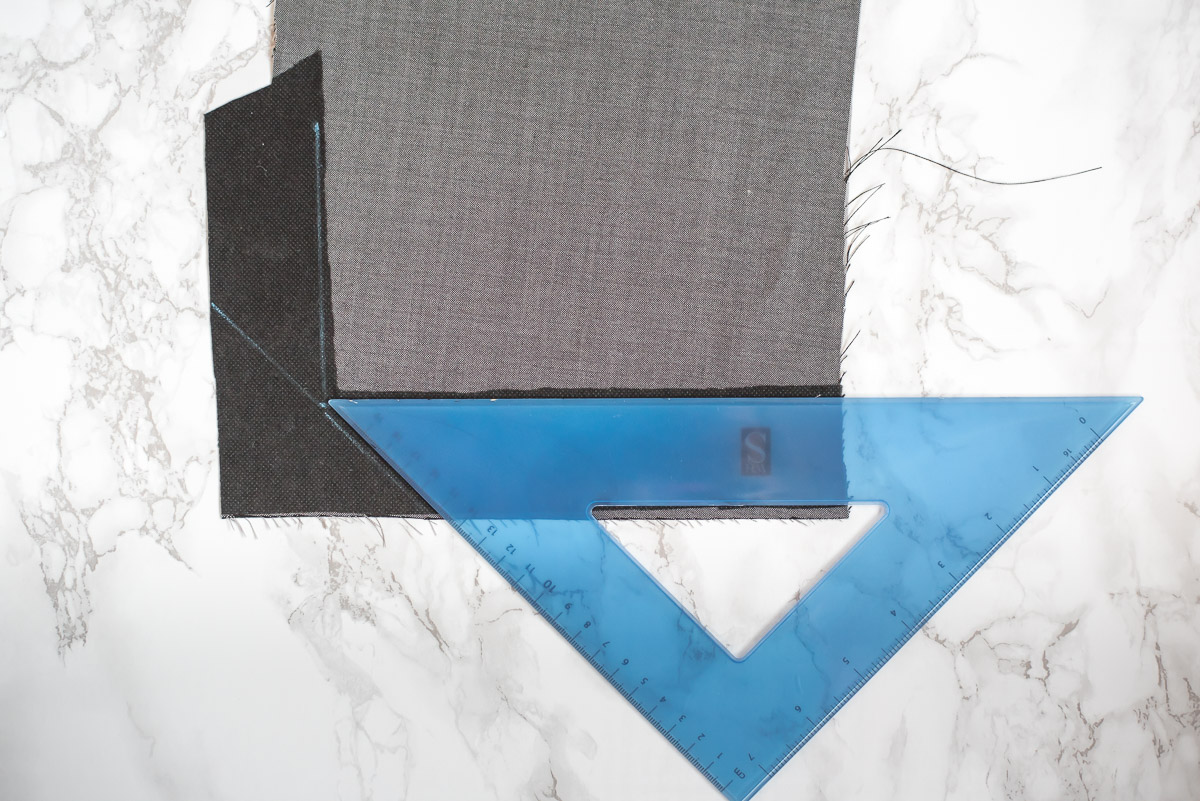
- Check the hem allowance on the pattern. I think it’s 1.5″ so increase this to 2″
- On the side back seam of both the undersleeve and upper sleeve. Measure up 4″ from the hemline and mark a point.
- Extend a 1.5″ wide piece out from the edge (2″ from seam allowance) up to the marked point and slope the top edge down a little (see photos).
- Iron interfacing on to the hem allowances down the extension and along the bottom on both sleeve pieces.
- On the upper sleeve mark a diagonal line across the corner at the bottom using a set square to get a 45-degree angle. This will be your stitch line for the mitred corner. Continued…..

- Next sew the sleeve pieces together stopping at the dot and pivoting along the slope
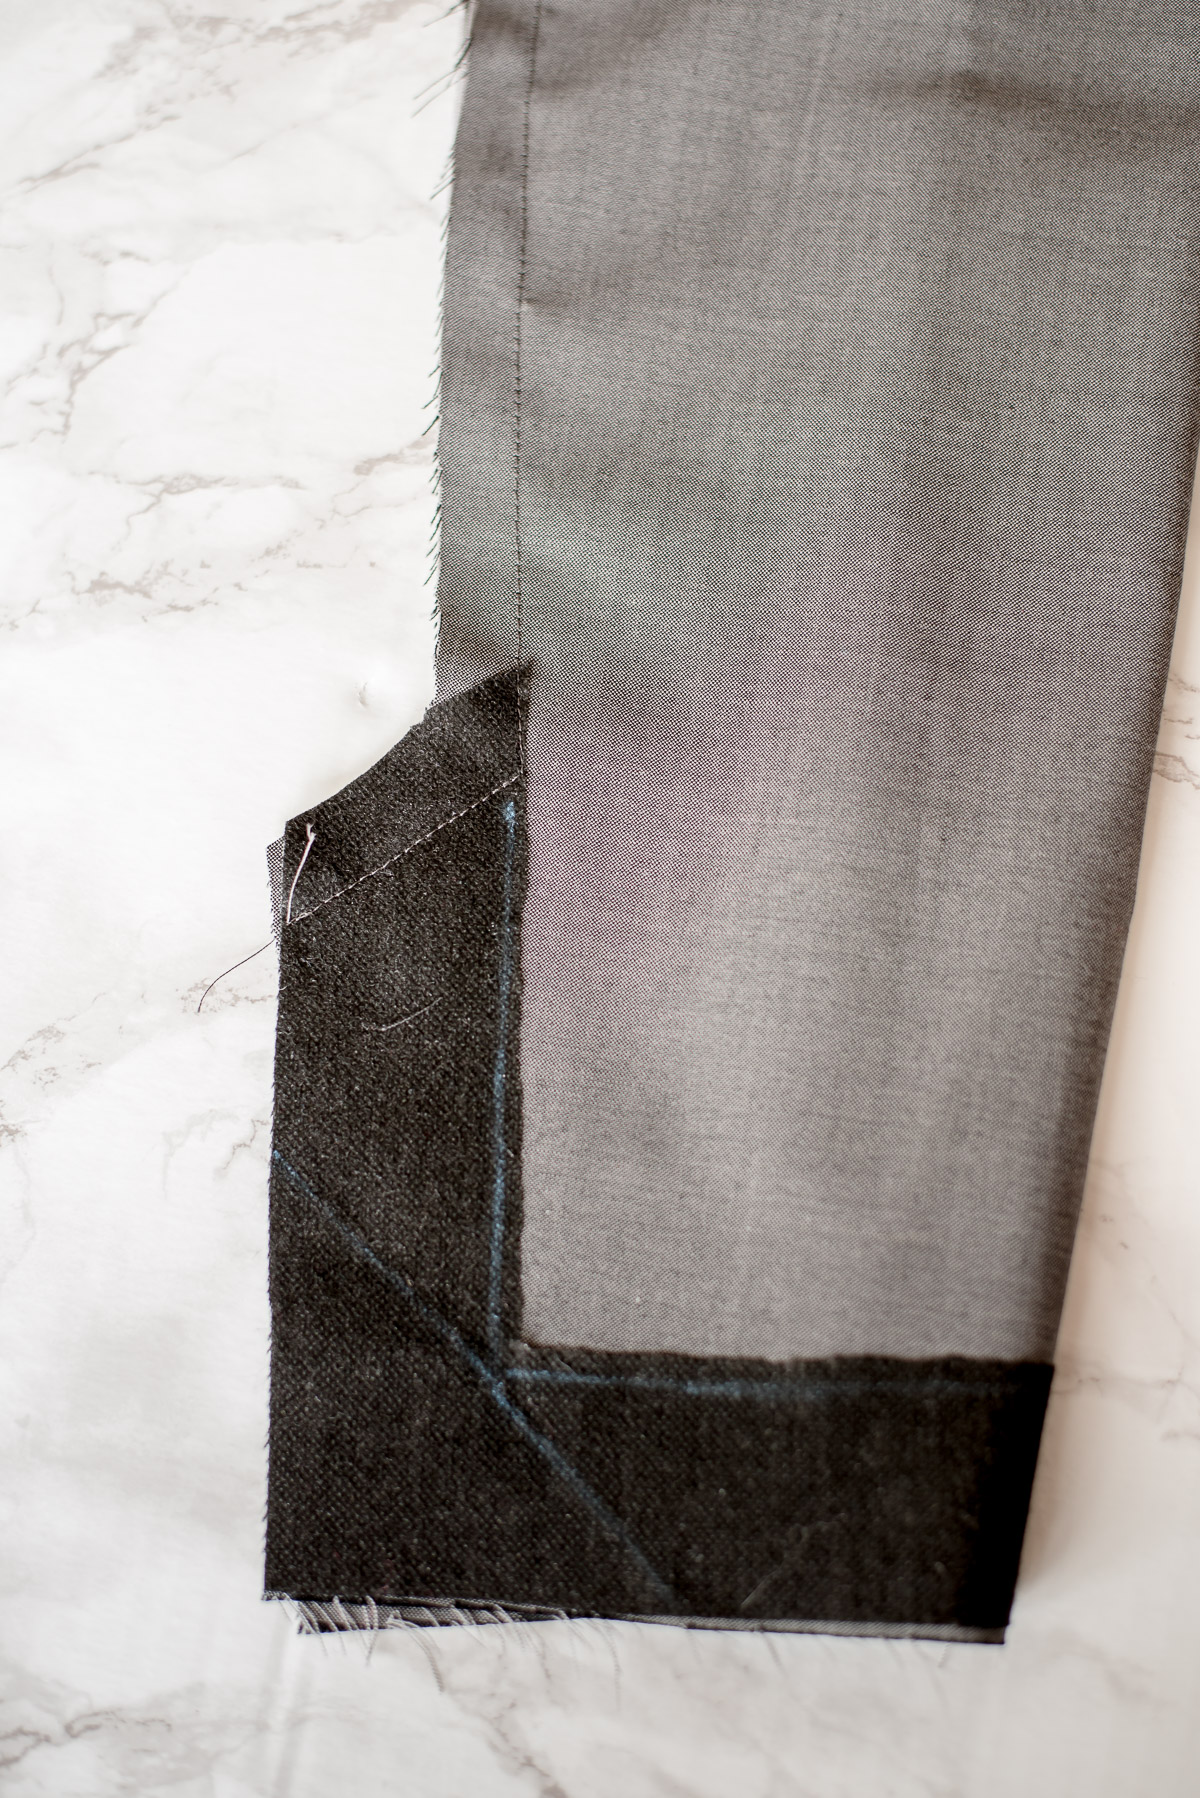
- Sew the mitred corner on the upper sleeve and the straight edge on the under sleeve


- Press and trim the mitred seam and then press the whole piece towards the upper sleeve. You’ll need to slash into the corner of the seam at the top of the vent. Press the hem up at the same time.
- The lining will just be stitched along by hand as normal. And you’re done! Just add buttons 🙂


Not only do you have a choice of pockets you’ve now got the option for plain or vented sleeves too. So I hope you find this tutorial useful if you try the latter.
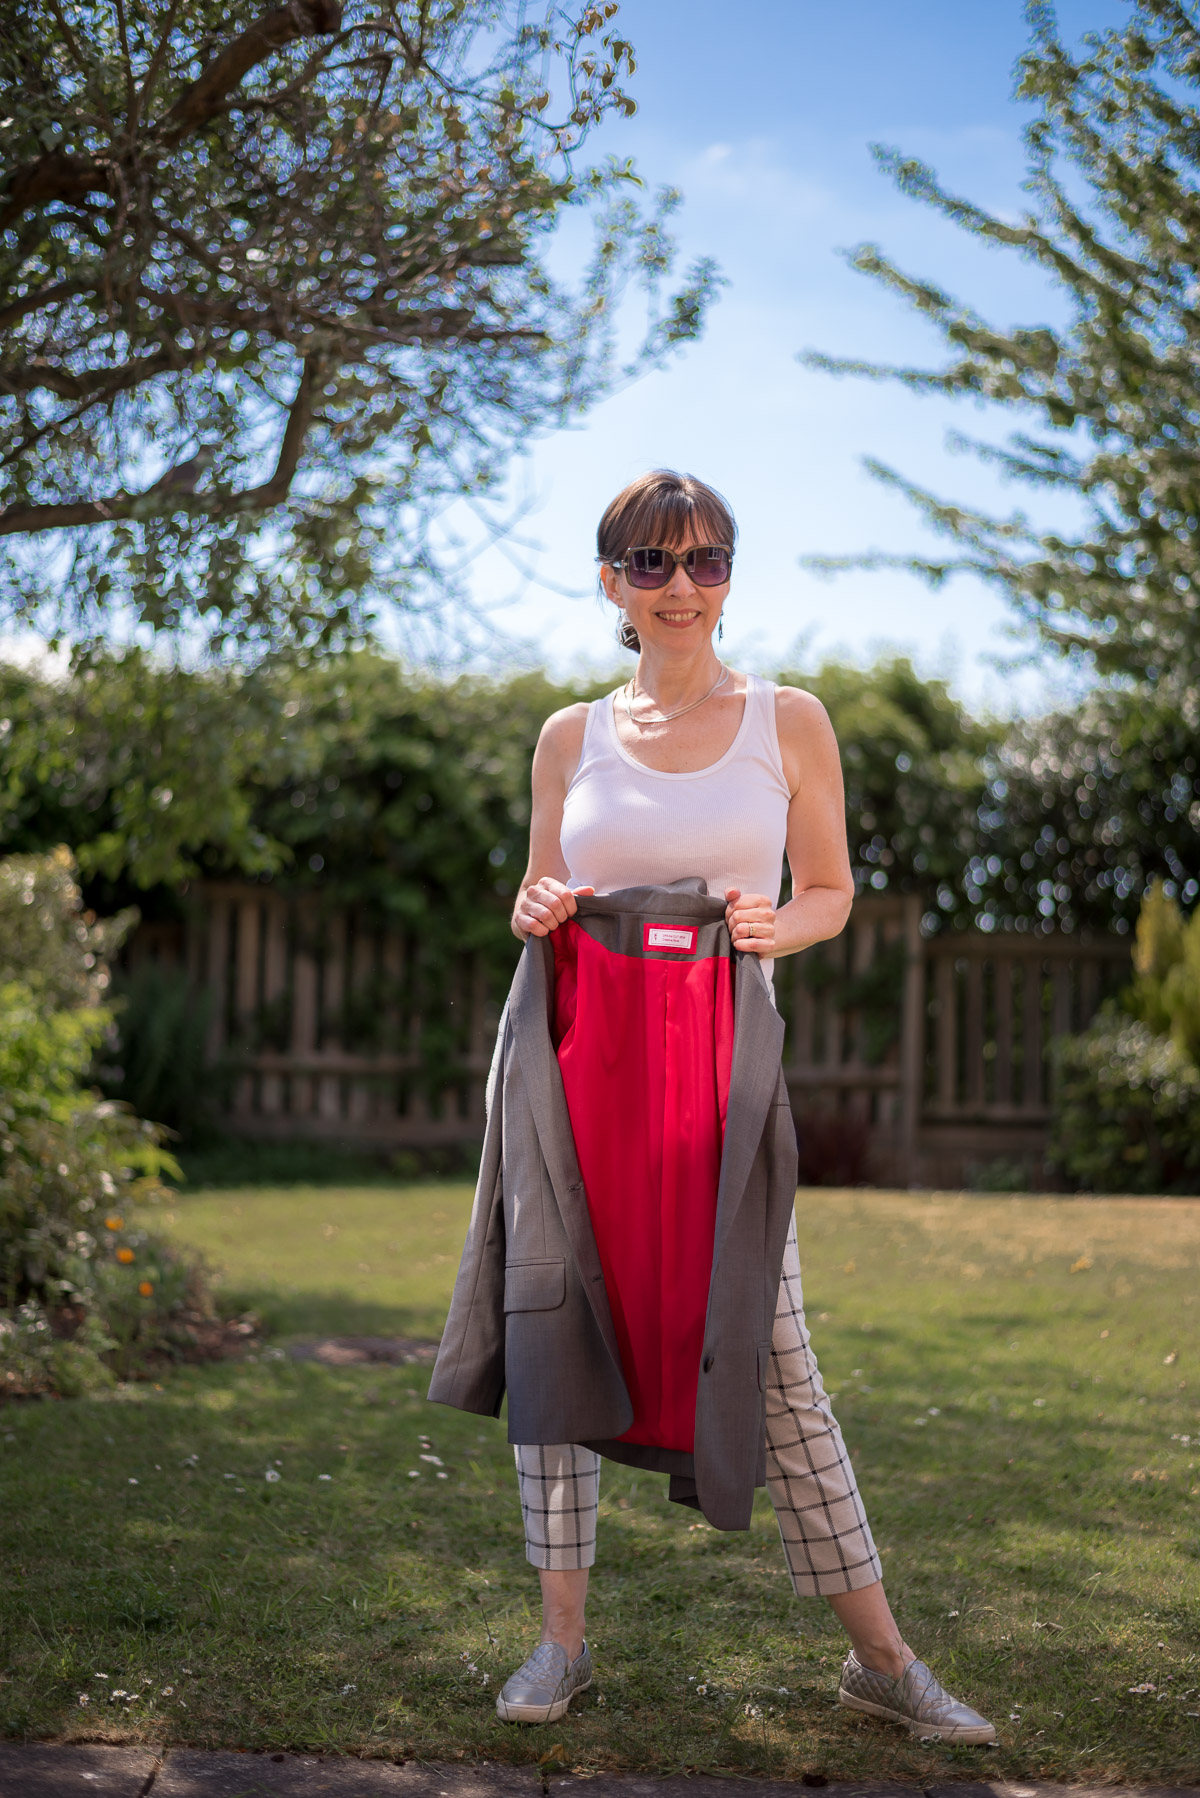


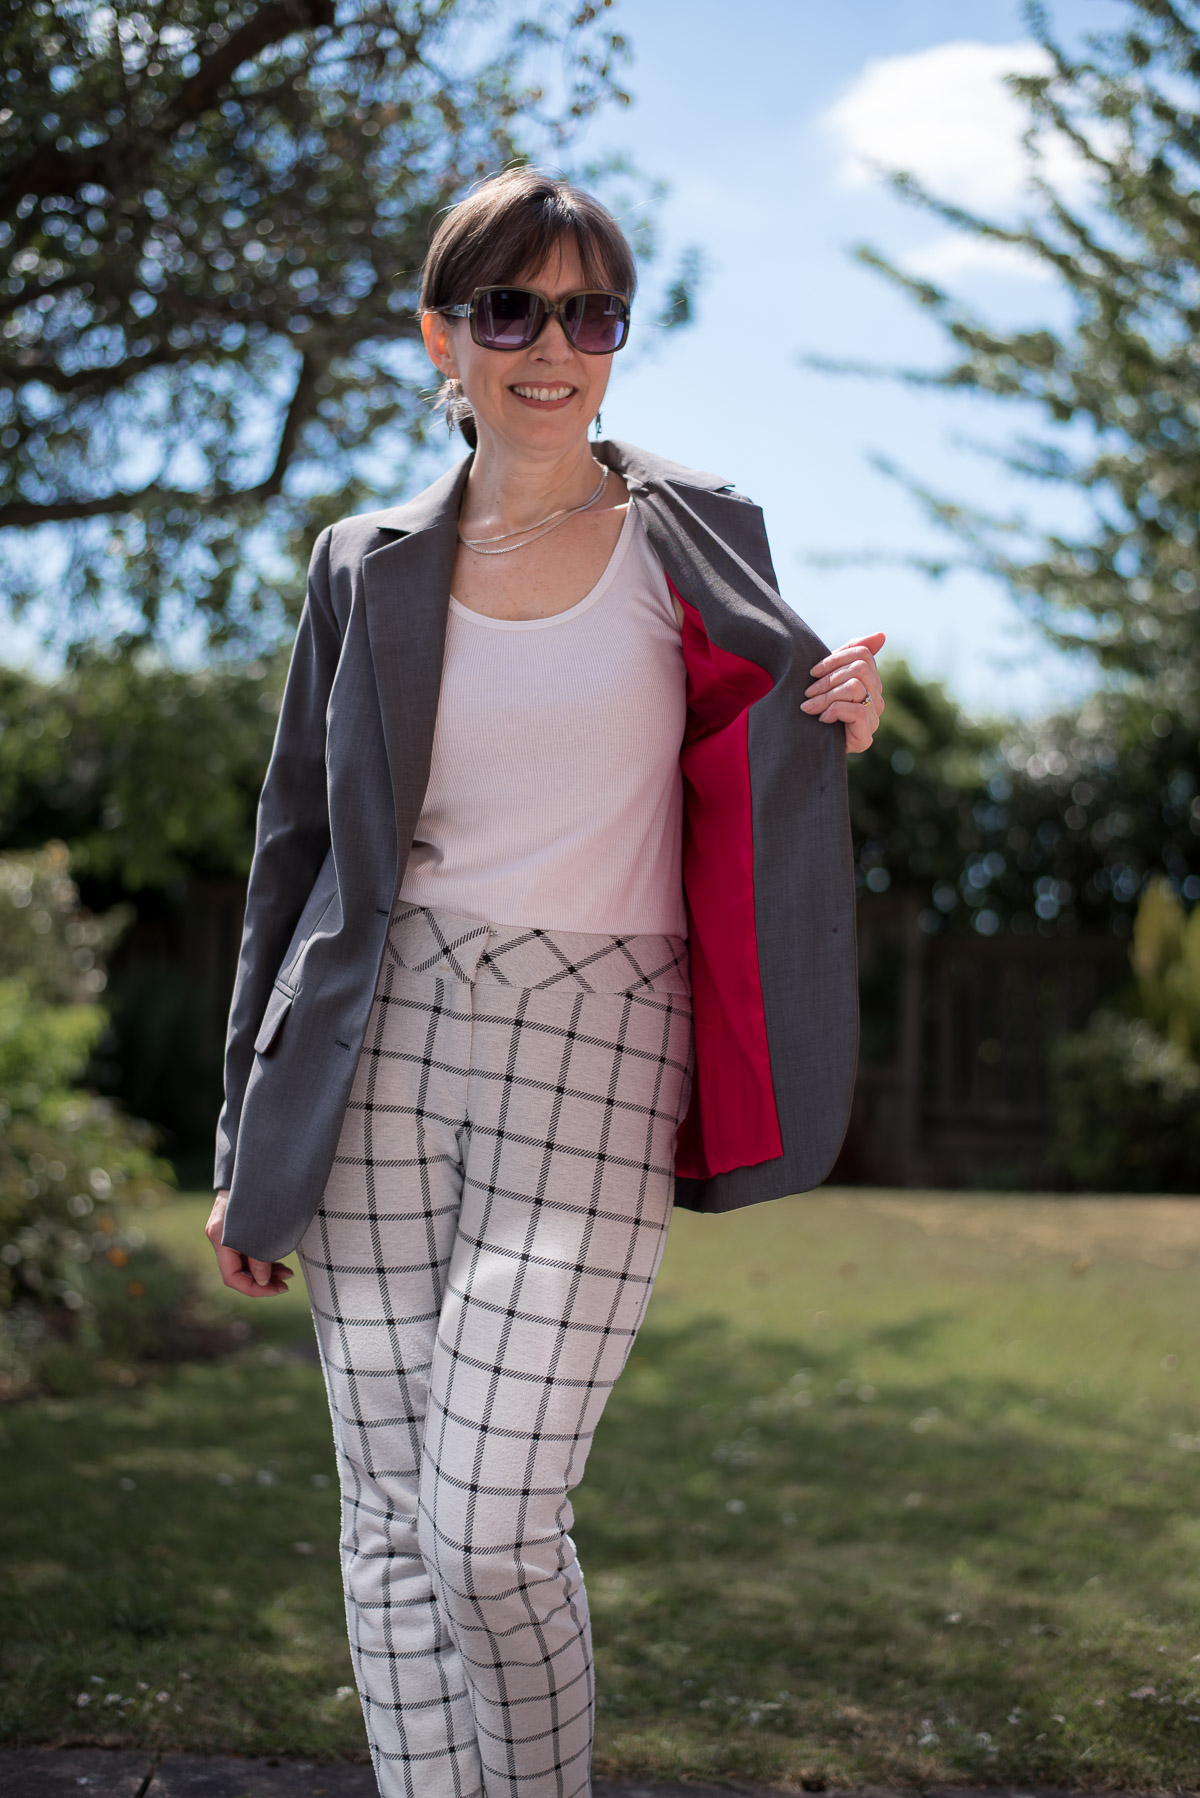

I love the lightweight easy to wear feel of my blazer and I reckon I could style it in many ways. How would you style it? Plus its perfect for cooler Spring/Summer days and early Autumn too. Truly versatile.
If you want to try one of the kits out for yourself, Clothspot will ship all over the world and there are several choices for fabric and lining combinations…but of course you could always go for my special grey and pink version 🙂
Let me know if you got tempted to try a blazer for yourself and thank you as always for stopping by my little corner of the interwebs. See you soon!


Wow Diane, truly amazing! I love all of it. Impeccable sewing.
Author
Awww, thank you so much Wis!
Beautiful blazer and post. Lovely photographs, descriptions are excellent ! Thank you.
Author
That’s really kind of you. Thanks!
Beautifully made. Thanks for the tutorial 🙂
Author
You’re welcome, Vicki, Thank you!
Very sharp pockets and sleeve vents! The colourful lining is the best!
Author
Thank you so much Linda!
That is a thing of beauty. I didn’t have a blazer on my to-sew list but this could be changing my plans. I love that the interfacing, etc., are included in the kit – those are often the hardest elements for me to find.
Author
Thanks, Lia. Yes, absolutely. It’s all included right down to the needle and thread, so it takes away all that angst.
Wowsers!! Your jacket is absolutely gorgeous!!
Author
Awww, thanks, Lynne