
This silvery grey simple wrap skirt actually featured on an IG photo of mine a couple of weeks back when I wore it on a date night out with hubby. Even though the photos were lousy quality, it got several compliments, so although I made it before I started blogging at the end of January, (I’m getting close to my 1 year blogiversary…eep!) I thought I would show it properly now, especially as several people asked what pattern I used….
Pattern…what pattern?
Yes.. well… I didn’t use a pattern at all actually. In fact, the skirt was made from a wonky-shaped leftover off-cut from some evening pants that I made. The shape of the fabric literally dictated the asymmetry of the final skirt. Here is my skirt laid open to show the odd shape. As you can see the hemline slopes and adds to the asymmetry. I angled the front leading edge too.


So how was it made?
It’s probably best to make a quick test muslin first. The little gallery of photos should help explain, but I’ll go through the process too. **Note that I’m showing the skirt with a straight hem and vertical edges for ease of illustration, but feel free to get all asymmetric too if you want.**
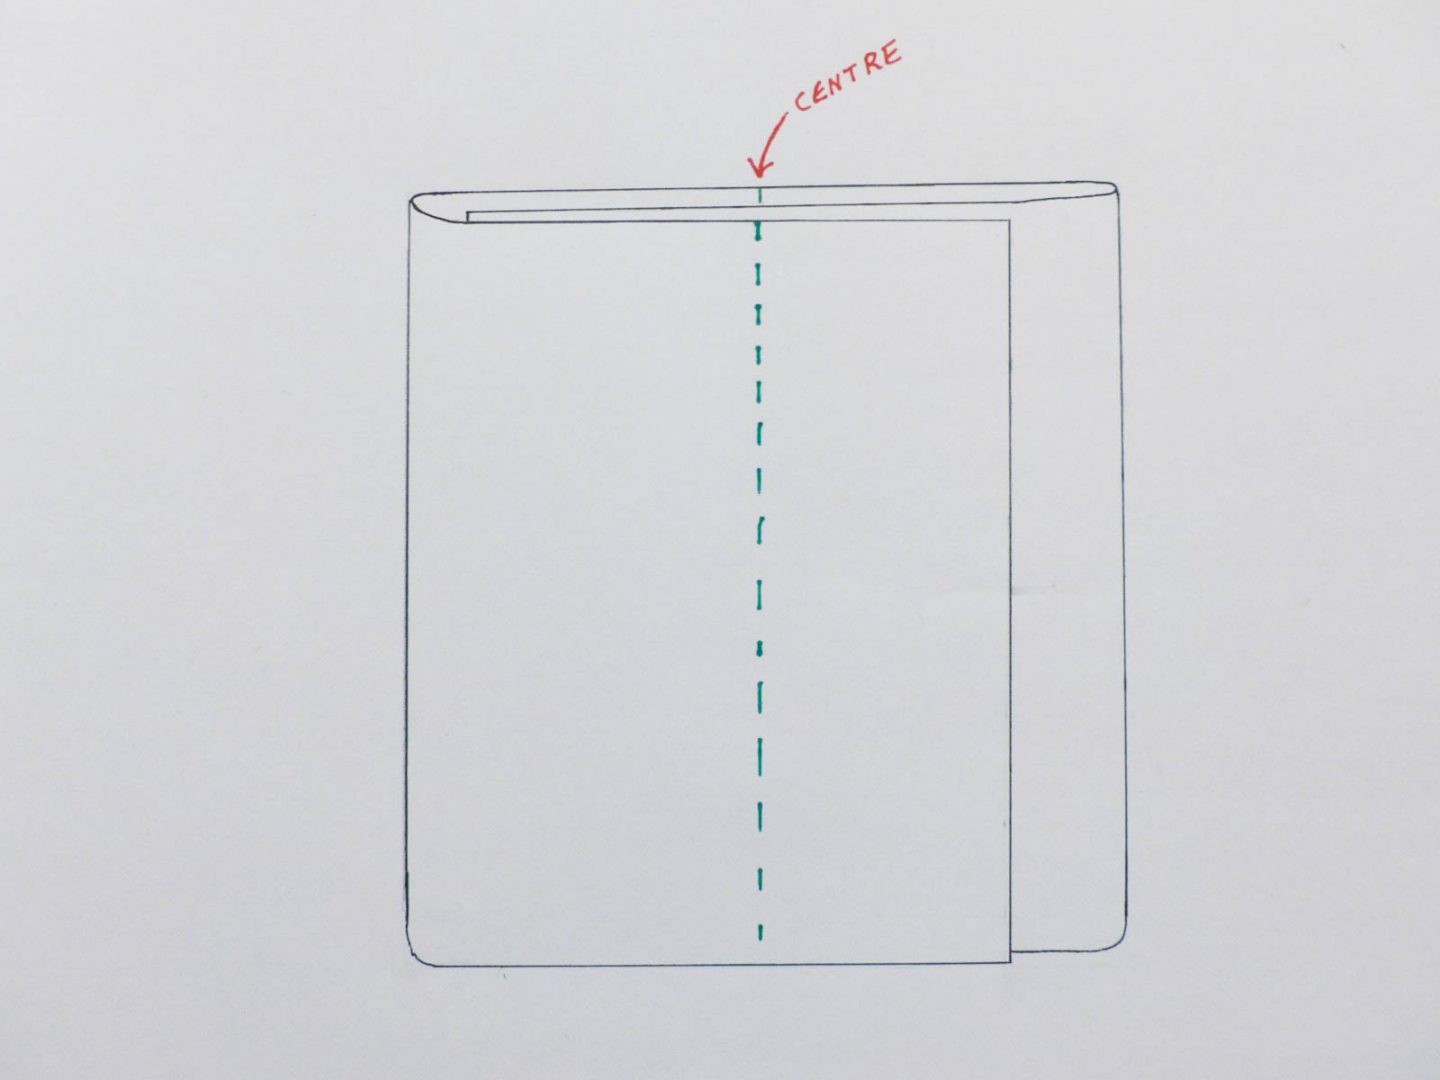
- So, to begin with, I just folded my fabric over as if it were already a wrapped skirt allowing for plenty of wrap over. The width laid flat should measure half of your hip measurement.
- Next, mark the centre front and back.
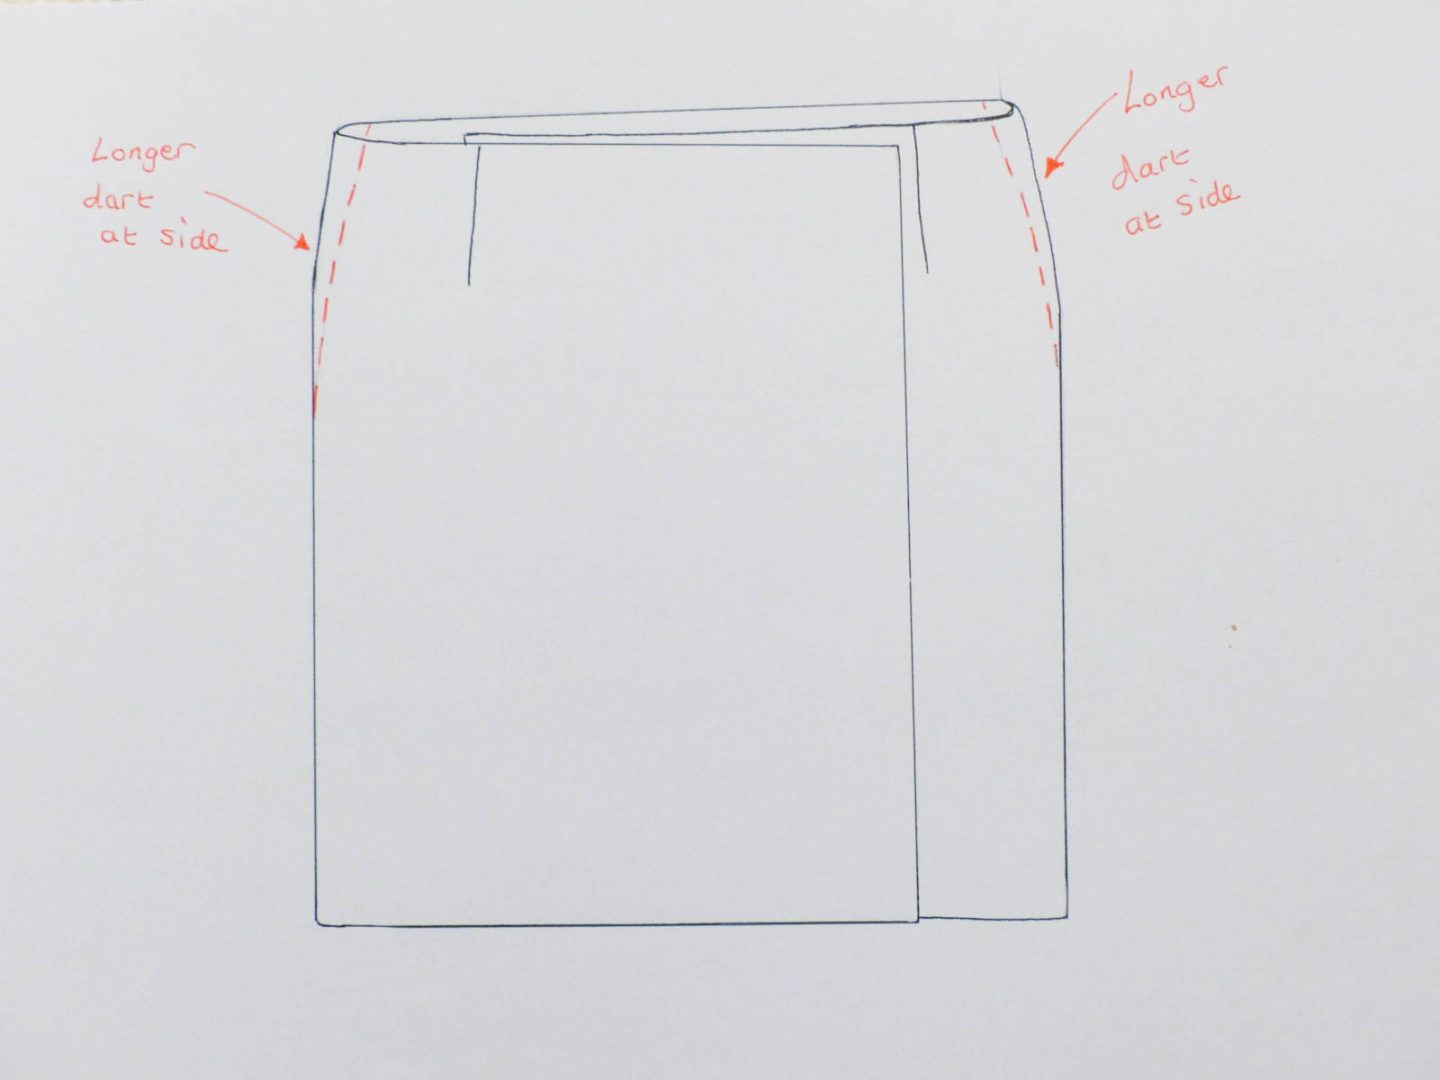
- Using any skirt pattern dart as a guide for length and width, make two back waist darts on either side of the centre.
- Now make darts on the front section in the same way (you can leave off the one near the leading wrap edge)
- Now align the two centre front markings. Lay the skirt flat measure half your waist and mark with a pin.
- Baste two long darts down to hip level and then try it around yourself to check fit.

Once you’re happy with the feel of the waist on the muslin, be sure to add on hem allowances for the verticals and lower edges before cutting your main fabric.
After sewing all of the darts in the main fabric I hemmed along the bottom (you could just overlock and turn up a narrow hem). I then folded back the two wrap edges and stitched them in place.
If you don’t want to add a separate straight foldover waistband you could try the more simple and lazy way as I did…..
The lazy waist finish:
Basically, I extended the length at the top of the skirt by about 1.5″ and ‘grew on’ my darts by carrying on the stitching in a straight line. You then just need to iron a strip of interfacing, fold it over twice and stitch along once. Easy peasy!

Simple wrap skirt…the finishing bit:
- Overlock along your hem and just press up and stitch.
- Then add a buttonhole at the top corner of each end of your waistband.
- Stitch one button on the outside of your skirt to correspond with the overlap and one button on the inside of the waistband.
- Add hanging loops if you want.
- Give it a final press and then you’re done!

If you suddenly find that you need something new to wear to a festive ‘do’ at short notice, you might enjoy trying a fairly simple project like this and it only uses a small amount of fabric too. Incidentally, in case you’re interested, my fabric is an acetate blend brocade with some stretch and I bought it from Truro Fabrics. I’m also currently toying with the idea of getting some lovely textured brown brocade too. Love it! Of course, a skirt in this style doesn’t have to be made in an evening fabric. It could obviously work as daywear as well. How about a tweedy blend trimmed with a bit of pleather to emphasise the asymmetry?

So my lovelies, before I finish off, I just want to say thank you so much for all of the thoughtful comments and good wishes on last week’s post. We’re still waiting for a definite date for Dad to go home, but it should be within the next two weeks, so definitely for Christmas.
And on that note, I’ll leave you until next time. I expect I’ll soon be making a start on my Designin’ December project… Will you be sewing much more between now and Christmas?
See you soon! xx
PIN THIS FOR LATER!


I really like your skirt and how you have styled it. Thank you for the detailed tutorial, I may just make one of these!
Author
Ohh, thanks Sue. I’m so pleased that you like it. Let me know how you get on if you try my rather unconventional patterning and making techniques 😊
This is a wonderful skirt! Thank you so much for sharing too.
Author
I’m glad you like it, Faye. Thank you!
Really lovely, great fabric and so clever. I love garments that are a bit quirky. Great with the shoes too.
Author
Thank you Maggie. I do love a bit of quirkiness and asymmetry, and the look of molten, distressed metal drew me to this fabric.
What a cute little skirt! I really like the way you’ve styled it for these photos too. Asymmetry is a look I have yet to embrace, but you’ve done it perfectly with this fabric!
Author
Thanks, Helen xx. I love touches of asymmetry. It’s not as madly on trend as it was, but I’ll still add some here and there as I like the character it adds.