
I thought I would show you an un-blogged top I made a while back. I’d like to talk about how to add tucks to a sleeve plus a bonus how-to for adding a box pleated extension to a sleeve instead of a gathered piece. This is one of a couple of posts I’m going to be writing over the next few weeks that will be relevant to anyone entering the Sleevefest Challenge but will also include some new makes, so should be of interest to everyone, I hope.
So let’s dive in!
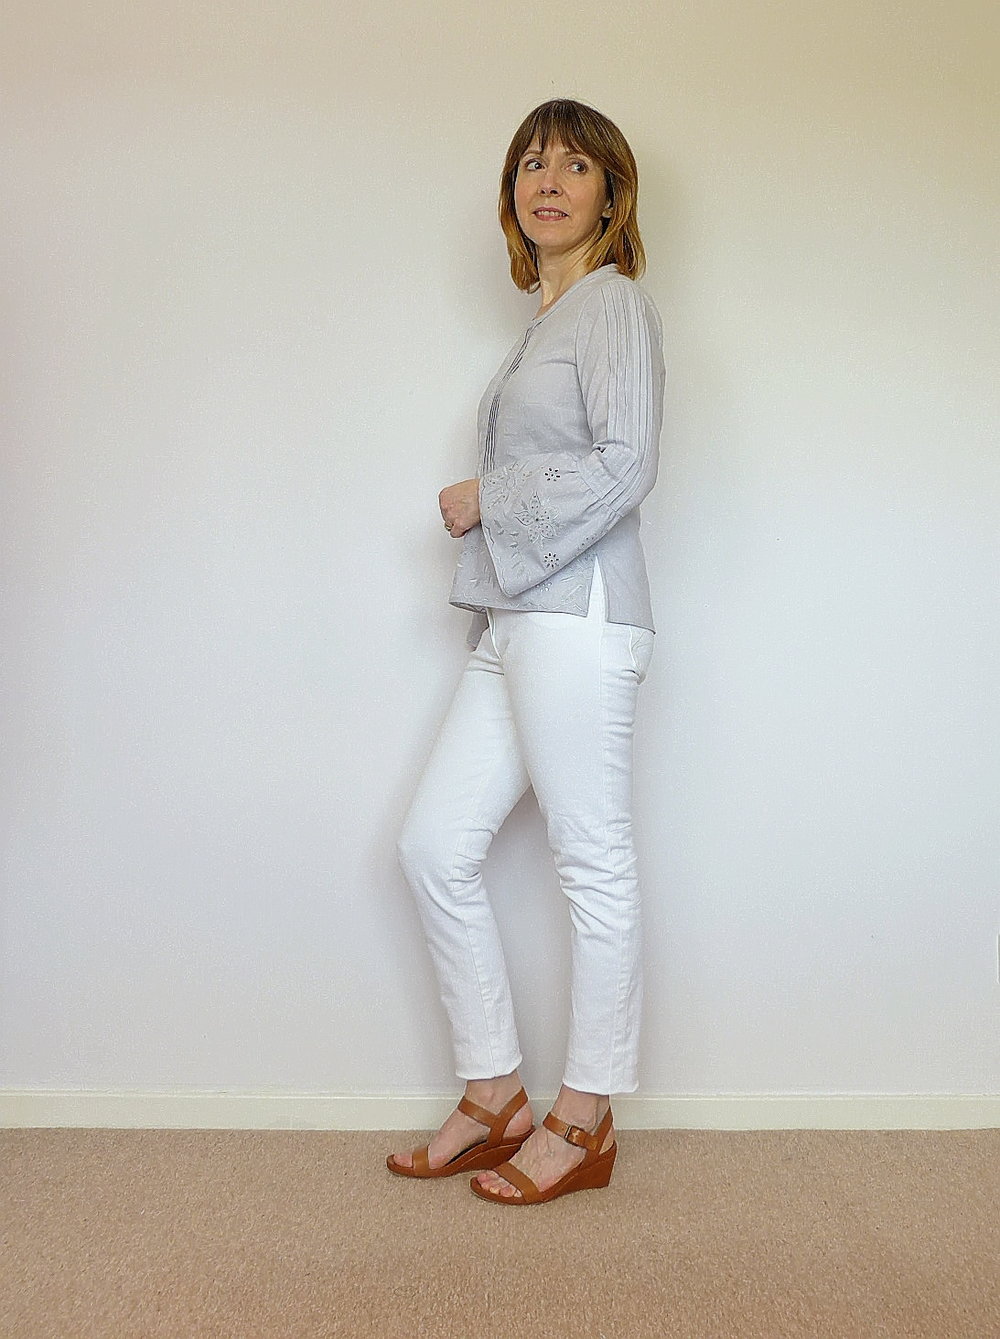
This top first appeared as part of a fabric review on Minerva Crafts blog page way back in May. But today I’m talking about the extra details that I added and how you can tweak them even more too.
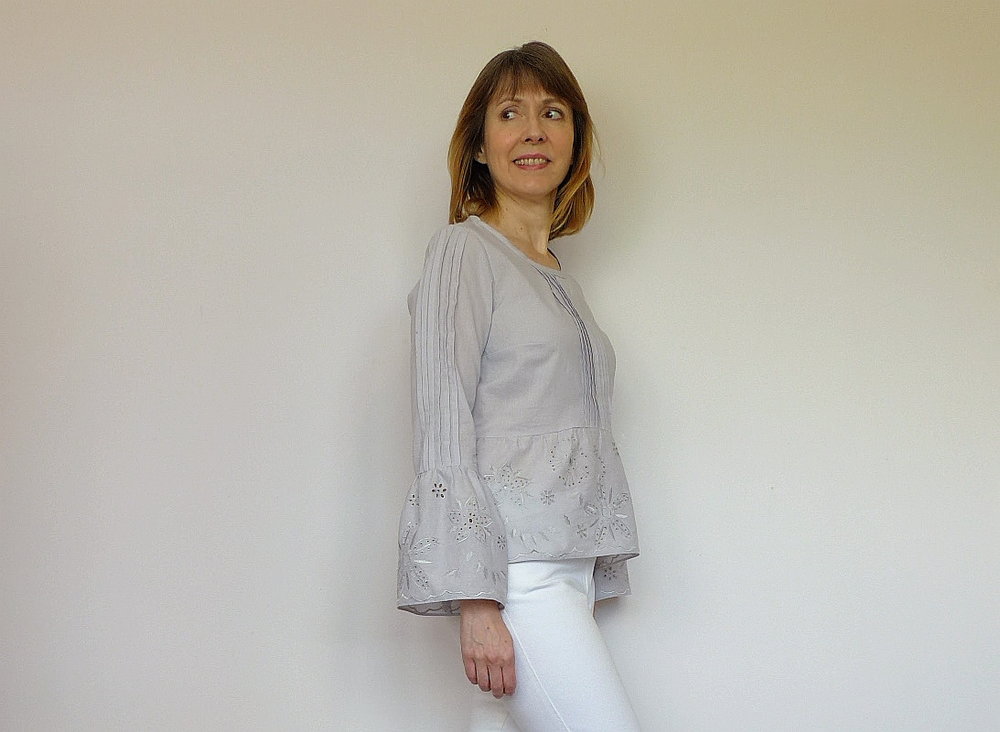
The fabric I used is a lightweight embroidered cotton lawn which was so easy to work with. As a start point, I once again used trusty New Look 6434…are you getting fed up with me mentioning this pattern…yes?/no? Tough…haha. I think you’ll be seeing me use it more. I just find it a useful starting point and we all love a good basic top that fits well.

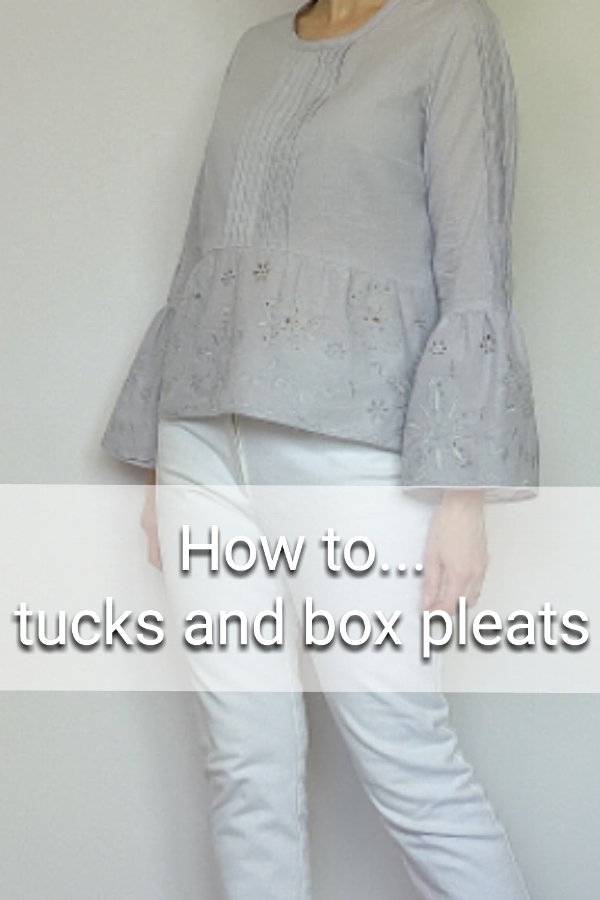
As you can see, the front bodice and both sleeves have vertical tucks down the centre. Now, rather than cut a sleeve pattern piece out with all the tucks marked, hoping that I had the lines marked accurately and that the sleeve ends up the correct width…I just cut a piece of fabric for both sleeves and the front roughly around the pattern pieces but wider. Then I stitched the tucks first and cut the sleeves and bodice piece from the pre-tucked fabric pieces….it’s just my way of working and you might find it useful yourself.
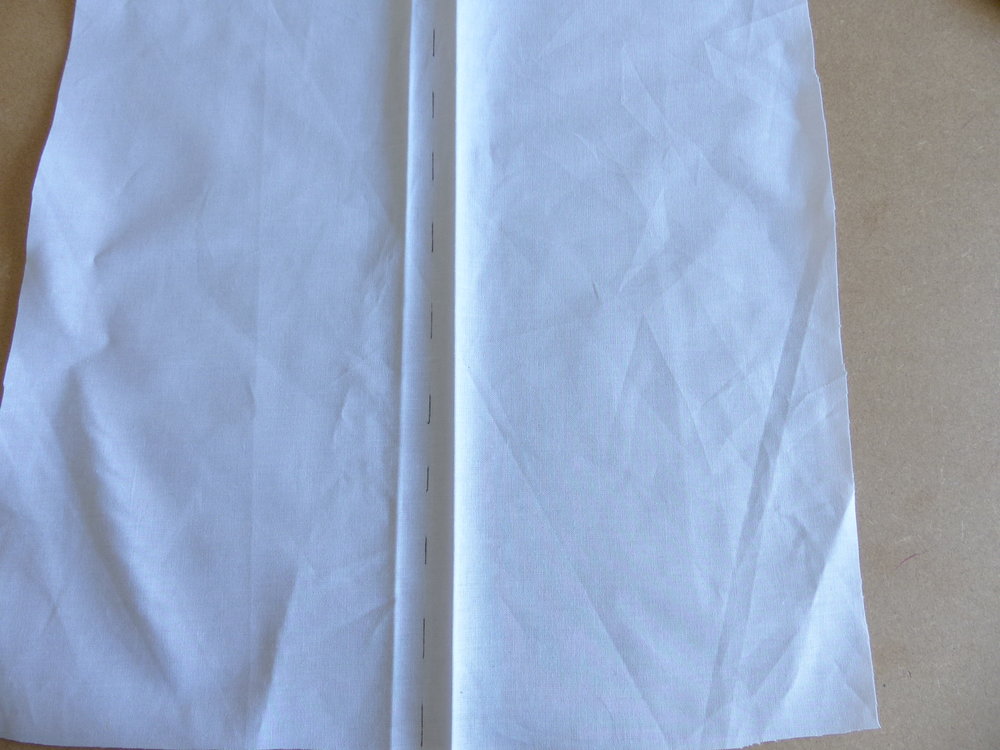
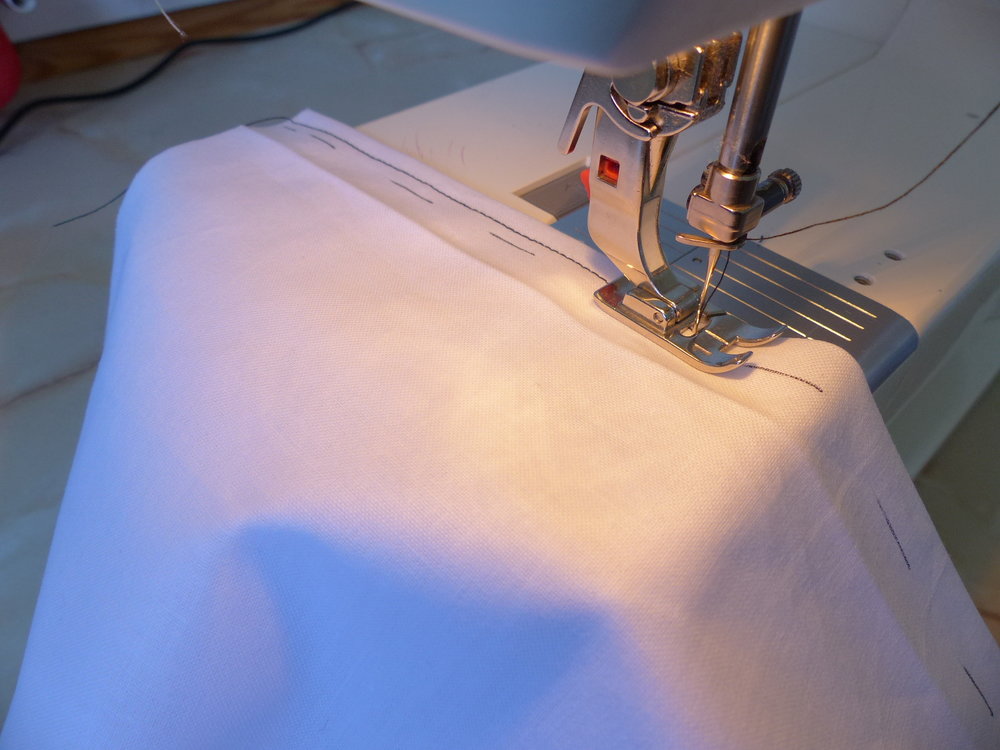
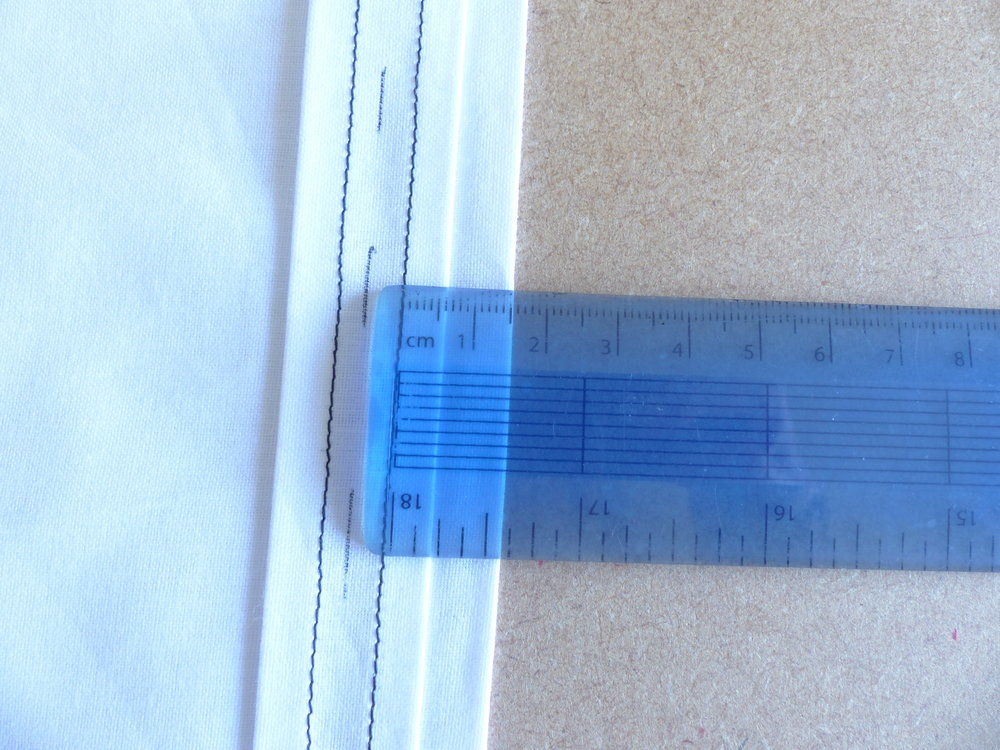
To get started, I marked the centre line and then using my tape measure or a ruler, I ironed a fold in the fabric at 1cm on either side of the centre. This is where my first two tucks will be. Stitching each tuck is done using the edge of my machine foot as a guide. Then each time I just measured 1.5cm from the previous stitching line, pressed a fold at the ironing board, and then stitched again. Repeat until you’ve made the number of tucks you want. This sequence of pictures illustrates done on some muslin fabric shows what I mean:

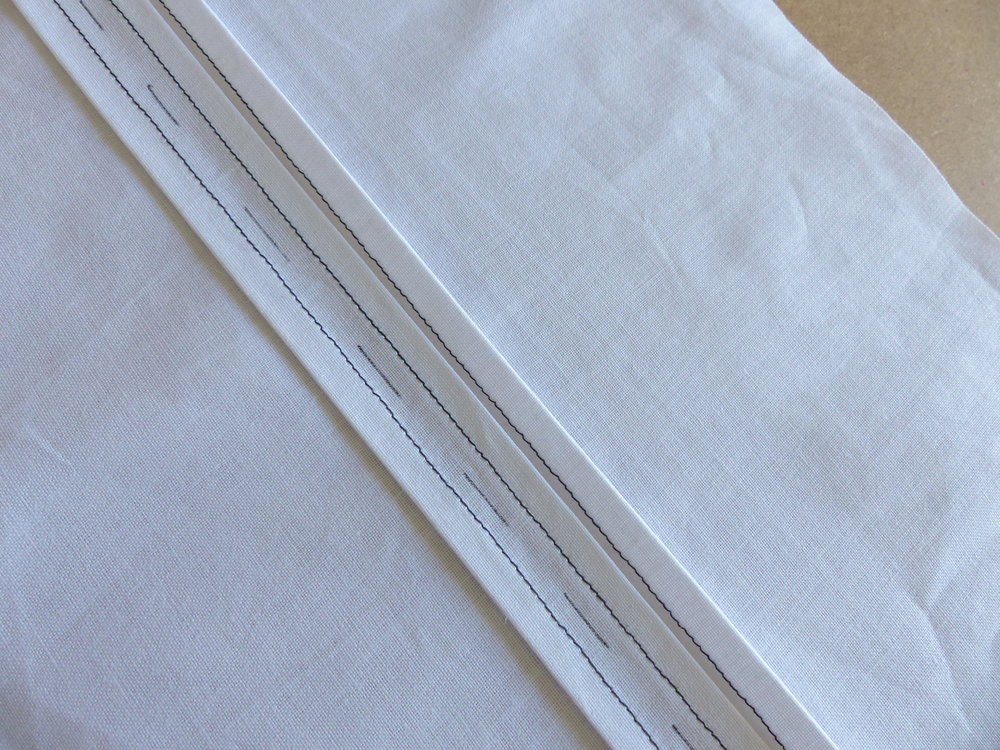
The next step is to just lay your pattern piece back onto the fabric you’ve just tucked, line up the centre of the pattern with the centre of the tucks and cut it out.
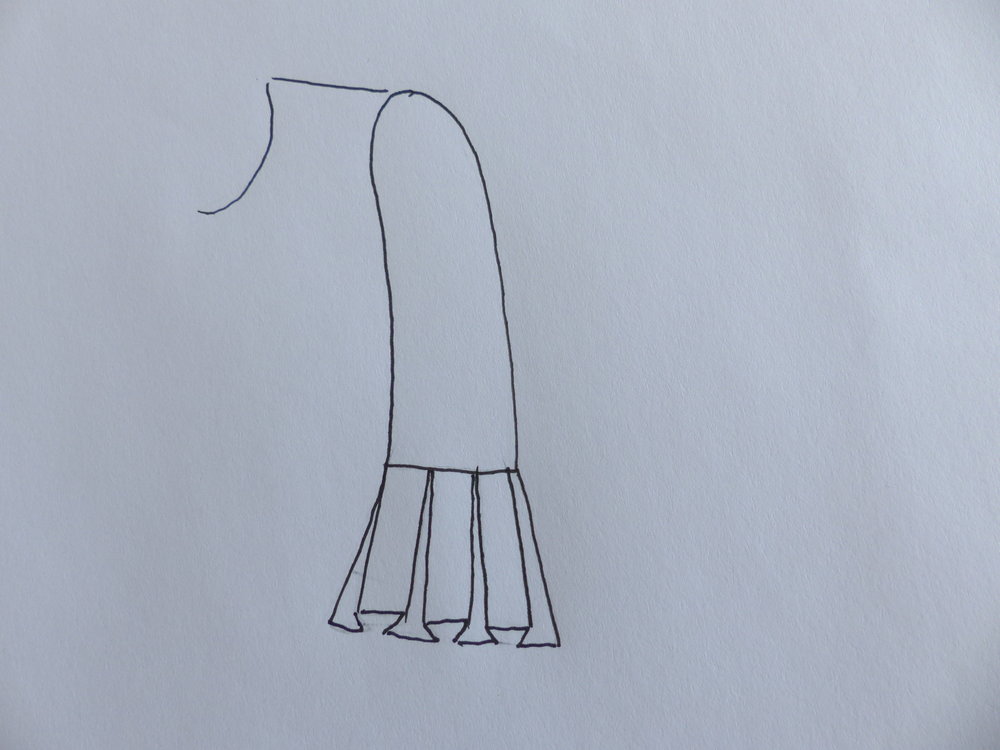
My top has gathered sections at the lower front and sleeves, but another option would be to make box pleats on the sleeve extension instead. Like this:
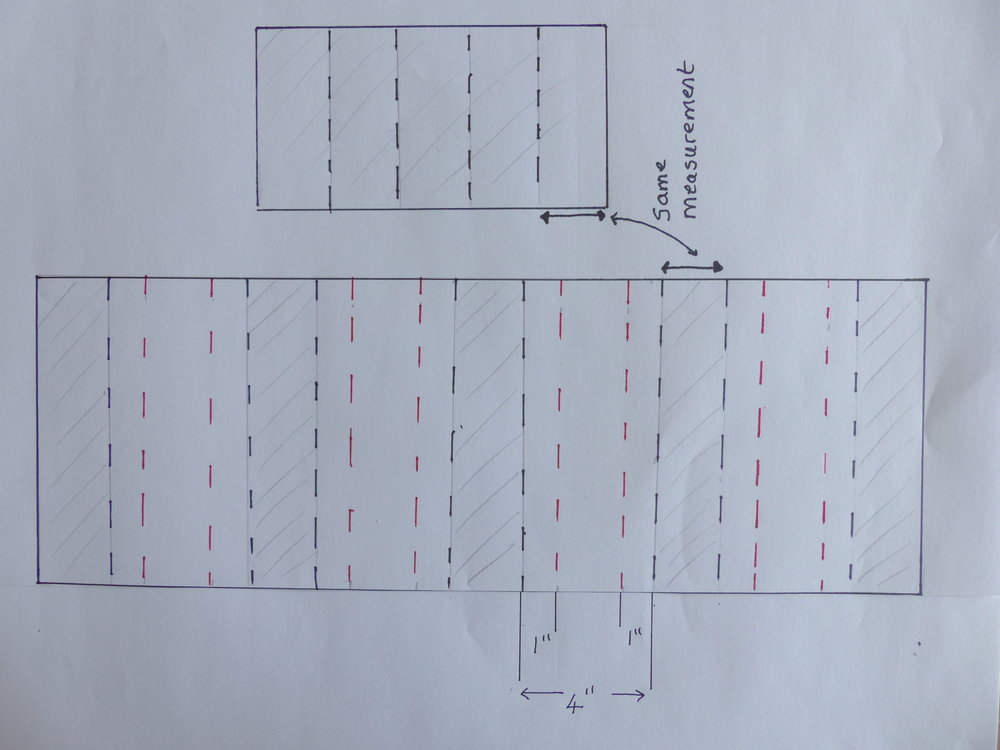
To make a box pleated section on the bottom of a sleeve you first need to measure the lower edge and then cut a pattern piece of that width plus the length you require. Divide this pattern piece up equally by drawing vertical lines and that will be the number of pleats your section will have. Next, you need to add enough for your pleats. A 5cm(2”) pleat needs 10cm(4”) marked up like this…
The lines will be your folds and when folded up it looks like this (this example is just on paper to show you what I mean)
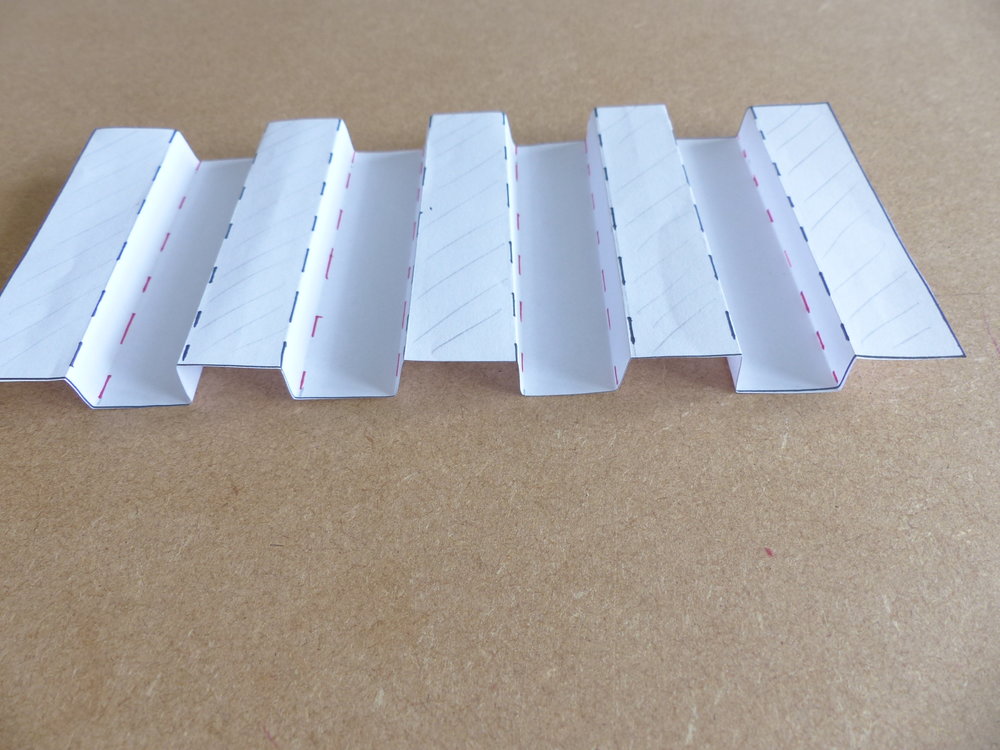
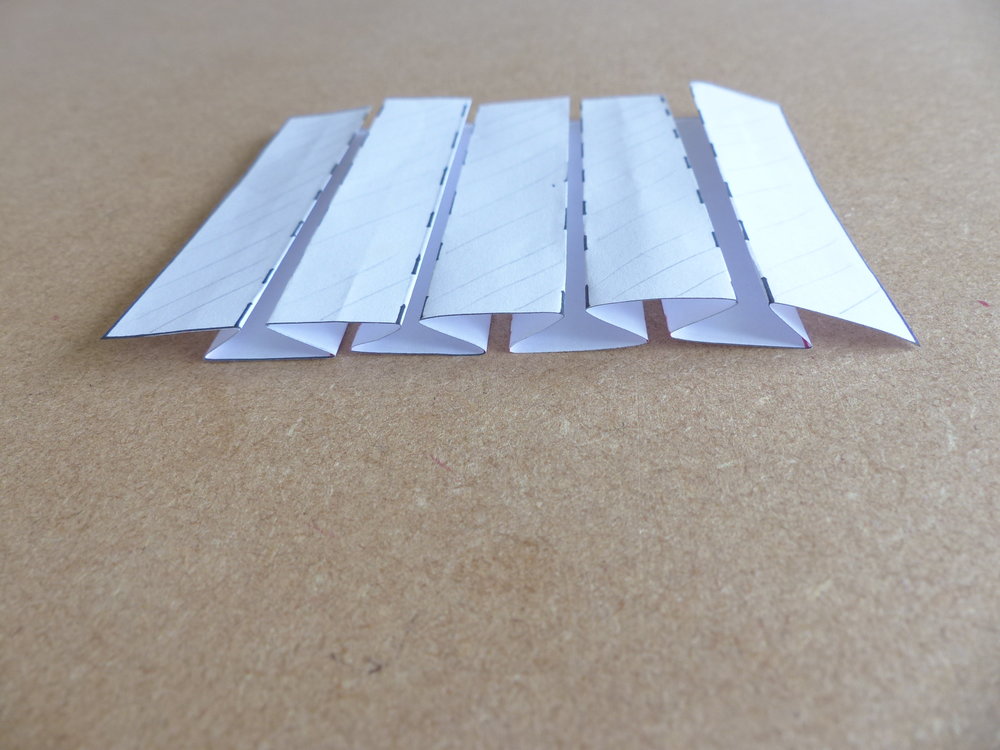
Baste across and press your fold lines and then simply seam it together and attach it to the bottom of your sleeve. Once attached, remove your basting and then hem with a tiny hem and finish off with a press. This kind of decorative detail would be a nice alternative to a gathered section, so why not give it a go…
EDIT: oops! I forgot to say that the section at each end that gets seamed together needs to be a half-width so that when seamed it creates a single width..Sorry to have missed this bit out.
See you next time with some inspiration for sleeves. Till then, bye!
Pin for later!

I love this! Such a logical way if working and great results! I’ll 100% be referring back to this post at some point, so useful! Xxx
Author
That’s brilliant! Thanks so much Sarah. I always hope that my way of working makes sense and is easy to follow. xxx
This was a great tutorial and a wonderful lesson in PLANNING your sew beforehand 🙂 I loved your blouse – what a beautful way to embellish a simple pattern (and have some fiddly fun while you’re at it!). I recently purchased some lovely light weight, tie dyed denim with an embroidered edge that I’ve been wondering what I’m going to do with it and I have a McCalls pattern that looks much like this New Look so you’ve given me huge inspiration here!
Author
Fabulous! Thanks Kathleen. I’m so pleased you feel inspired. Your embroidered fabric sounds lovely and will no doubt be great in a style like this. x
I love the fabric you used, and what a great idea to add interest with the sleeves! I have never been a fan of box pleated skirts as they’re not a good look on me, but box pleated sleeves… I could totally go for that!
Author
Thanks so much Helen. X
Funny you should say that about skirts with box pleats, because I’m not so keen either, but on sleeves…definitely!
so perfectly neat 😍
Author
Thank you Monika! Xx
Such a lovely spring/summer top, Diane! And thank you for this turorial — I hope to use this for a special sleeve sometime soon.
Author
Thank you, Joan! That’s great to hear. Let me know how it turns out if you do.