
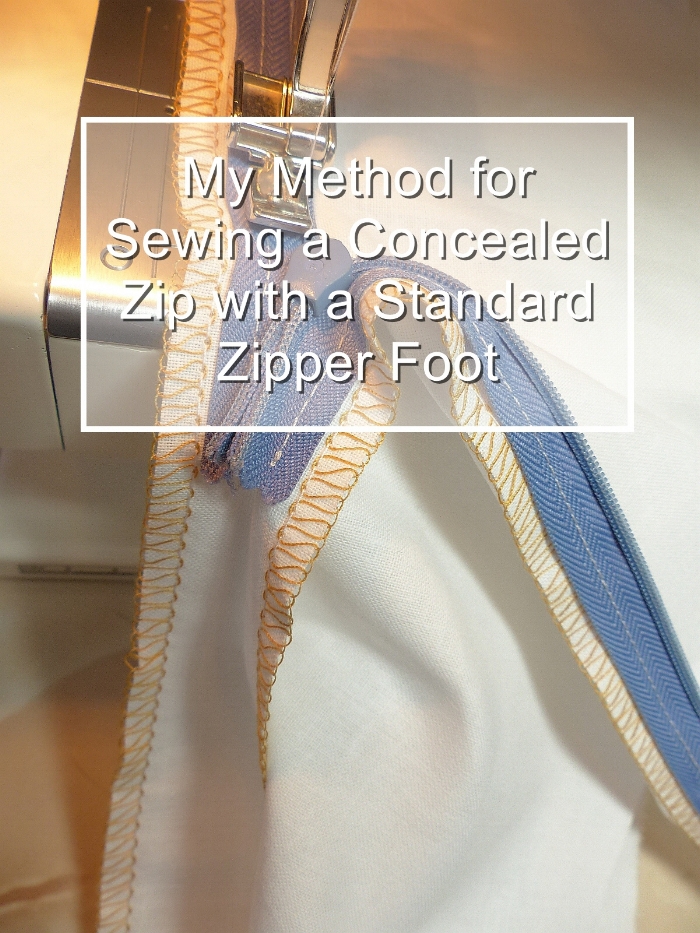
I thought I’d do a quick post sharing my concealed zip method. I know that these kinds of zips can seem a bit scary and rather daunting so I hope this will help. My method involves hardly any basting (if at all) and I just use a standard zipper foot, not a special one for concealed zips.
So let’s get started:
First of all you need to overlock/serge the two raw seam edges of the seam you’ll be using. For instance the centre back seam on a pencil skirt.
 Overlocked and pressed
Next, you need to lightly press a fold where the seam allowance would be just for the approximate zip length. By the way, I always use a zip of an inch longer than the opening that I want…more on that later I promise*
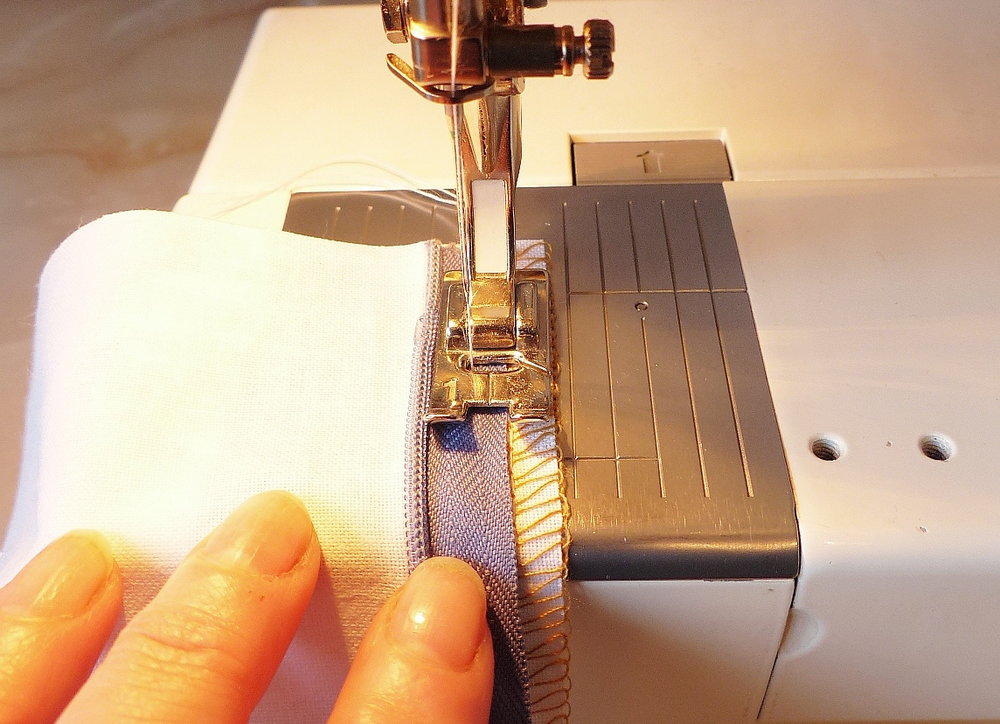
Now I line up the zipper teeth with the fold line and the top of your zipper tape should be level with the top of your fabric. You may want to just pop a few pins in to hold it in place.


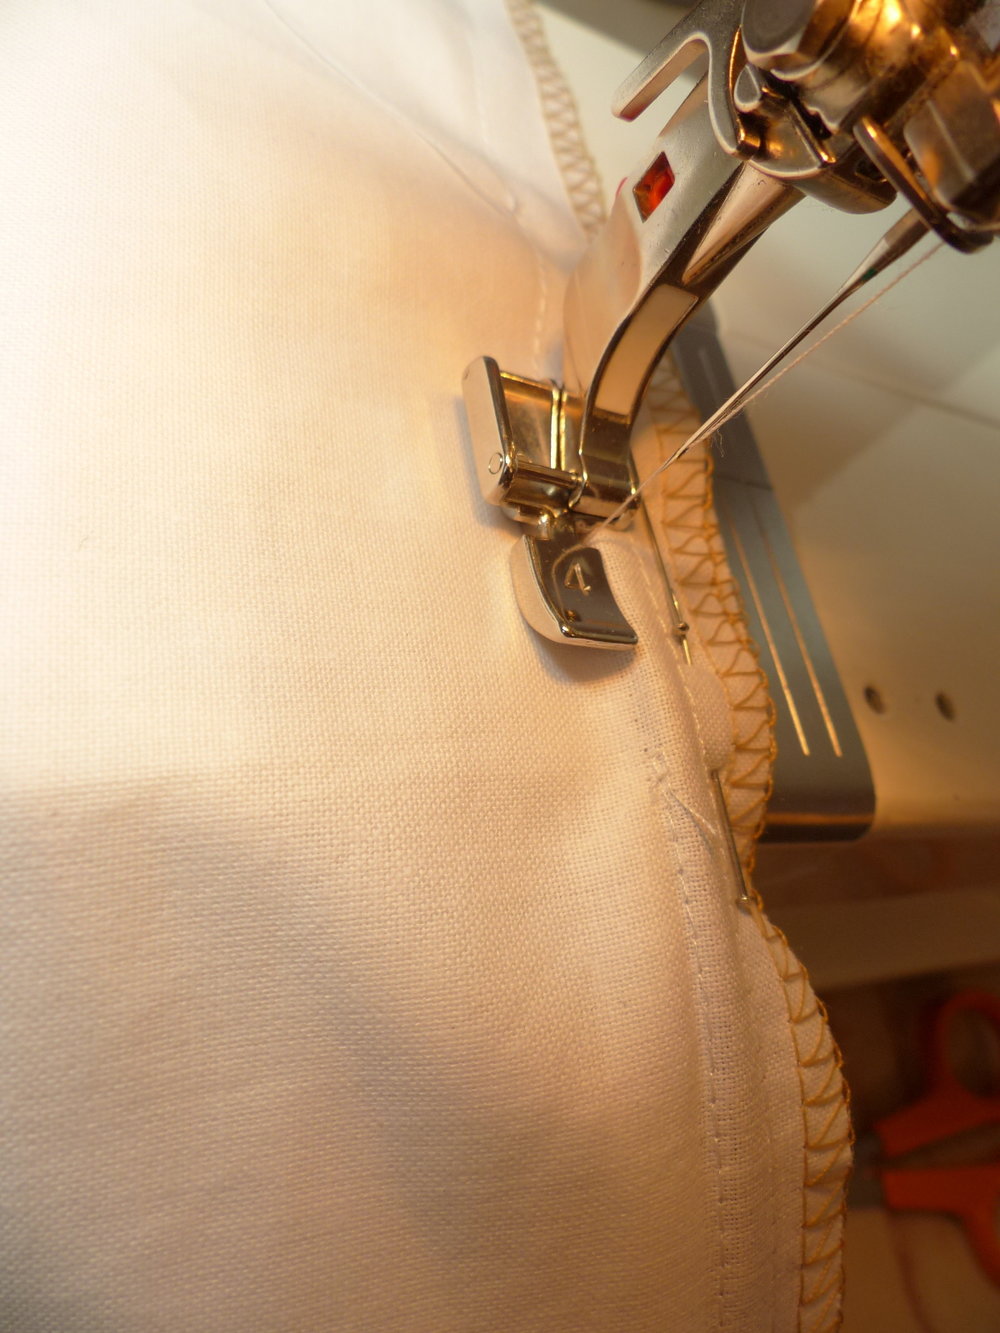
The next step is to stitch down the tape. I just use a standard foot and I move my needle over by one click so that my stitch line is nicely on the tape edge. It’s best to stitch all the way to the bottom, so as you approach the zipper pull, just stop with the needle down and move the pull out of the way, then finish stitching. Do this for both sides of the zip.

 Needle up, to move the pull out of the way
  Stitching right to the end
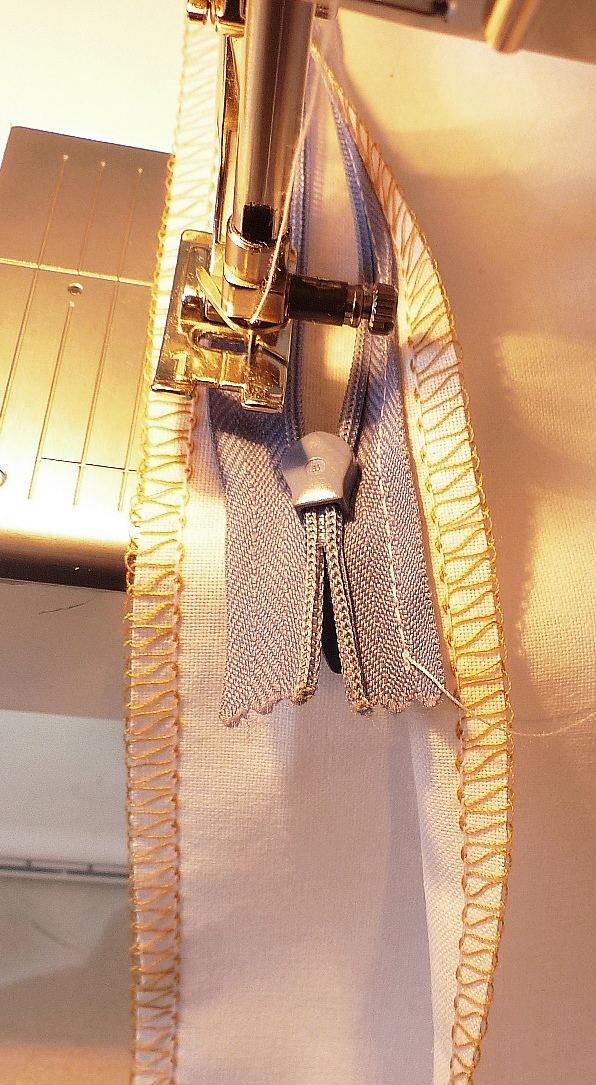
You can now do your final stitching. So, change to a standard zipper foot and just using your finger to open up the roll of the zip, stitch close to the teeth down as far as you can…..This is where you get the benefit of that first row of stitching because it creates an anchor on the tape and enables you to pull against the stitching as you roll the zip out with your finger. When you get close to the bottom of the zip, you’ll find that the zipper pull stops you from going all the way to the end and even if you move the pull out of the way you won’t be able to get close enough to the teeth, so just stop at that point….*this is why you get a zip longer than you need.
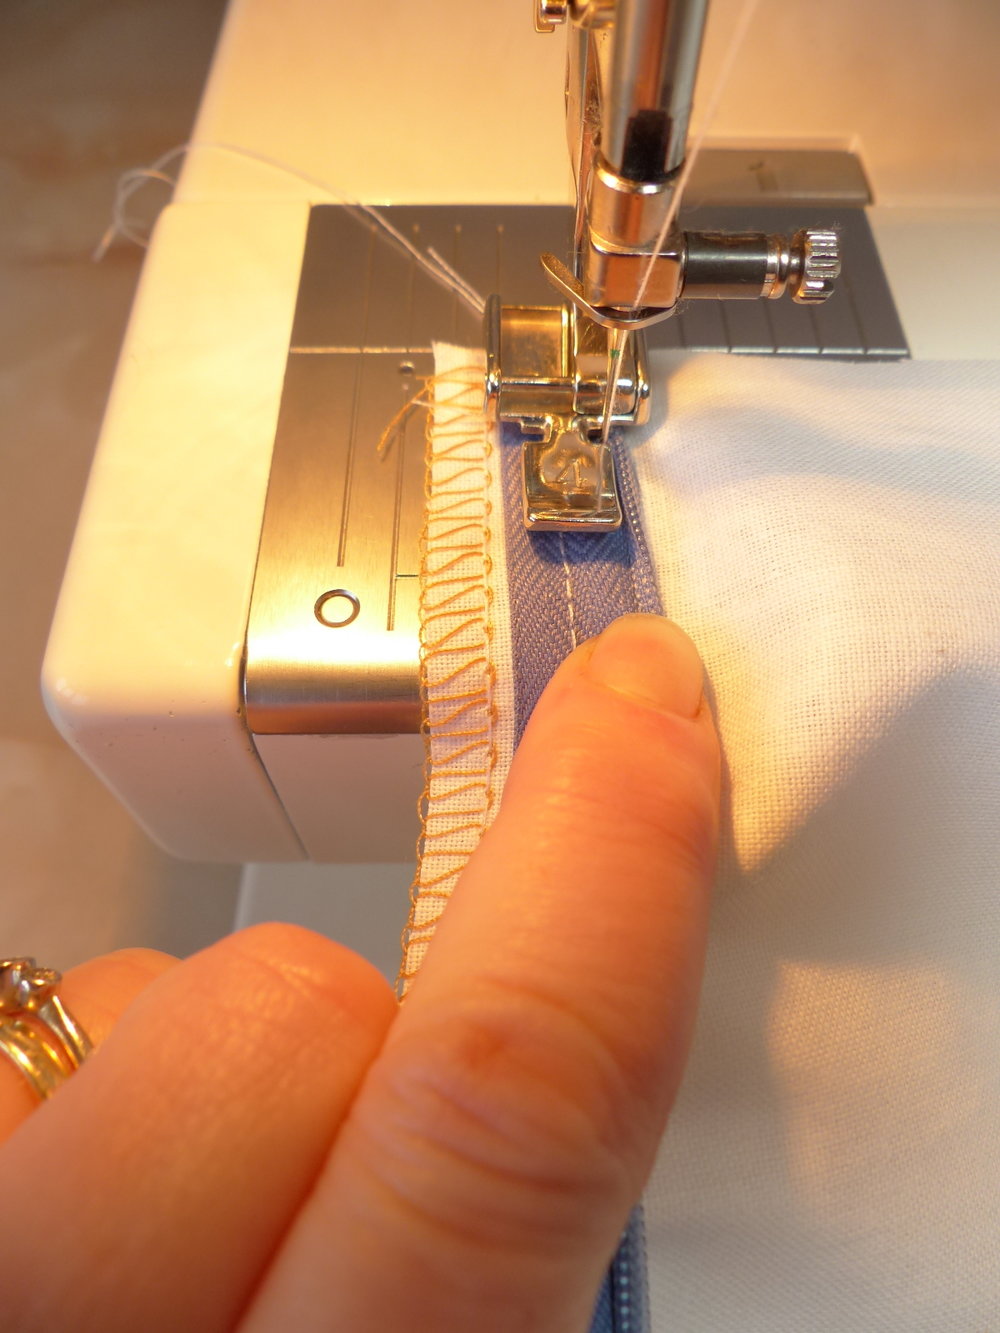
The next stage is now to stitch up the seam….pop a few pins in and using a standard foot just stitch along until you get about 2” from the bottom of the zip.

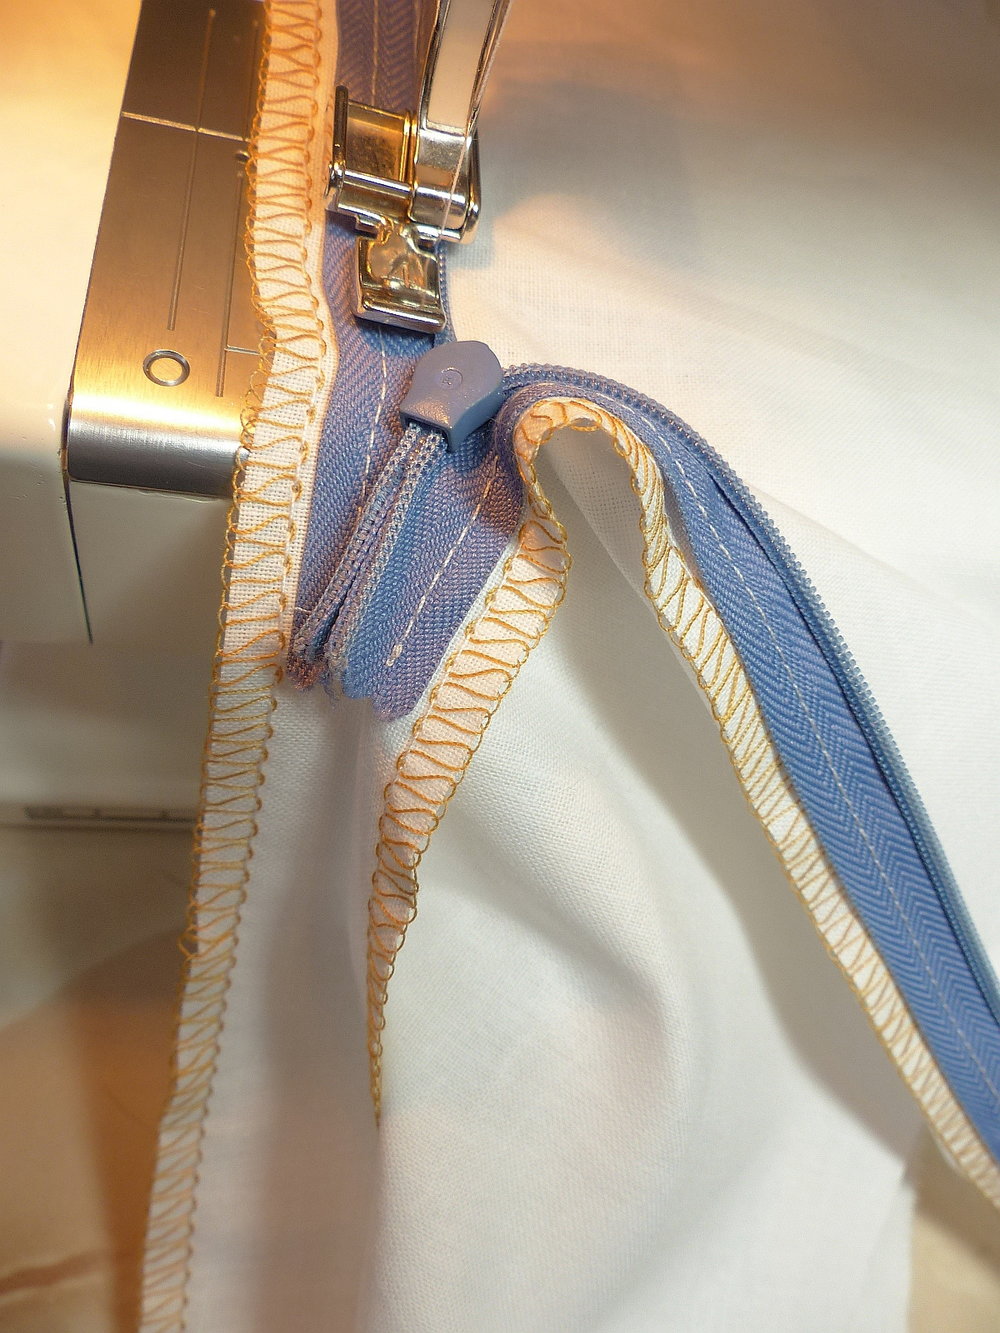
Now, for the final bit, change to a zipper foot again and do the last bit of stitching so that it can meet with the stitching that holds the zip in. You’ll see that I pinned the seam by the bottom of the zip together to hold it in place. You can also see that where my seam meets with the zip stitching, that it very slightly overlaps….this is a good way to finish and gets a clean look on the right side. It’s a tip I picked up many years ago on a video somewhere…sadly I can’t find it now.


Last but not least, give the seam a good press and you’re done.


Well, I really hope you found that you could follow my explanations ok and that you feel a bit less fazed by the idea of sewing in a concealed zip, but if you have any questions or suggestions please chime in in the comments, I’d love to hear your thoughts.
Anyway, thanks for stopping by and reading. ‘Til next time…
Pin for later!

I commented yesterday but I don’t think it went through so – – thank you, thank you, THANK YOU for posting these instructions! Concealed zips are my nemesis, I recently put one in a skirt and, after two attempts, I settled for less-than-perfect (I am not one who "settles," but I figured I won’t be wearing a shirt tucked in without a blazer or sweater over it anyway…). I am sewing up a pair of pants and will DEFINITELY be following your directions for the zipper. Thanks again!
No, I’m afraid I got no notification of a reply yesterday and when I logged in just there was just this one from you Karie. Anyway, I’m so, so pleased that you find my tutorial helpful. Good luck with trying it out on your pants.
Your explanation is easy to understand! Attaching a zipper is one of the trickiest parts of sewing for me. I sometimes make a mistake on that. Thank you for the informative post:D
Thank you so much for the great feedback EliCat. I’m so pleased you like my post and find it easy to understand
Cannot thank you enough for it! I’m definitely using your technique on my next skirt! Thank you so so much!!!)
Yay!, I’m so pleased that you find it useful Valeria 😀 Good luck with your skirt.
Thank you Diane!!!!! 🙂
Author
Ah, you found it Lisa xx
I love your method for stitching the zipper down, first further out on the zipper tape, then very close to the zipper. Also using a slightly longer zipper than called for so you can stitch far enough down. Can’t wait to try these out.
I love the look of invisible (that’s what we call these zippers in the US) zippers and have always sewn them using the regular (not invisible) zipper foot. One thing I do that also helps, is to iron the zipper flat. It temporarily stays flat while you are sewing the zipper in and helps you to get very close to the zipper. For me, the invisible zipper application is so much easier than a lapped or centered one, where your stitching shows, etc.
Author
Ahh, thank you so much, Liz! I’m glad you like the sound of my zipper tutorial. And thanks for the idea about ironing it first, I’ll definitely do that next time. I much prefer the look of a concealed zip in garments as well, oh, and I sometimes call it invisible too 🙂
Genius, I can’t get away with my invisible zipper foot so have been settling for slightly visible zips covered by tops this will be a game changer!!
Author
Thanks, Claire! So glad you love my tutorial